Cathedral of Marika
2025.06


Last year I played through the Dark Souls series and Elden Ring and was really inspired by the amazing environmental art.
What especially caught me was the story telling that the games do through their environments, so one of my plans was to incorporate this into my own future projects too.
I decided to learn Unreal Engine for the project, since its the industry standard engine nowdays.
I had used both Unity and Godot quite a bit before, so I was familiar with game engines and their workflows.
I am happy to say that I think I achieved by goals with the project.
It took some time until I got used to doing things the "Unreal way", but now I can say that I can comfortably work with the engine.
I also have a much better understanding of optimization, post processing, spatial/vertex shaders, foliage and modular kits.
And most importantly I really enjoyed working on the project, and I am pleased with the result.
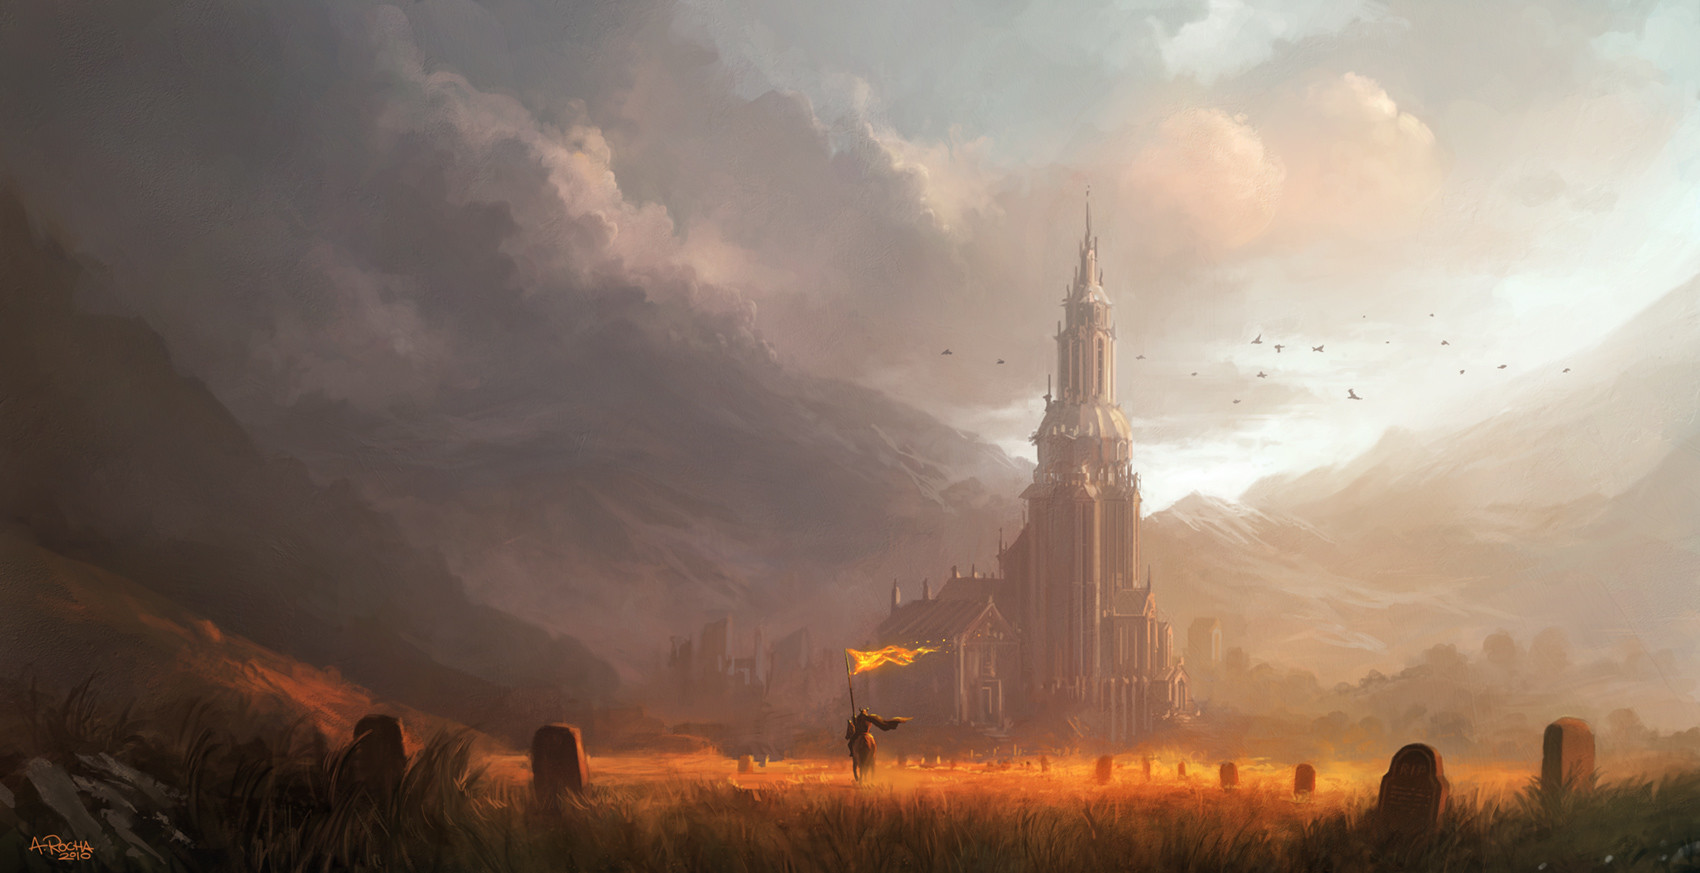
The original inspiration for the visual direction of the project came from some amazing concept art by Andreas Rocha, titled "Fields of Gold"
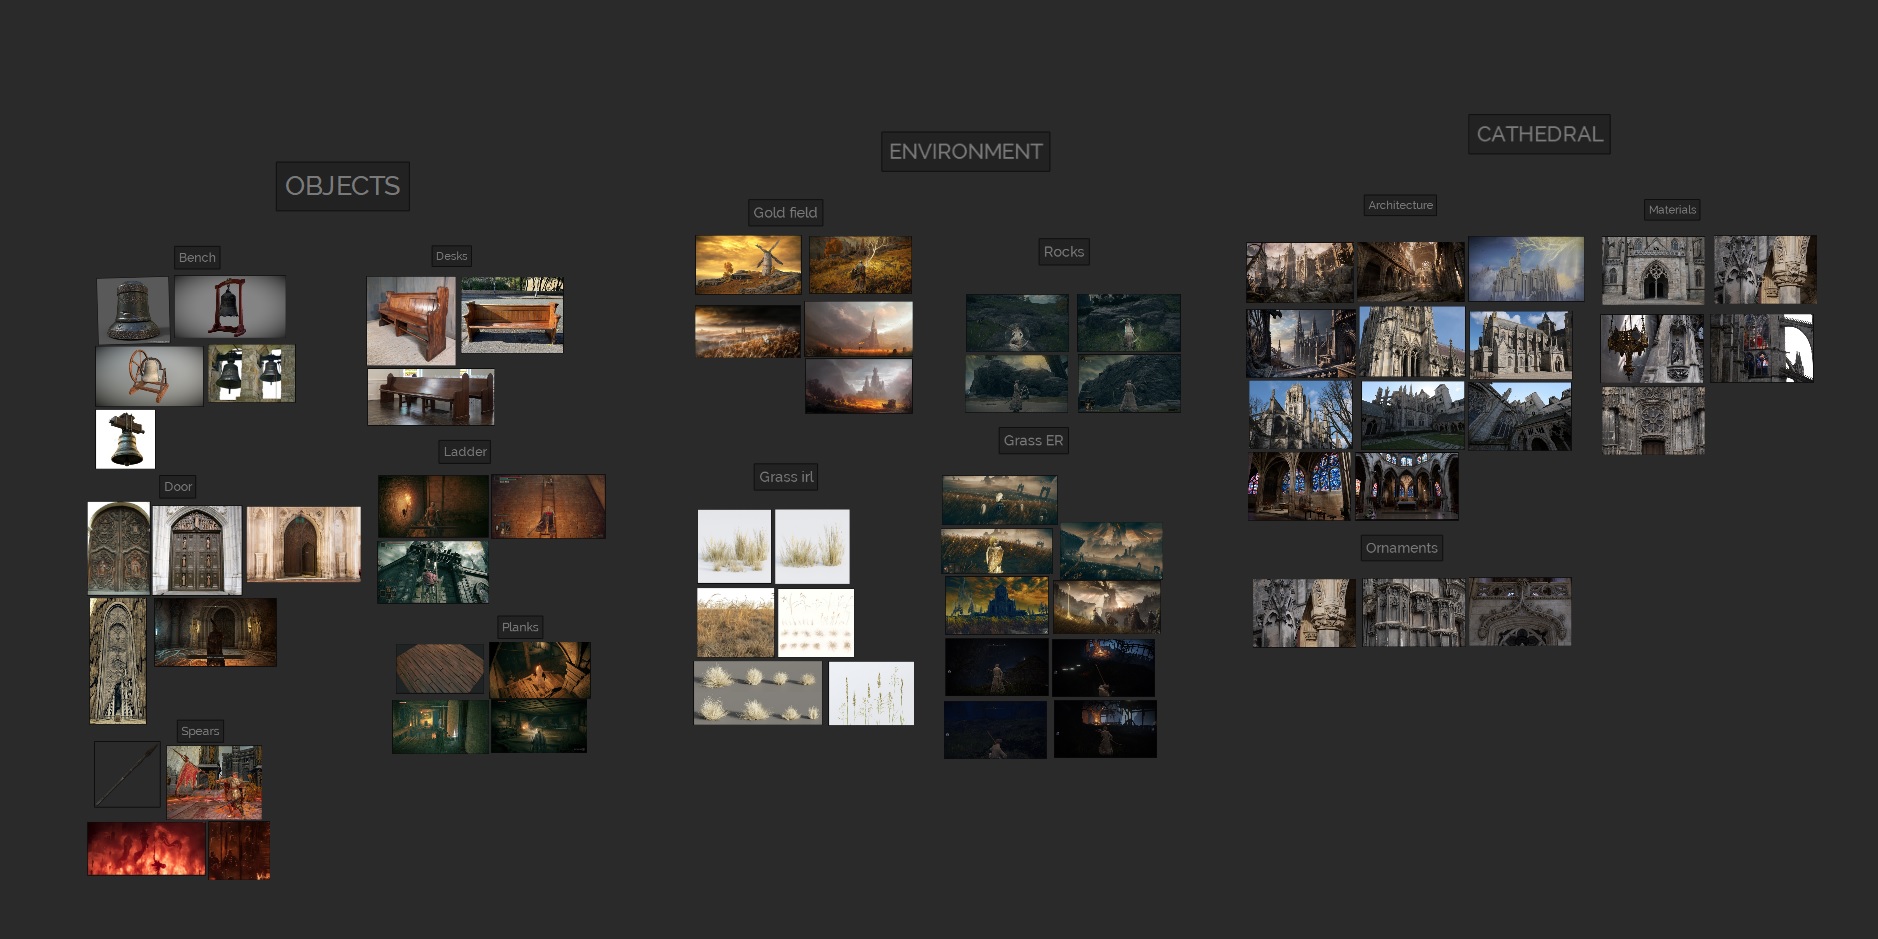
I used PureRef for gathering reference. I tried to collect both real life and video game asset references, especially from Elden Ring, so I can match the style better.
All of the modelling was done in Blender, with some in-engine modifcations in Unreal when needed like fixing pivot points, normals etc.
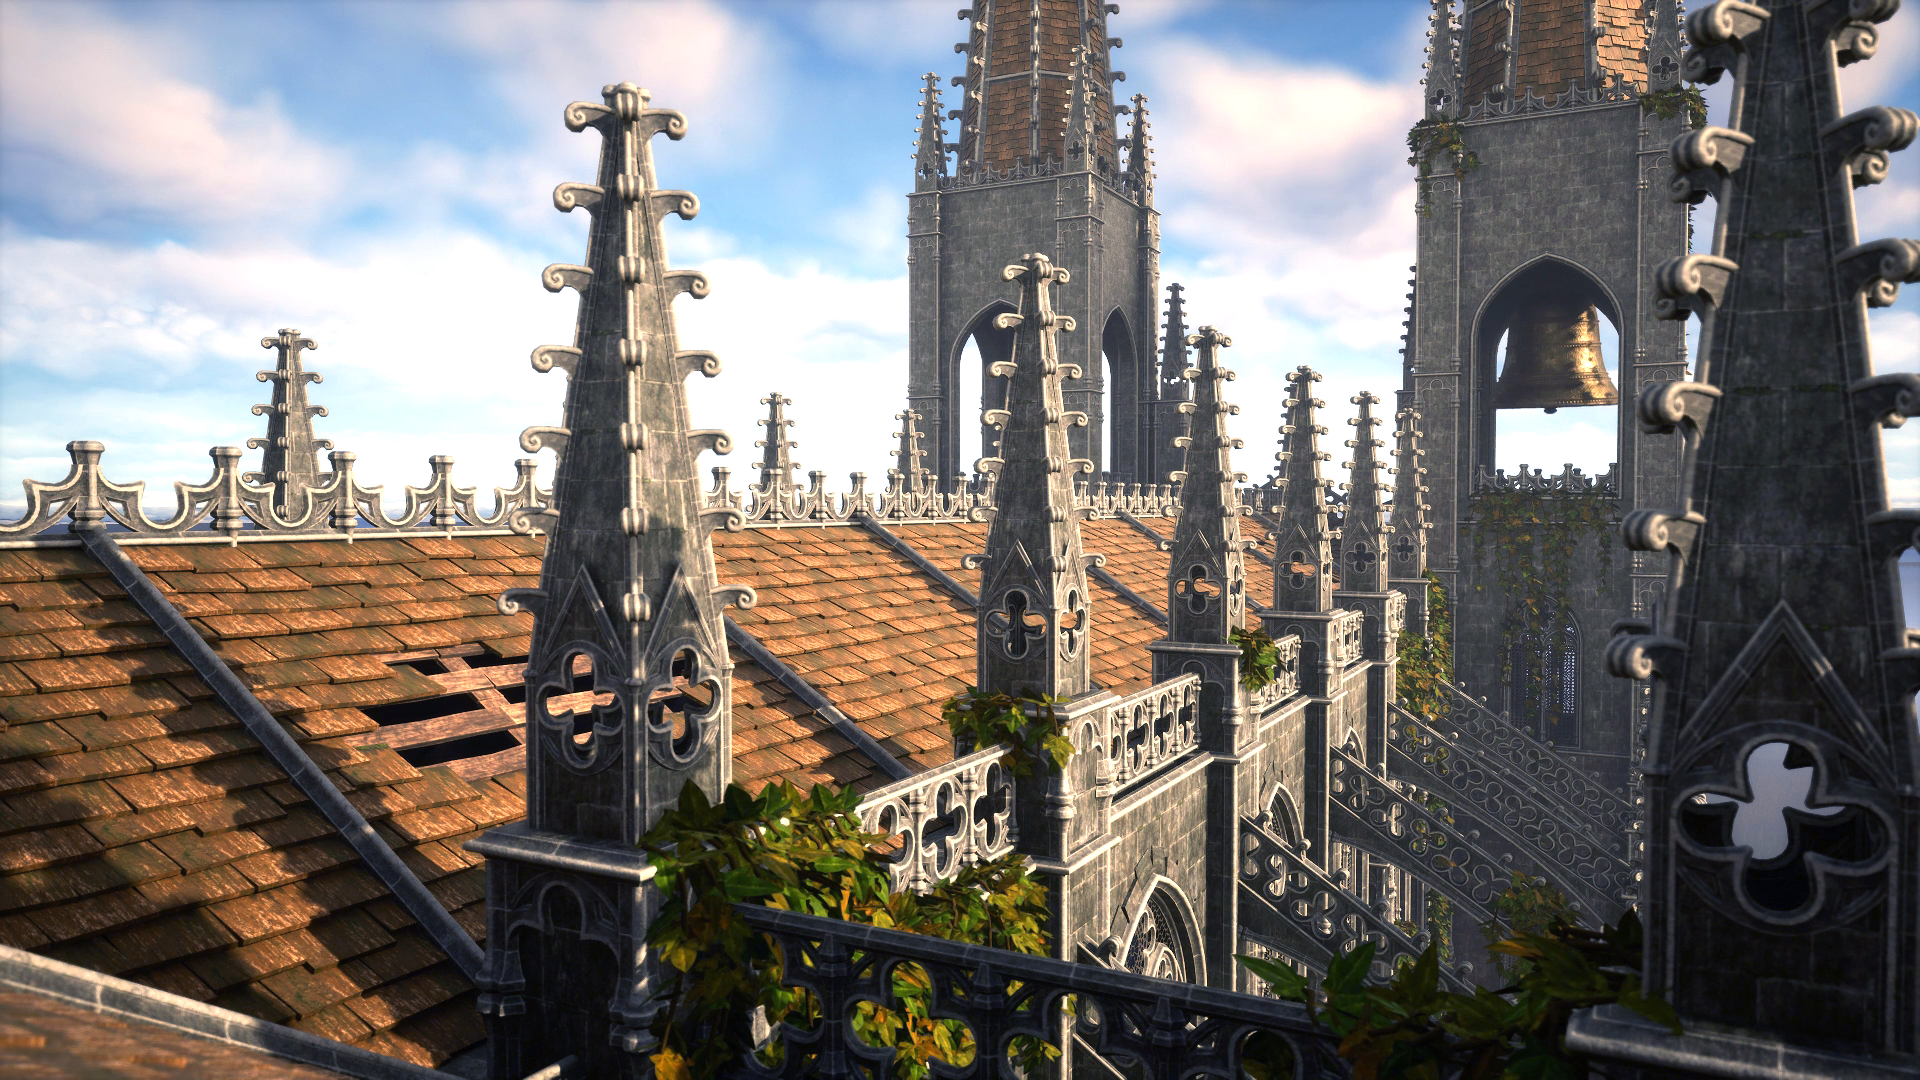
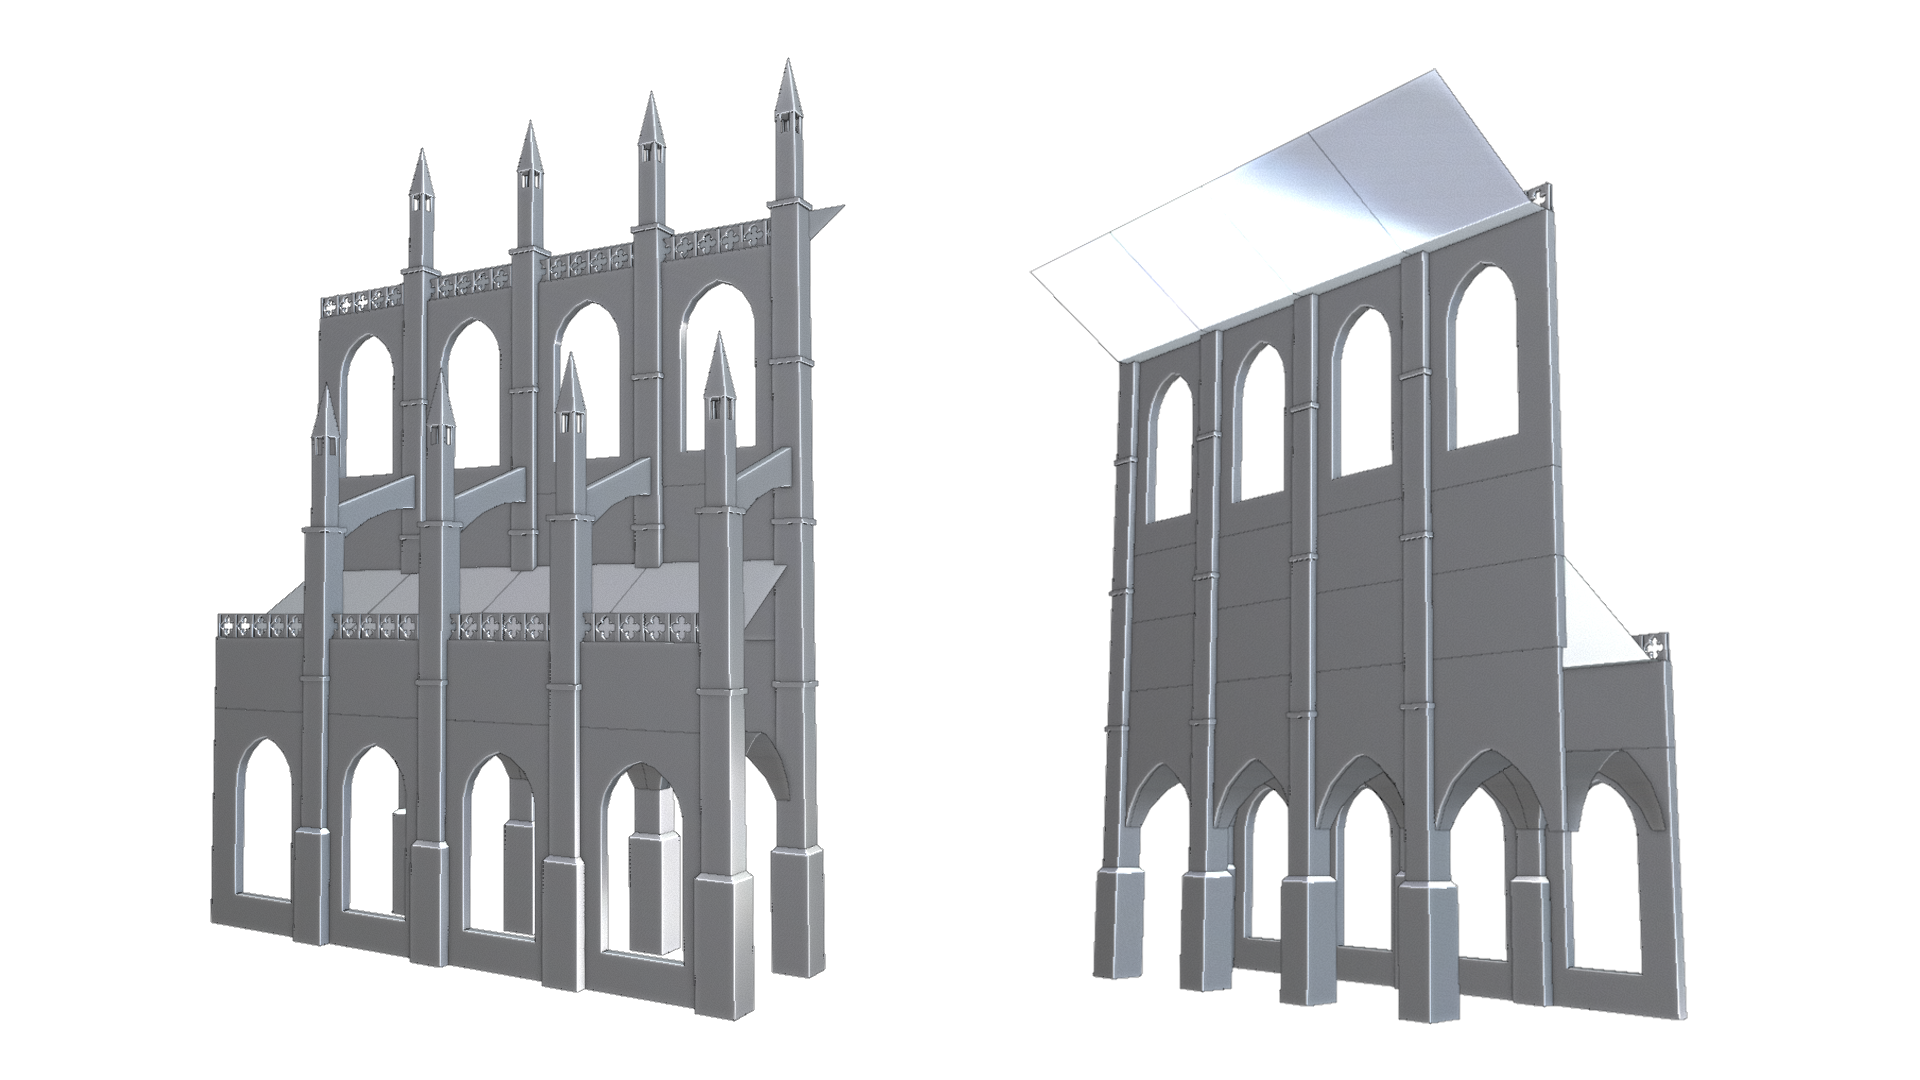
I started with blocking out the modular kit. I used Blenders built in measure and snap tools to make sure that everything fits perfectly, so I had little corrigation to do in engine.
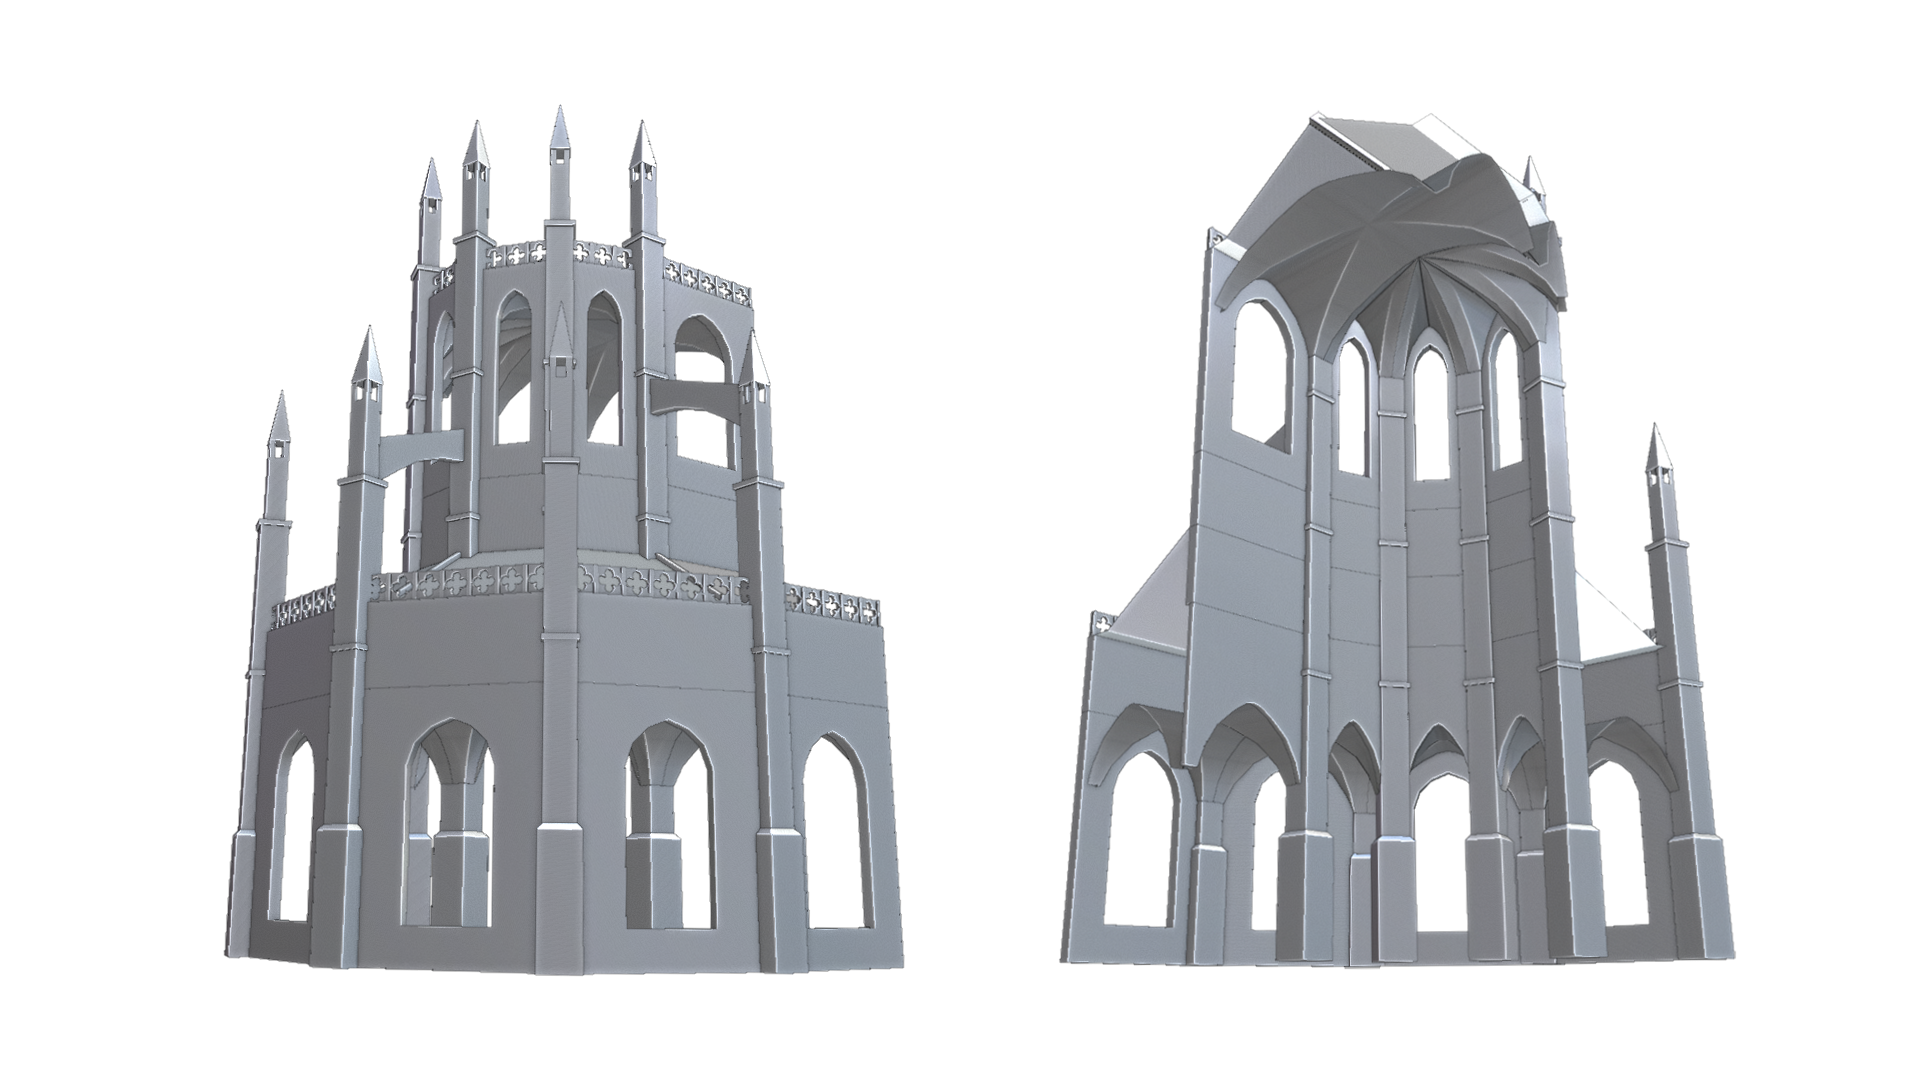
In the end the elements looked quite different, but this step was necessary for getting the shape and proportions right.
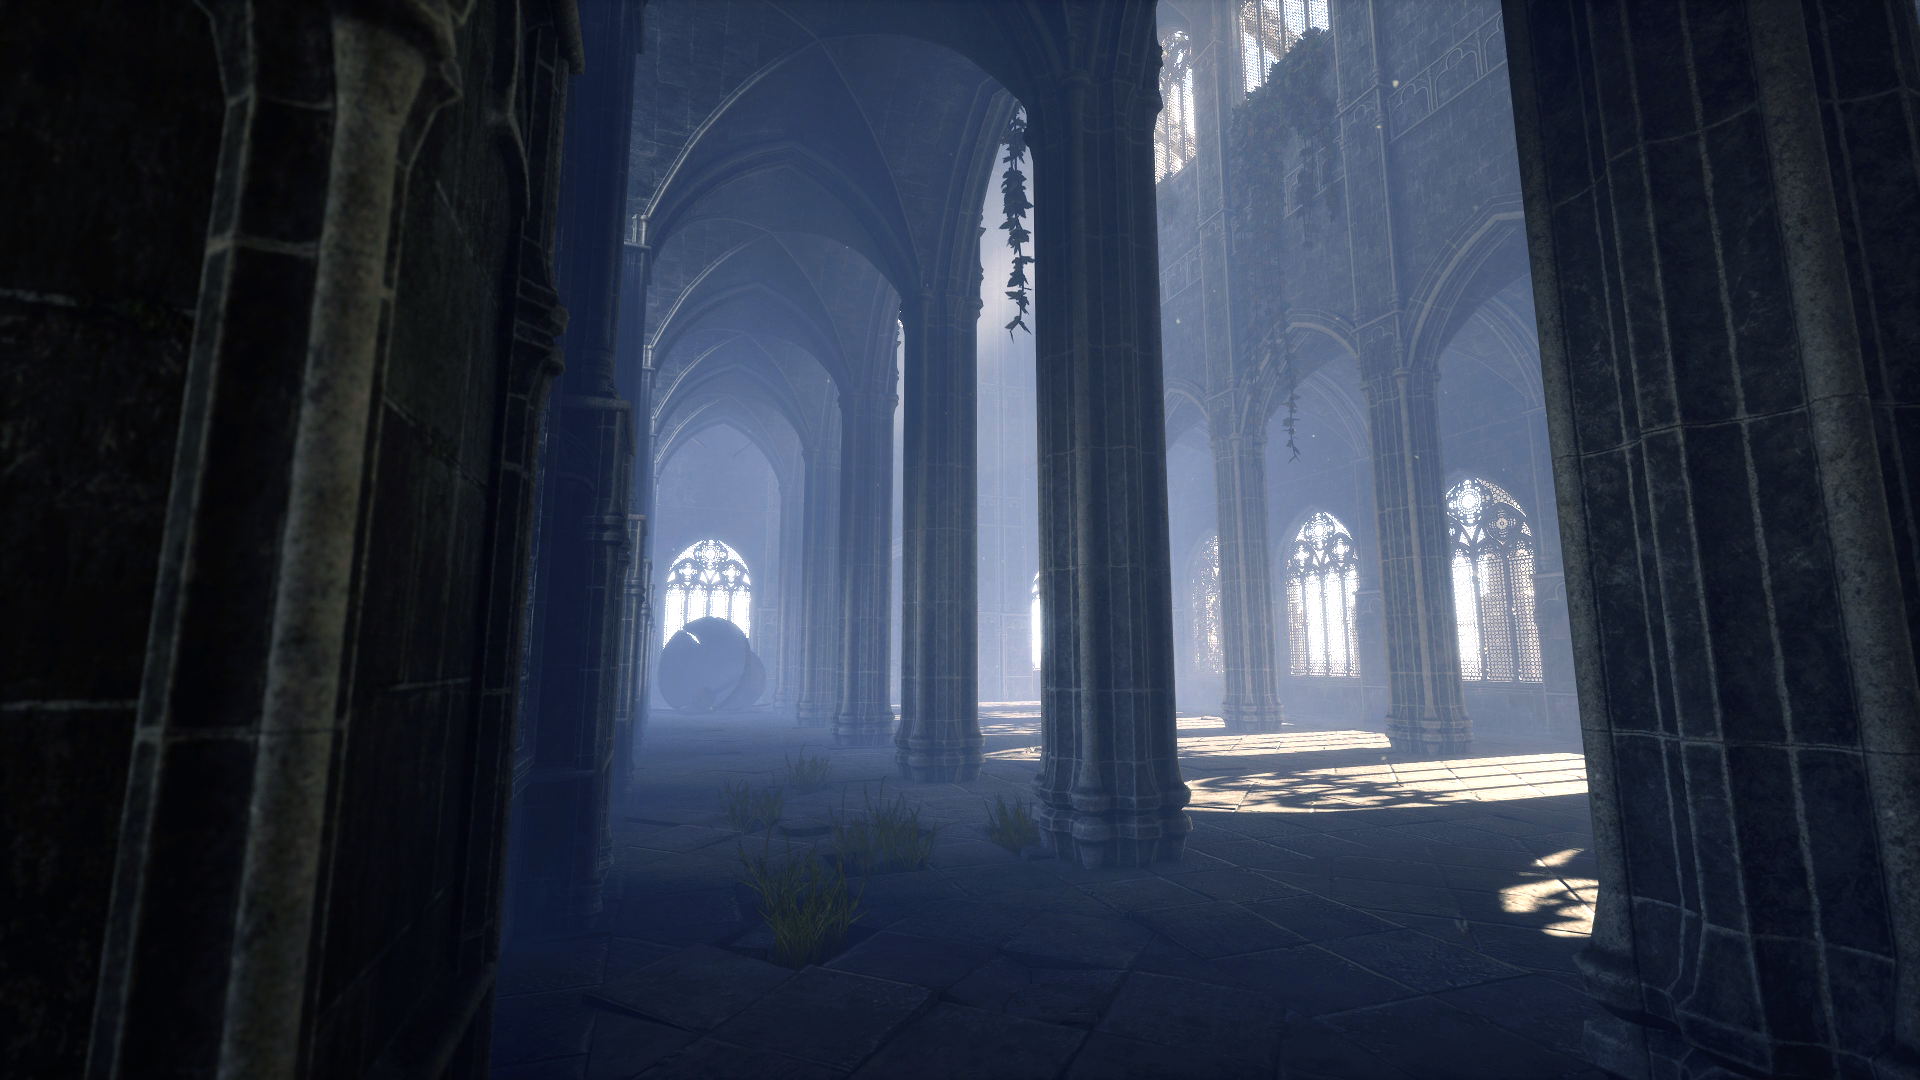
The most difficult part was definetly the ambulatory, with its round vaults.
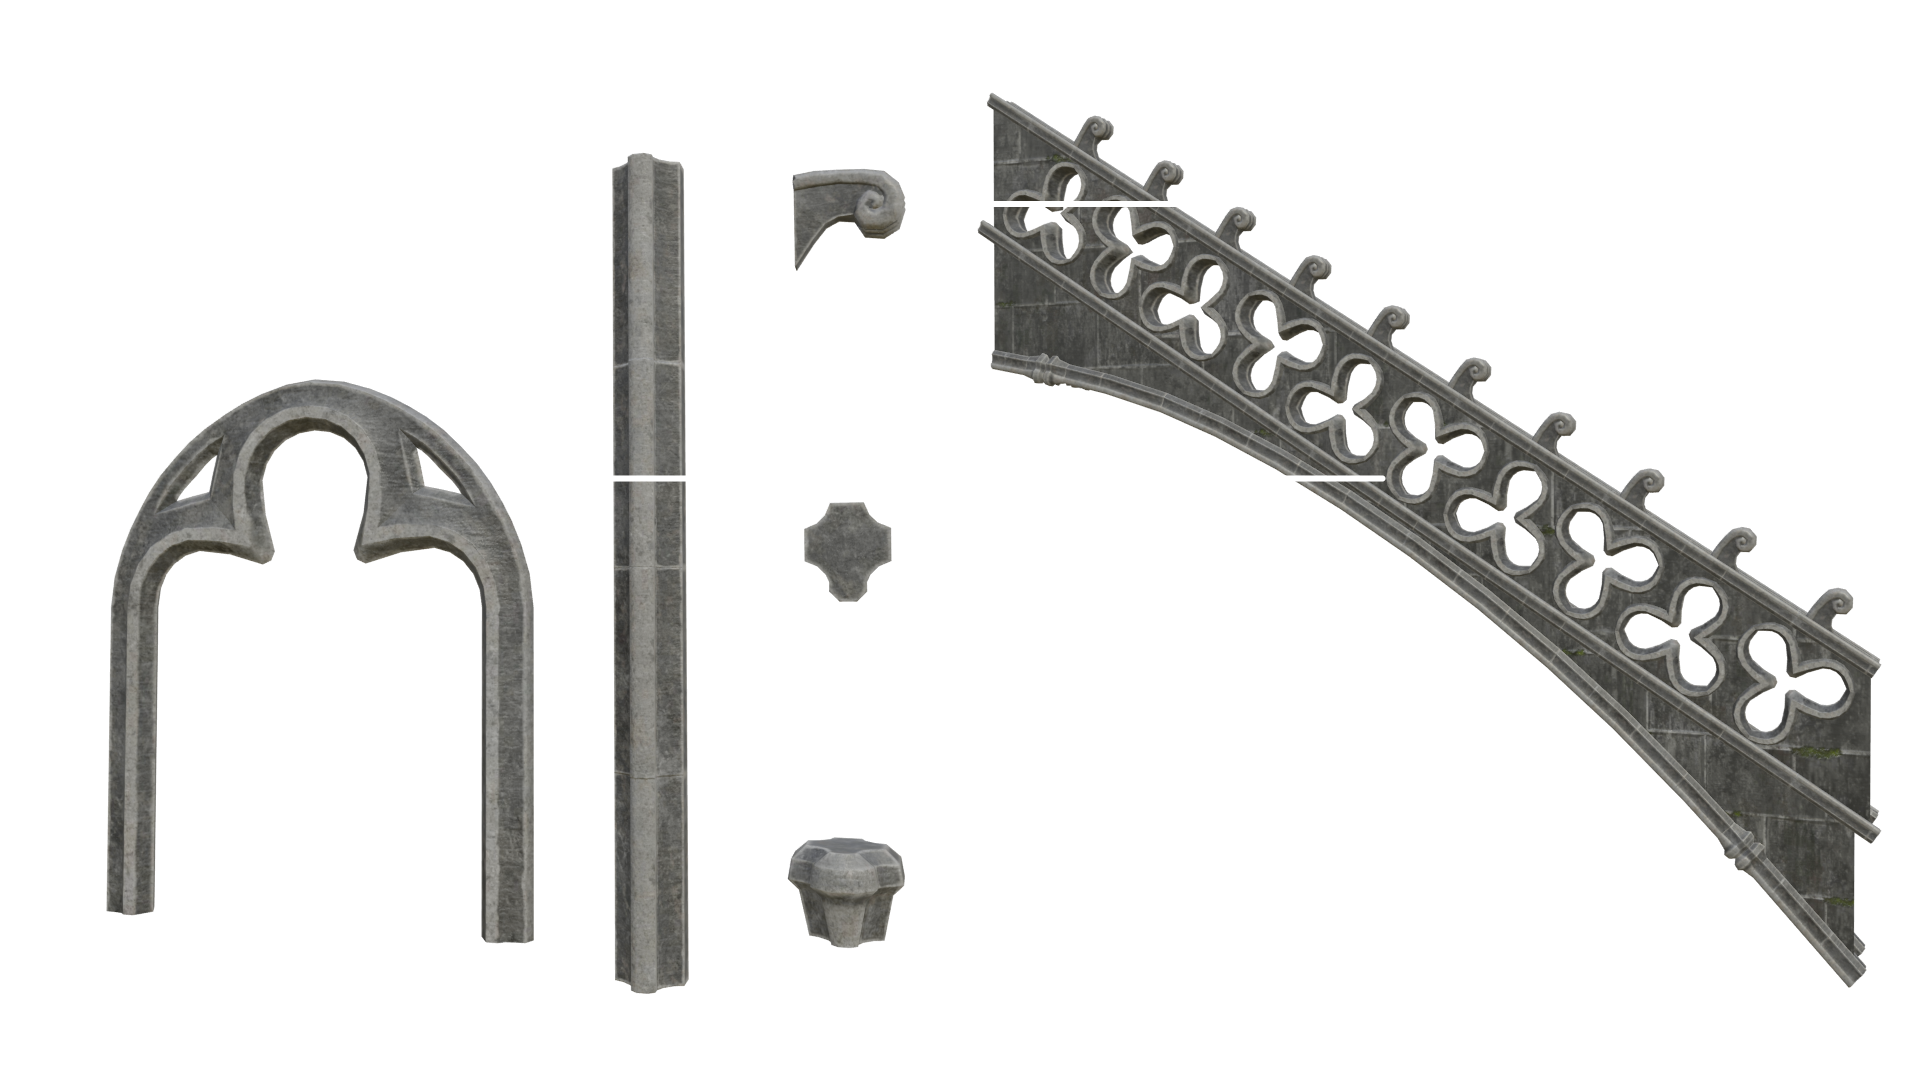
After the blockout was done I started working on some general ghotic-style shapes which I could use later to build some more detailed ornaments.
They were textured in Substance Painter, and I used tiling textures made in Substance Desginer for the rest.
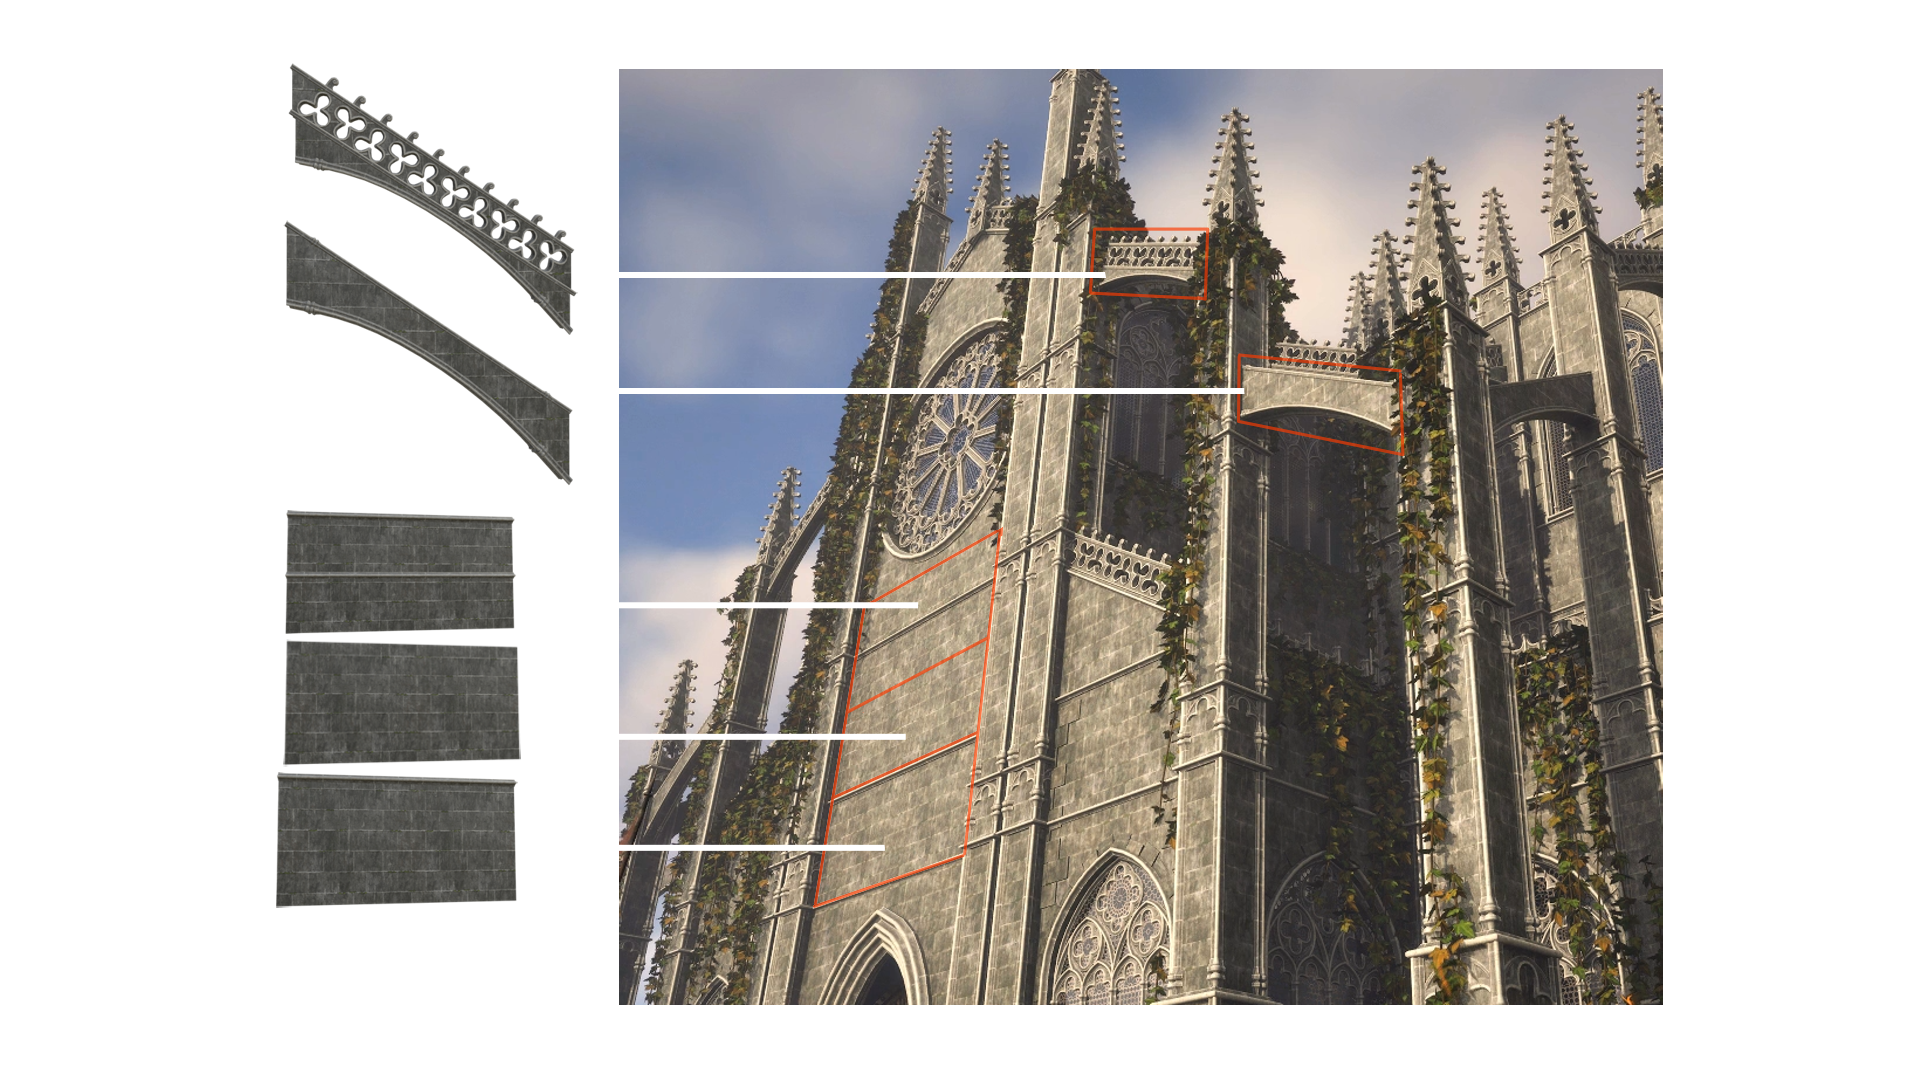
After this I begun working on the detailed kit.
I made sure that everything matched perfectly both in measures and style.
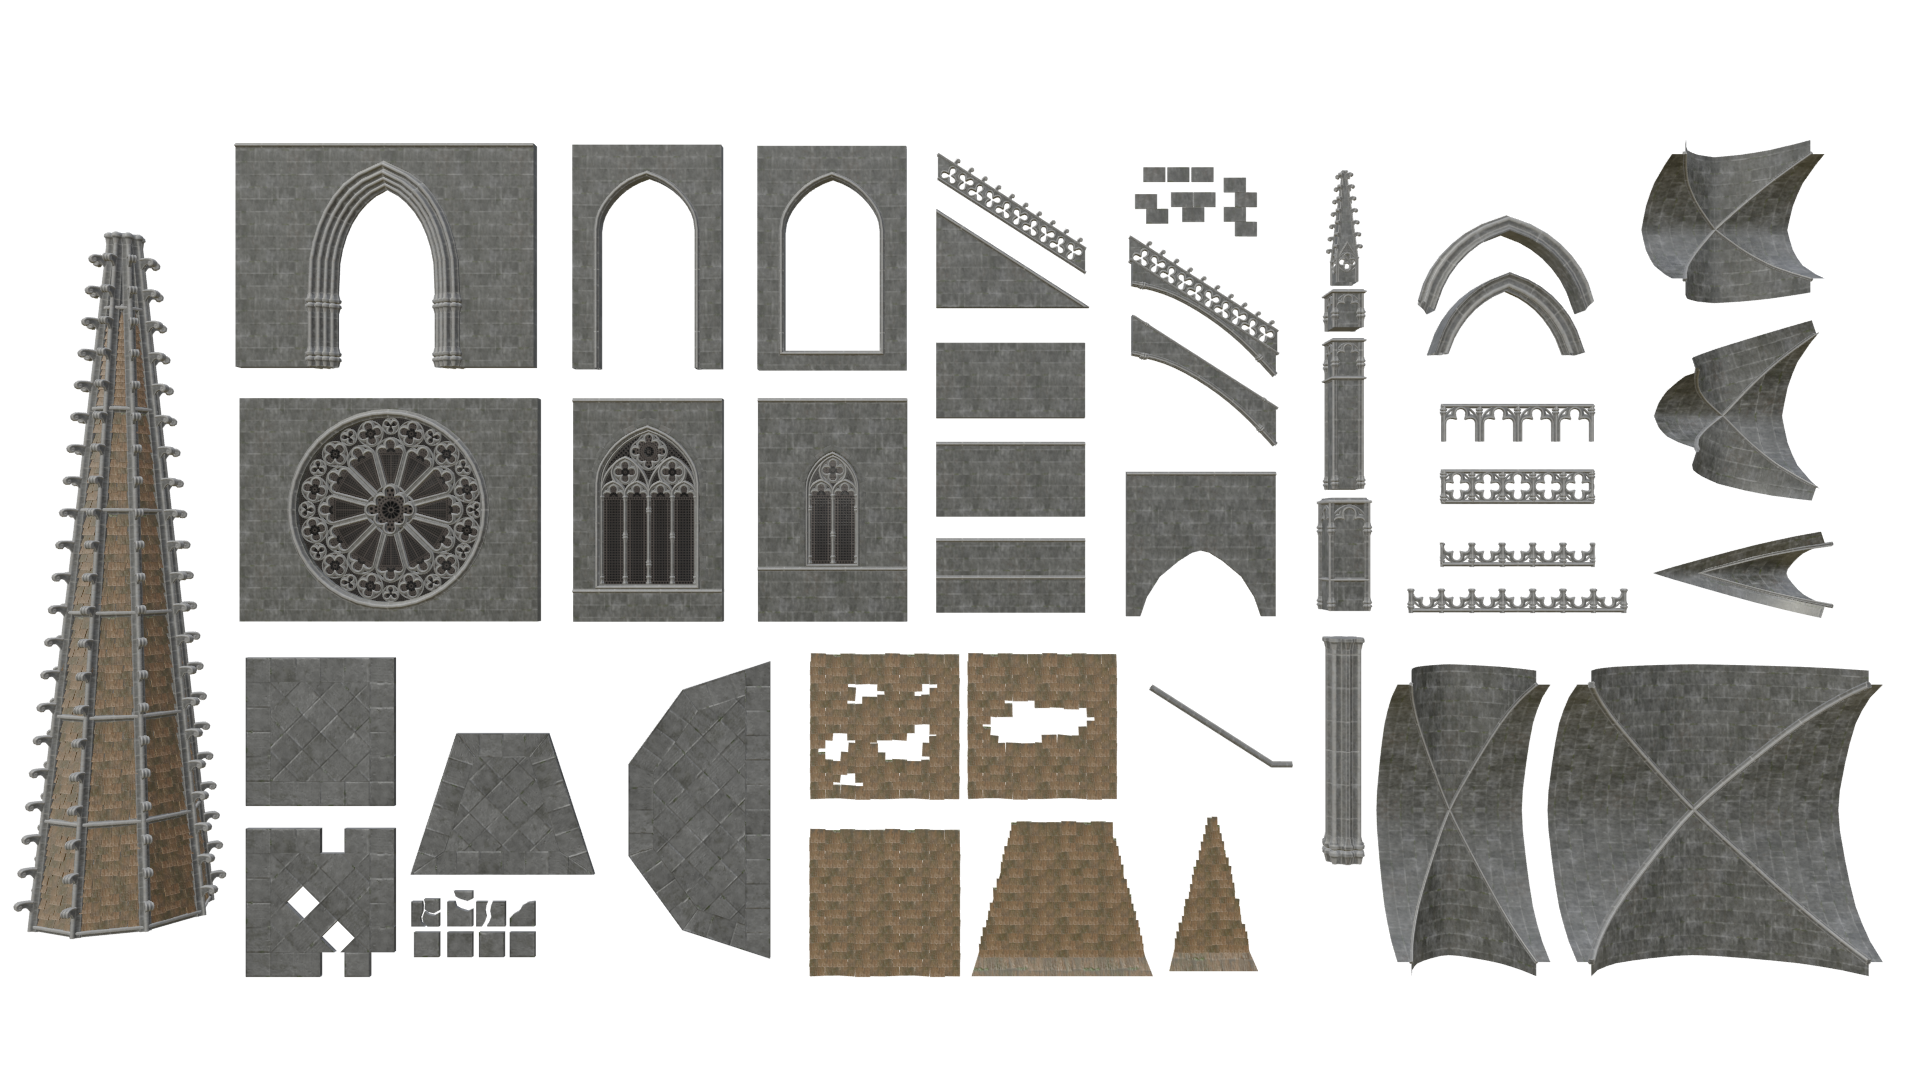
I was afraid that when assembled the kit will look bland, but some slight variations of the same pieces managed to break up the reperition nicely in my opinion.
The later added ivy helped a lot in this too.
The next task was creating the objects that are needed to decorate the scene.
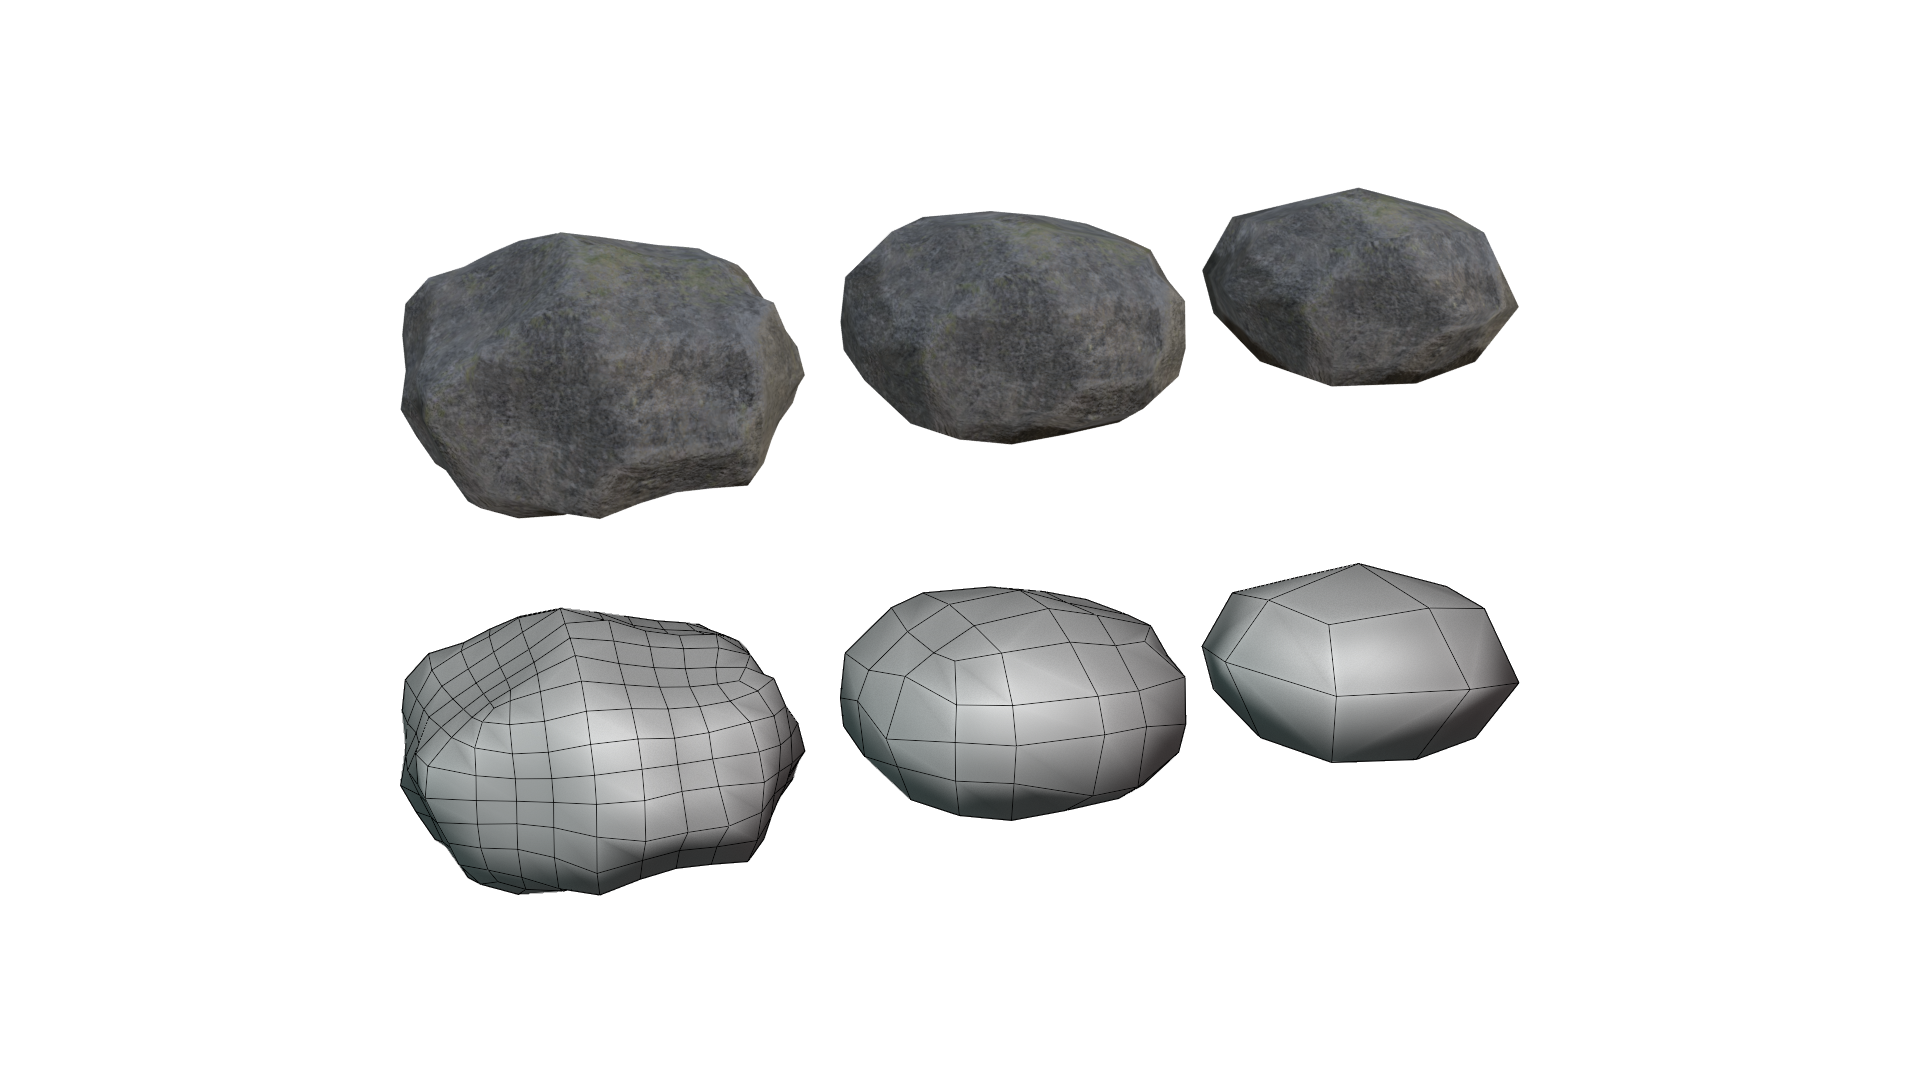
The process was very similar for most of them: modelling in Blender, texturing in Substance Painter, animated if needed in Blender, creating LODs if needed in Blender, importing and implementing in Unreal.
Example for 3 levels of LODs:
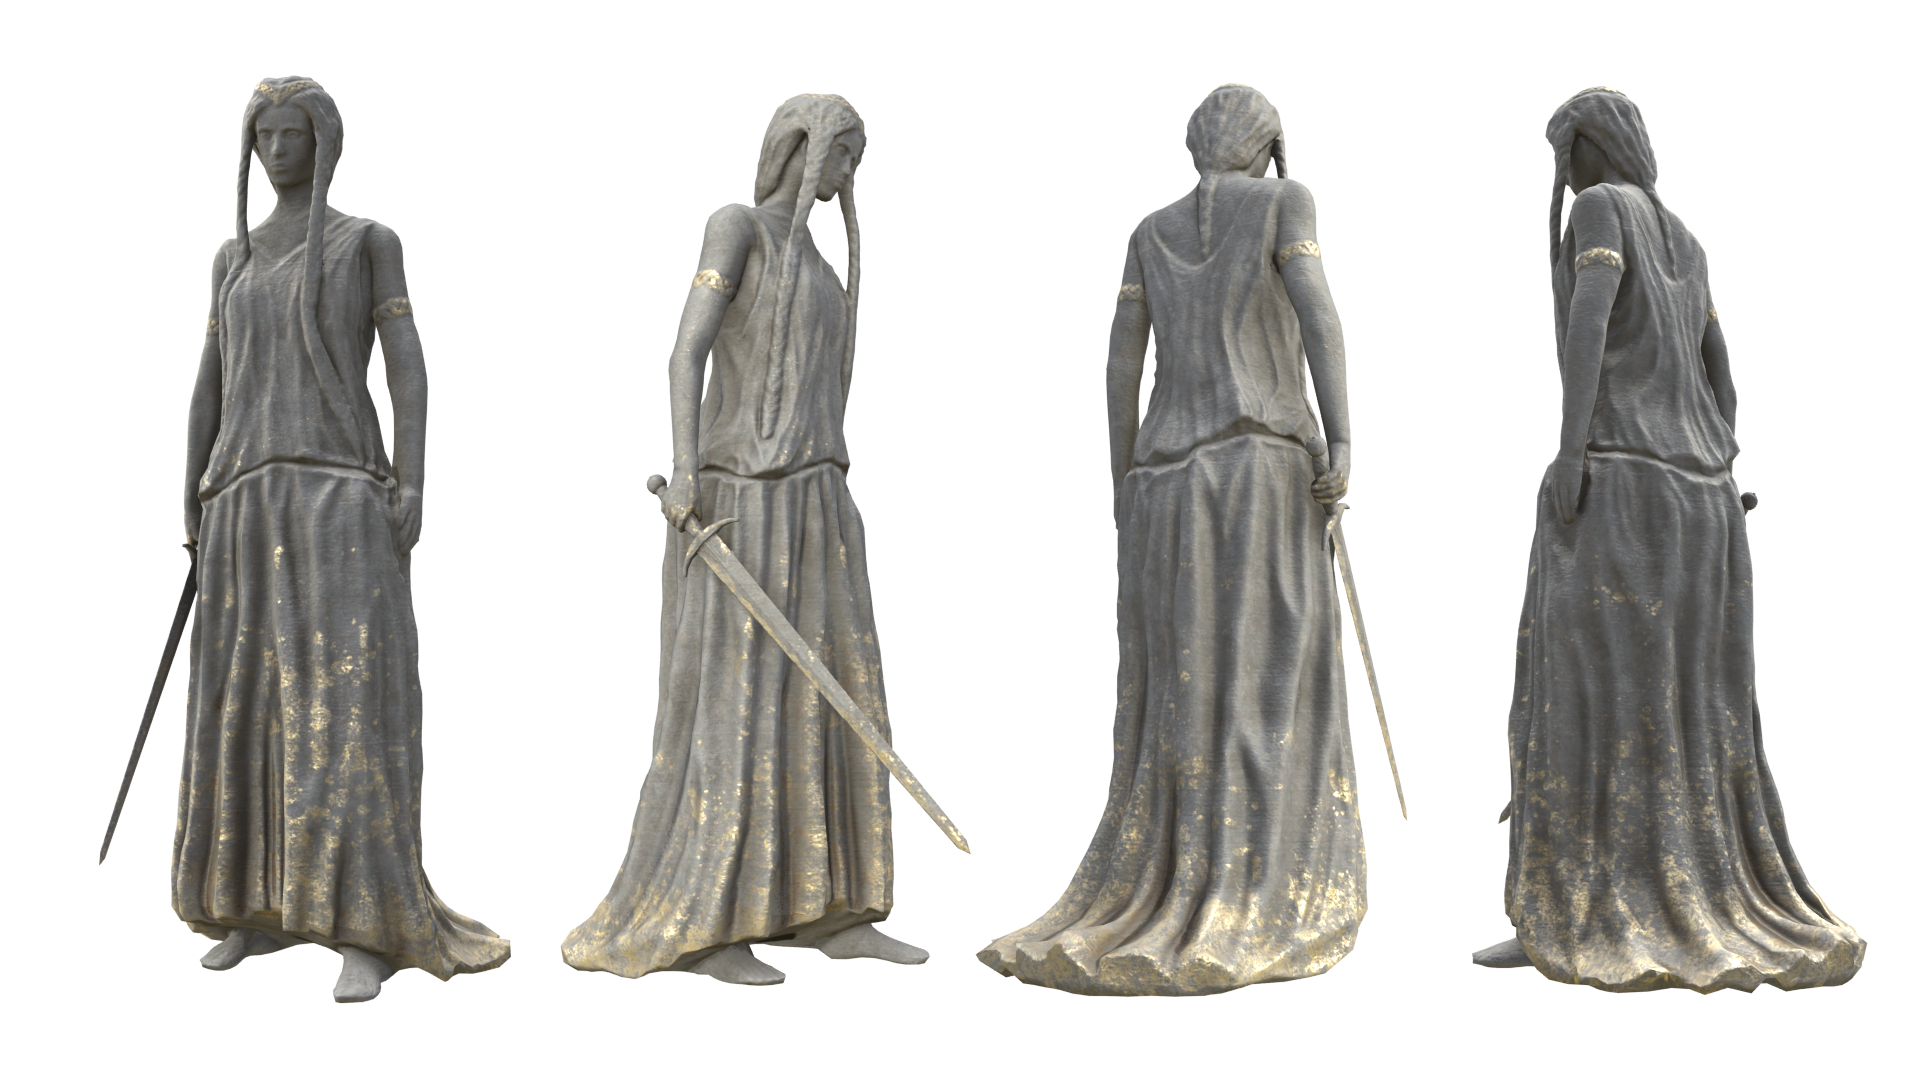
I would like to dedicate a whole segment for this object, because it was by far the most complex and challenging.
I have some experience with scultping creatures in Blender, and I have some anatomical knowledge, but even though going into this I was very scared.
Not only did I have to sculpt a human body, but I had to sculpt thick flowing cloth as well, which I had zero experience in.
I started by posing and dressing up a manequinn, and baking the cloth simulation onto it.
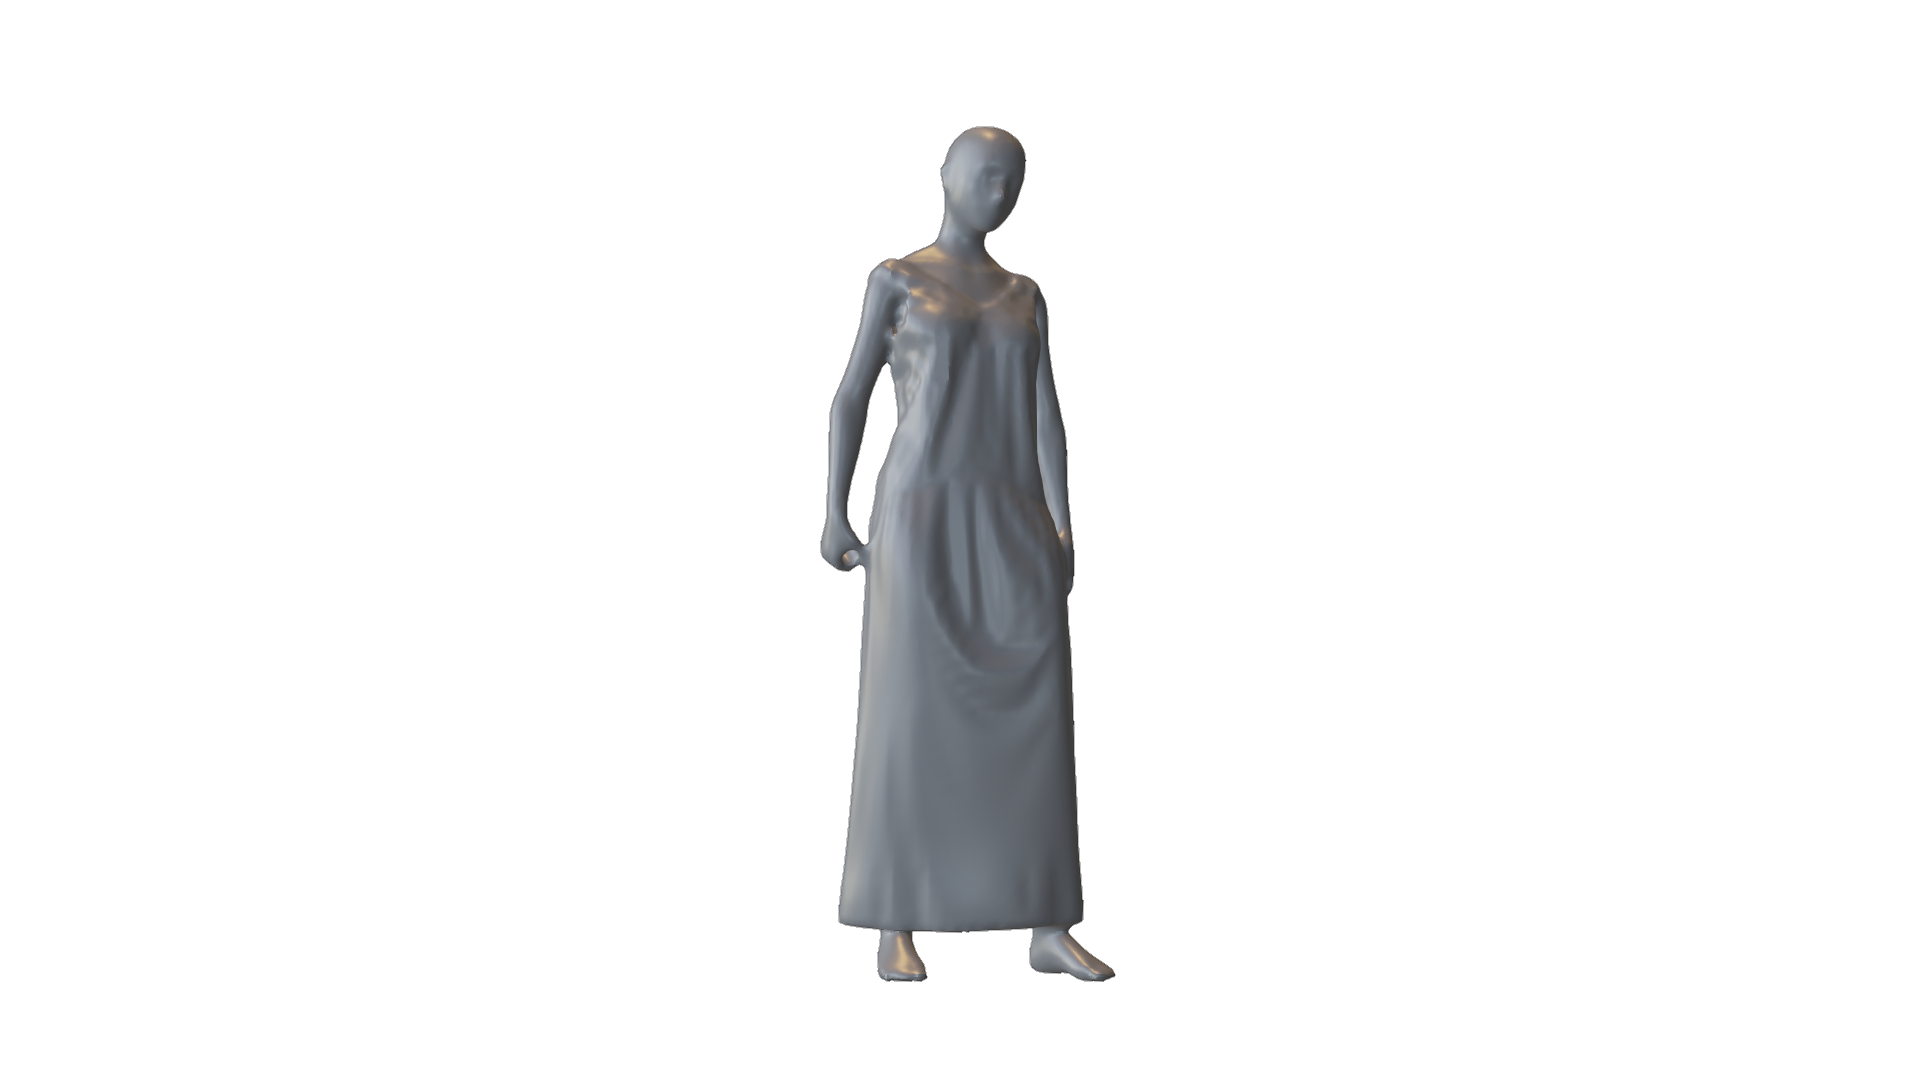
I then used the built in remesh tools to prepare it for sclupting. I went through a lot of rescultping until I got something I found accapteble.
The human part was not that challenging in the end, especially because I could use the manequinn as a constant reference for proportions, but the cloth was just as bad as I expected.
I resculpted the skirt about 4 times, and learned something new every time that I could implement in my next attempt.
In the beginning I increadibly overdid the folds and it looked more like plastic wrap rather than thick flowy cloth.
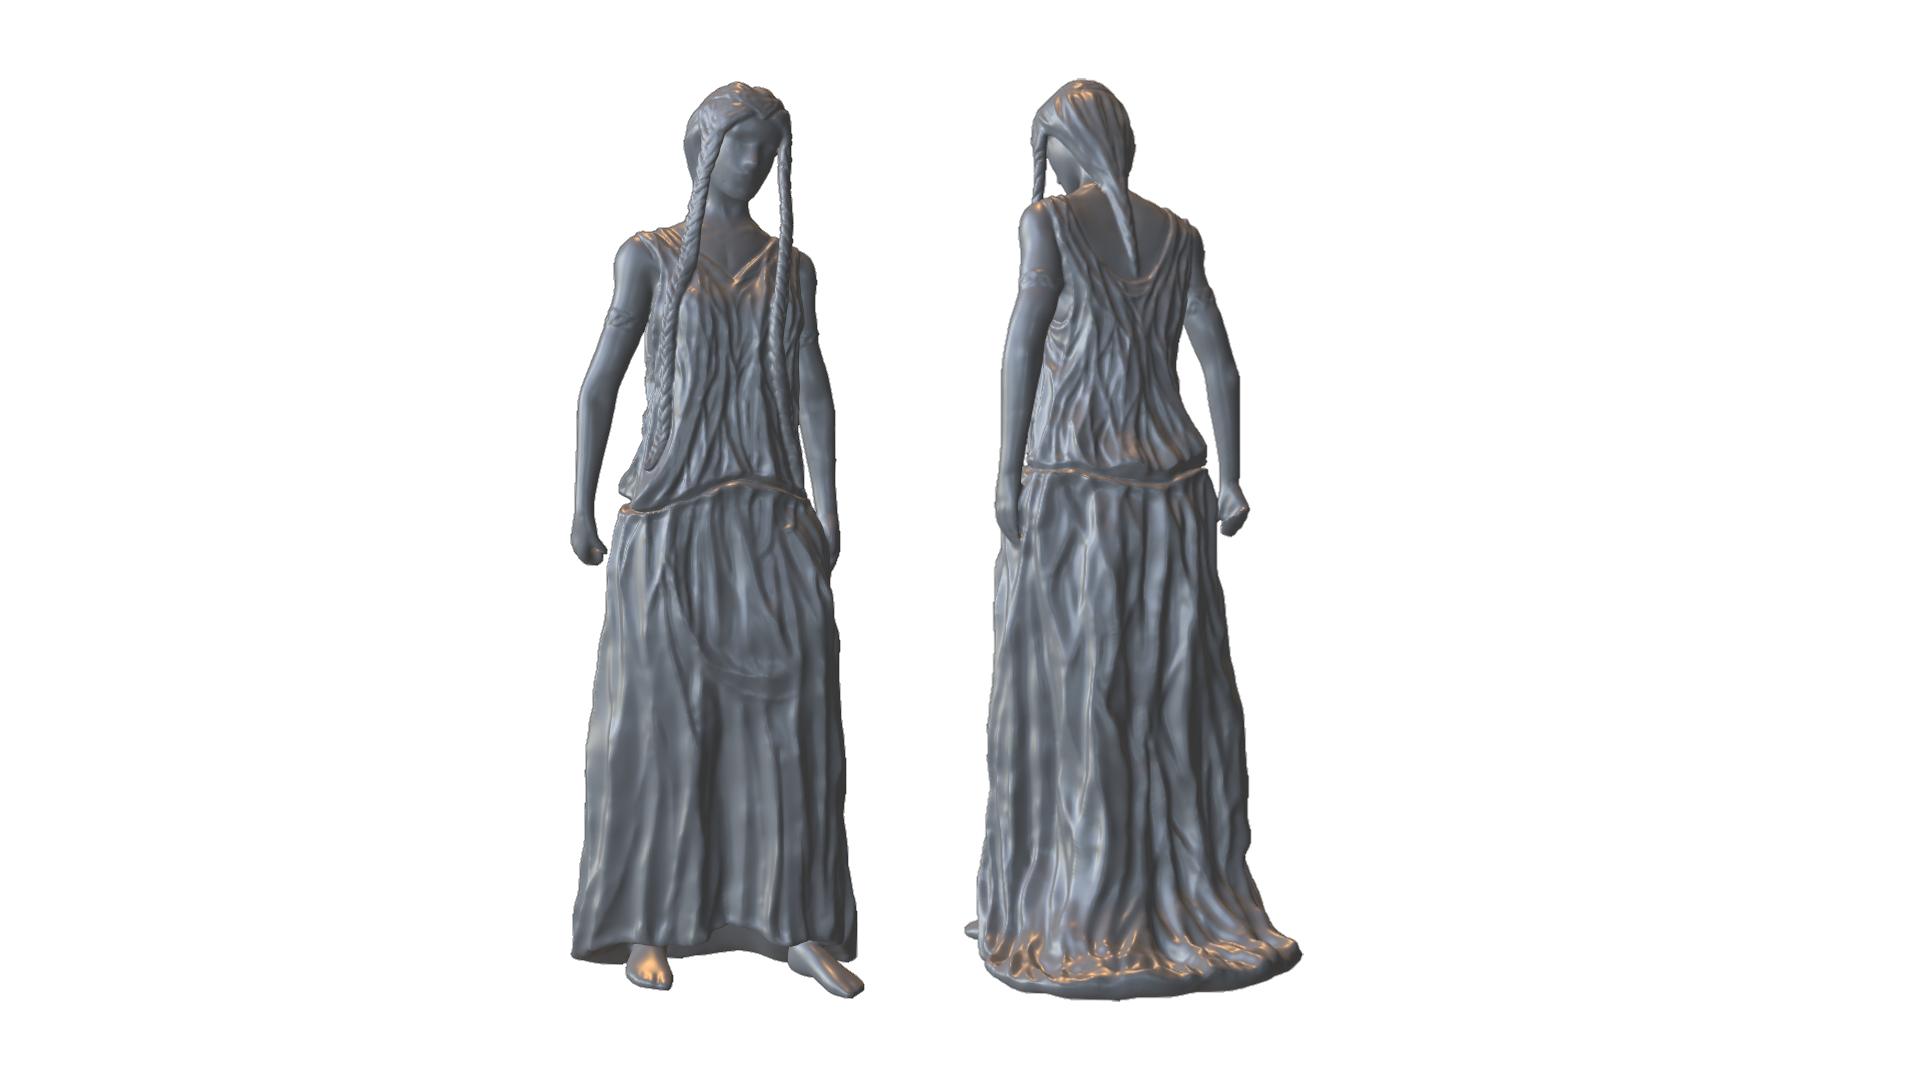
I used a lot of reference of real clothes folding and wrapping, and I looked up some traditional 2D cloth drawing techniques to learn the basics of how cloth behaves.
I also had to pay attention as to where to cut the realism and overexaggerate the shapes, because in the end, this is a statue that is meant to convey something, and not a real person turned to stone.
This is the final sculpt that I ended up with.
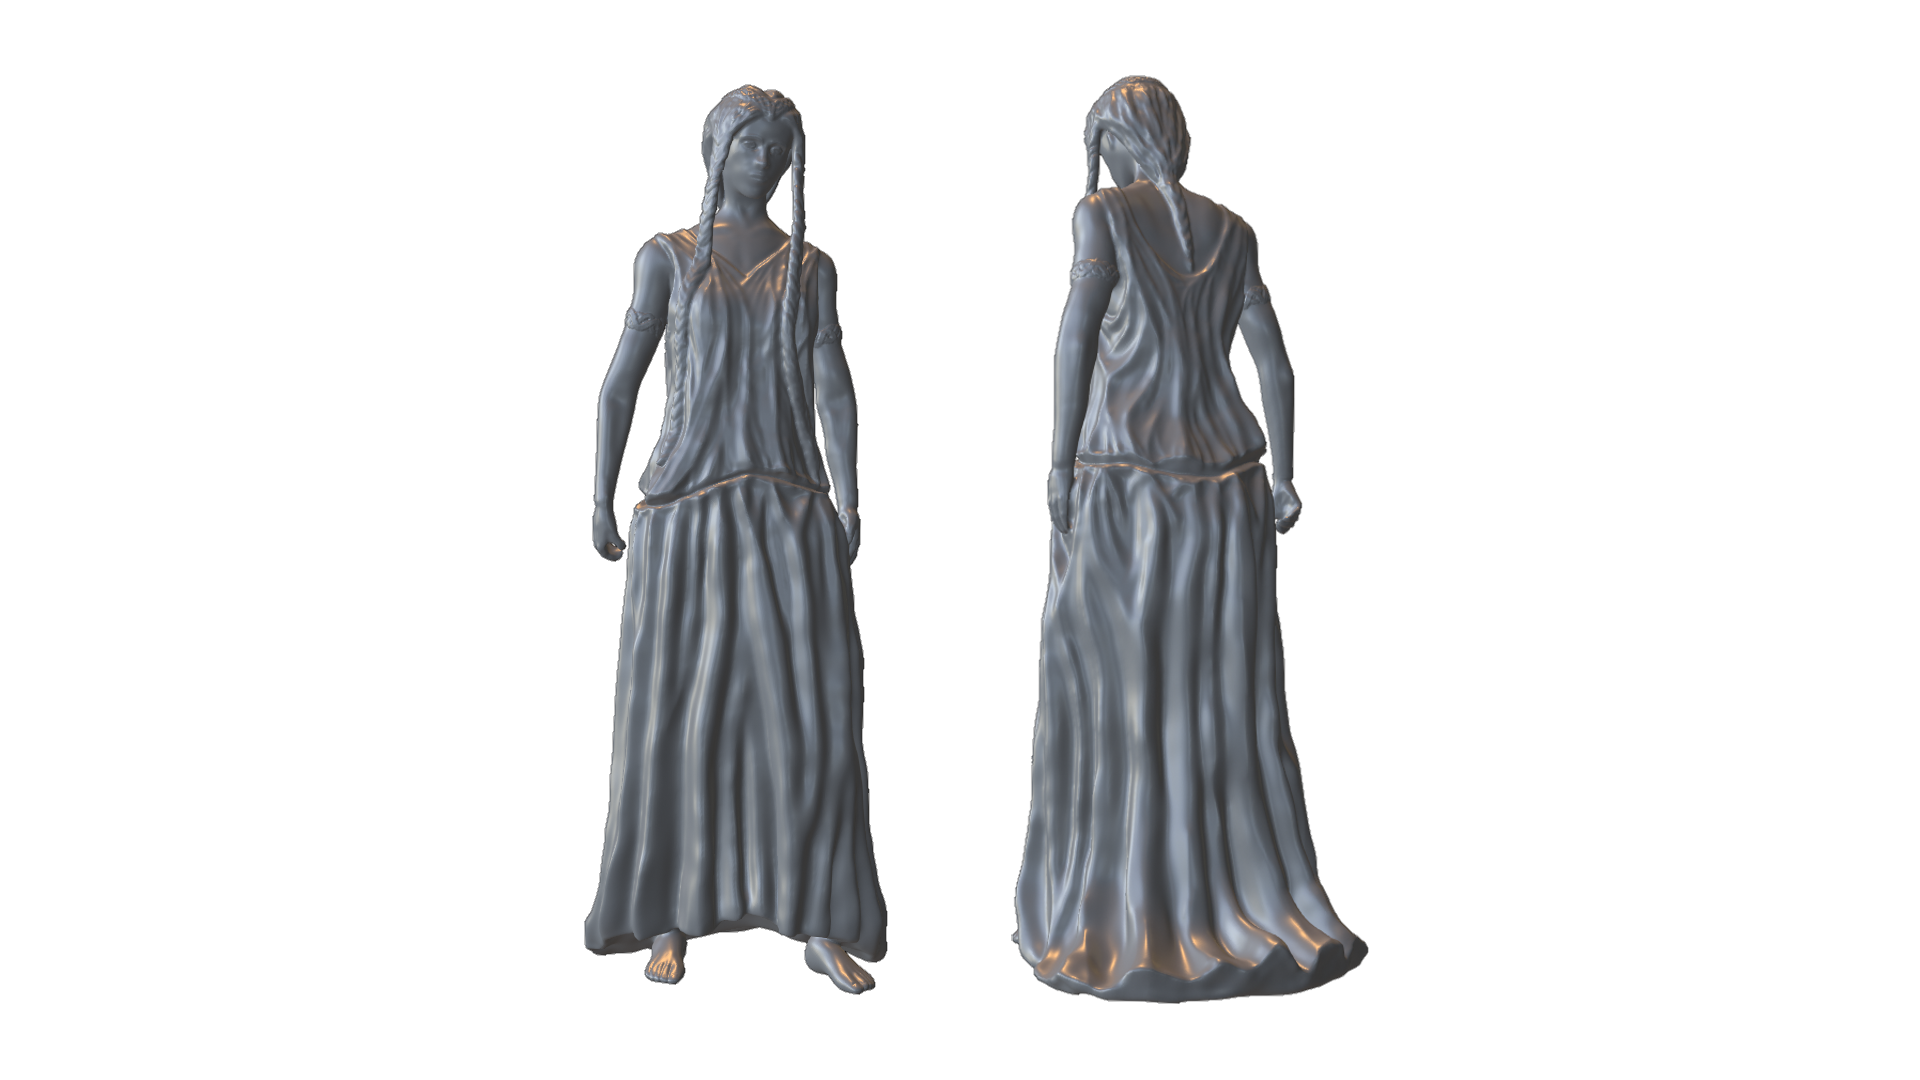
The final model totals out to 2.1 million tris, which is actually not much in a sculpting sense, but my PC was struggling to handle more. After this it was time for retopology.
About a year ago I started learning about proper topology, and I did quite a bit of retopology practice, so I was comfortable going into it.
I underestimated the task tho, and in the end I had to redo it 3 times till I got it right.
The problem was that there are a lot of small details that are organic, so making them all fit into a nice and proper topology requires quite a bit of planning ahead.
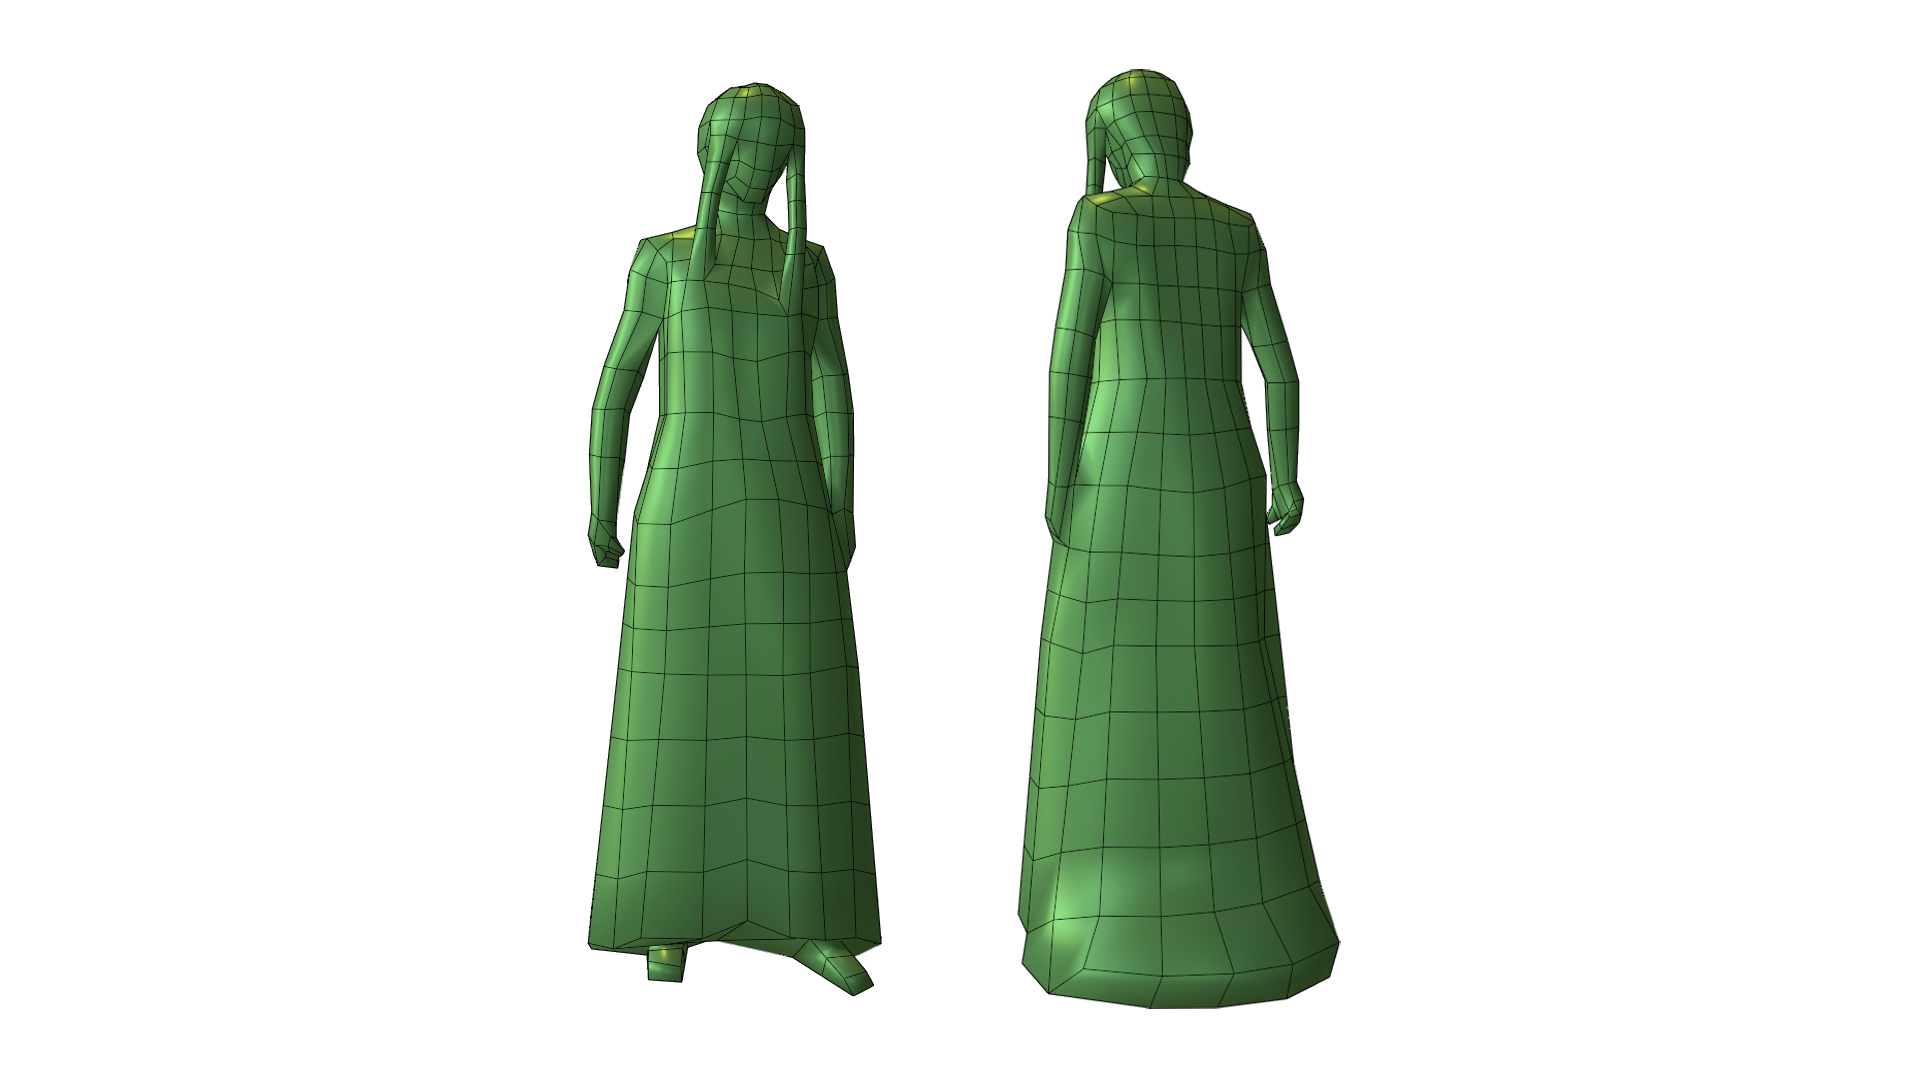
In the end, the topology does leave some things to be desired, but it works fine.
I subdivided the mesh and shrinkwrapped it onto the original sculpt, unwrapped it, baked it, and it was time for texturing.
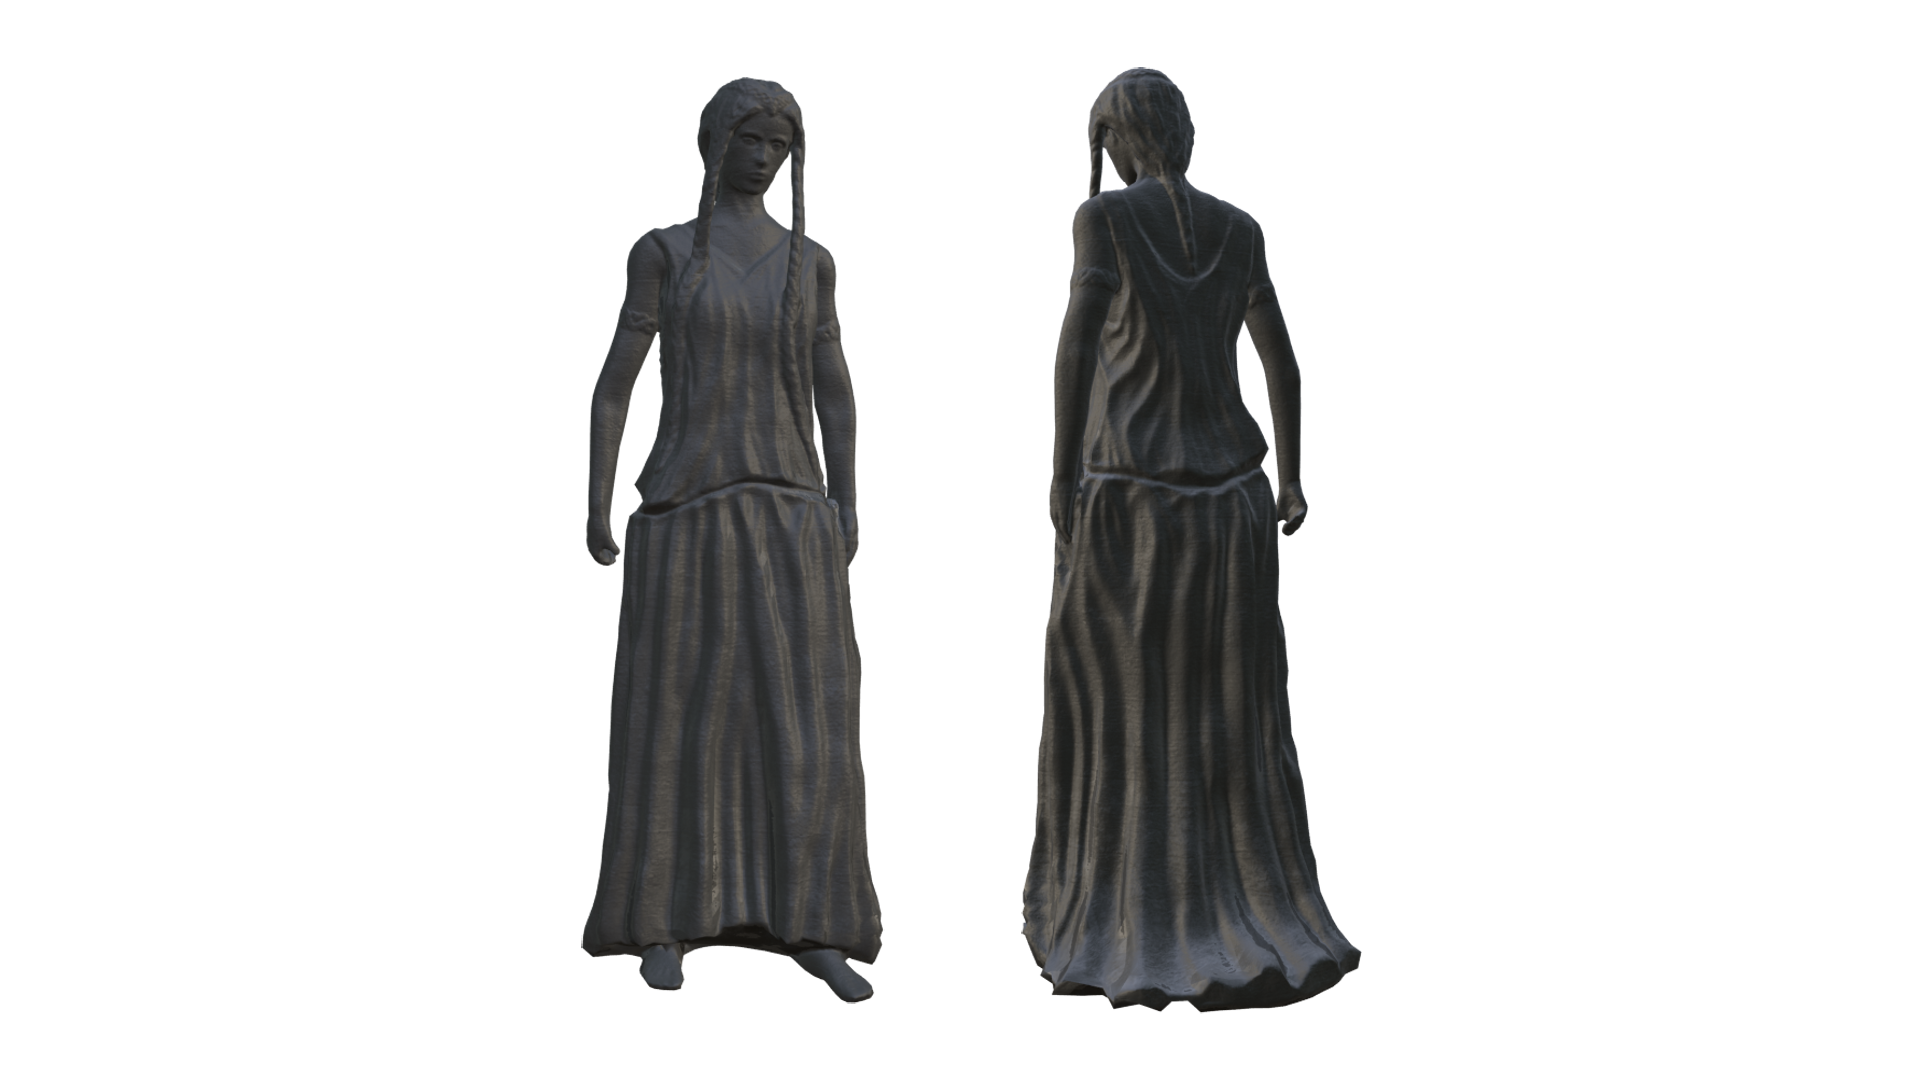
Texturing and baking was done in Substance Painter.
The materials are all procedural.
I start by making the albedo, roughness, metallic etc. channels by layering noises, then add dirt and imperfections via generators and filters.
In the end I'm quite happy with how it turned out. I think it looks great in game, and it achieves to convey the vibe and narrative I was going for.
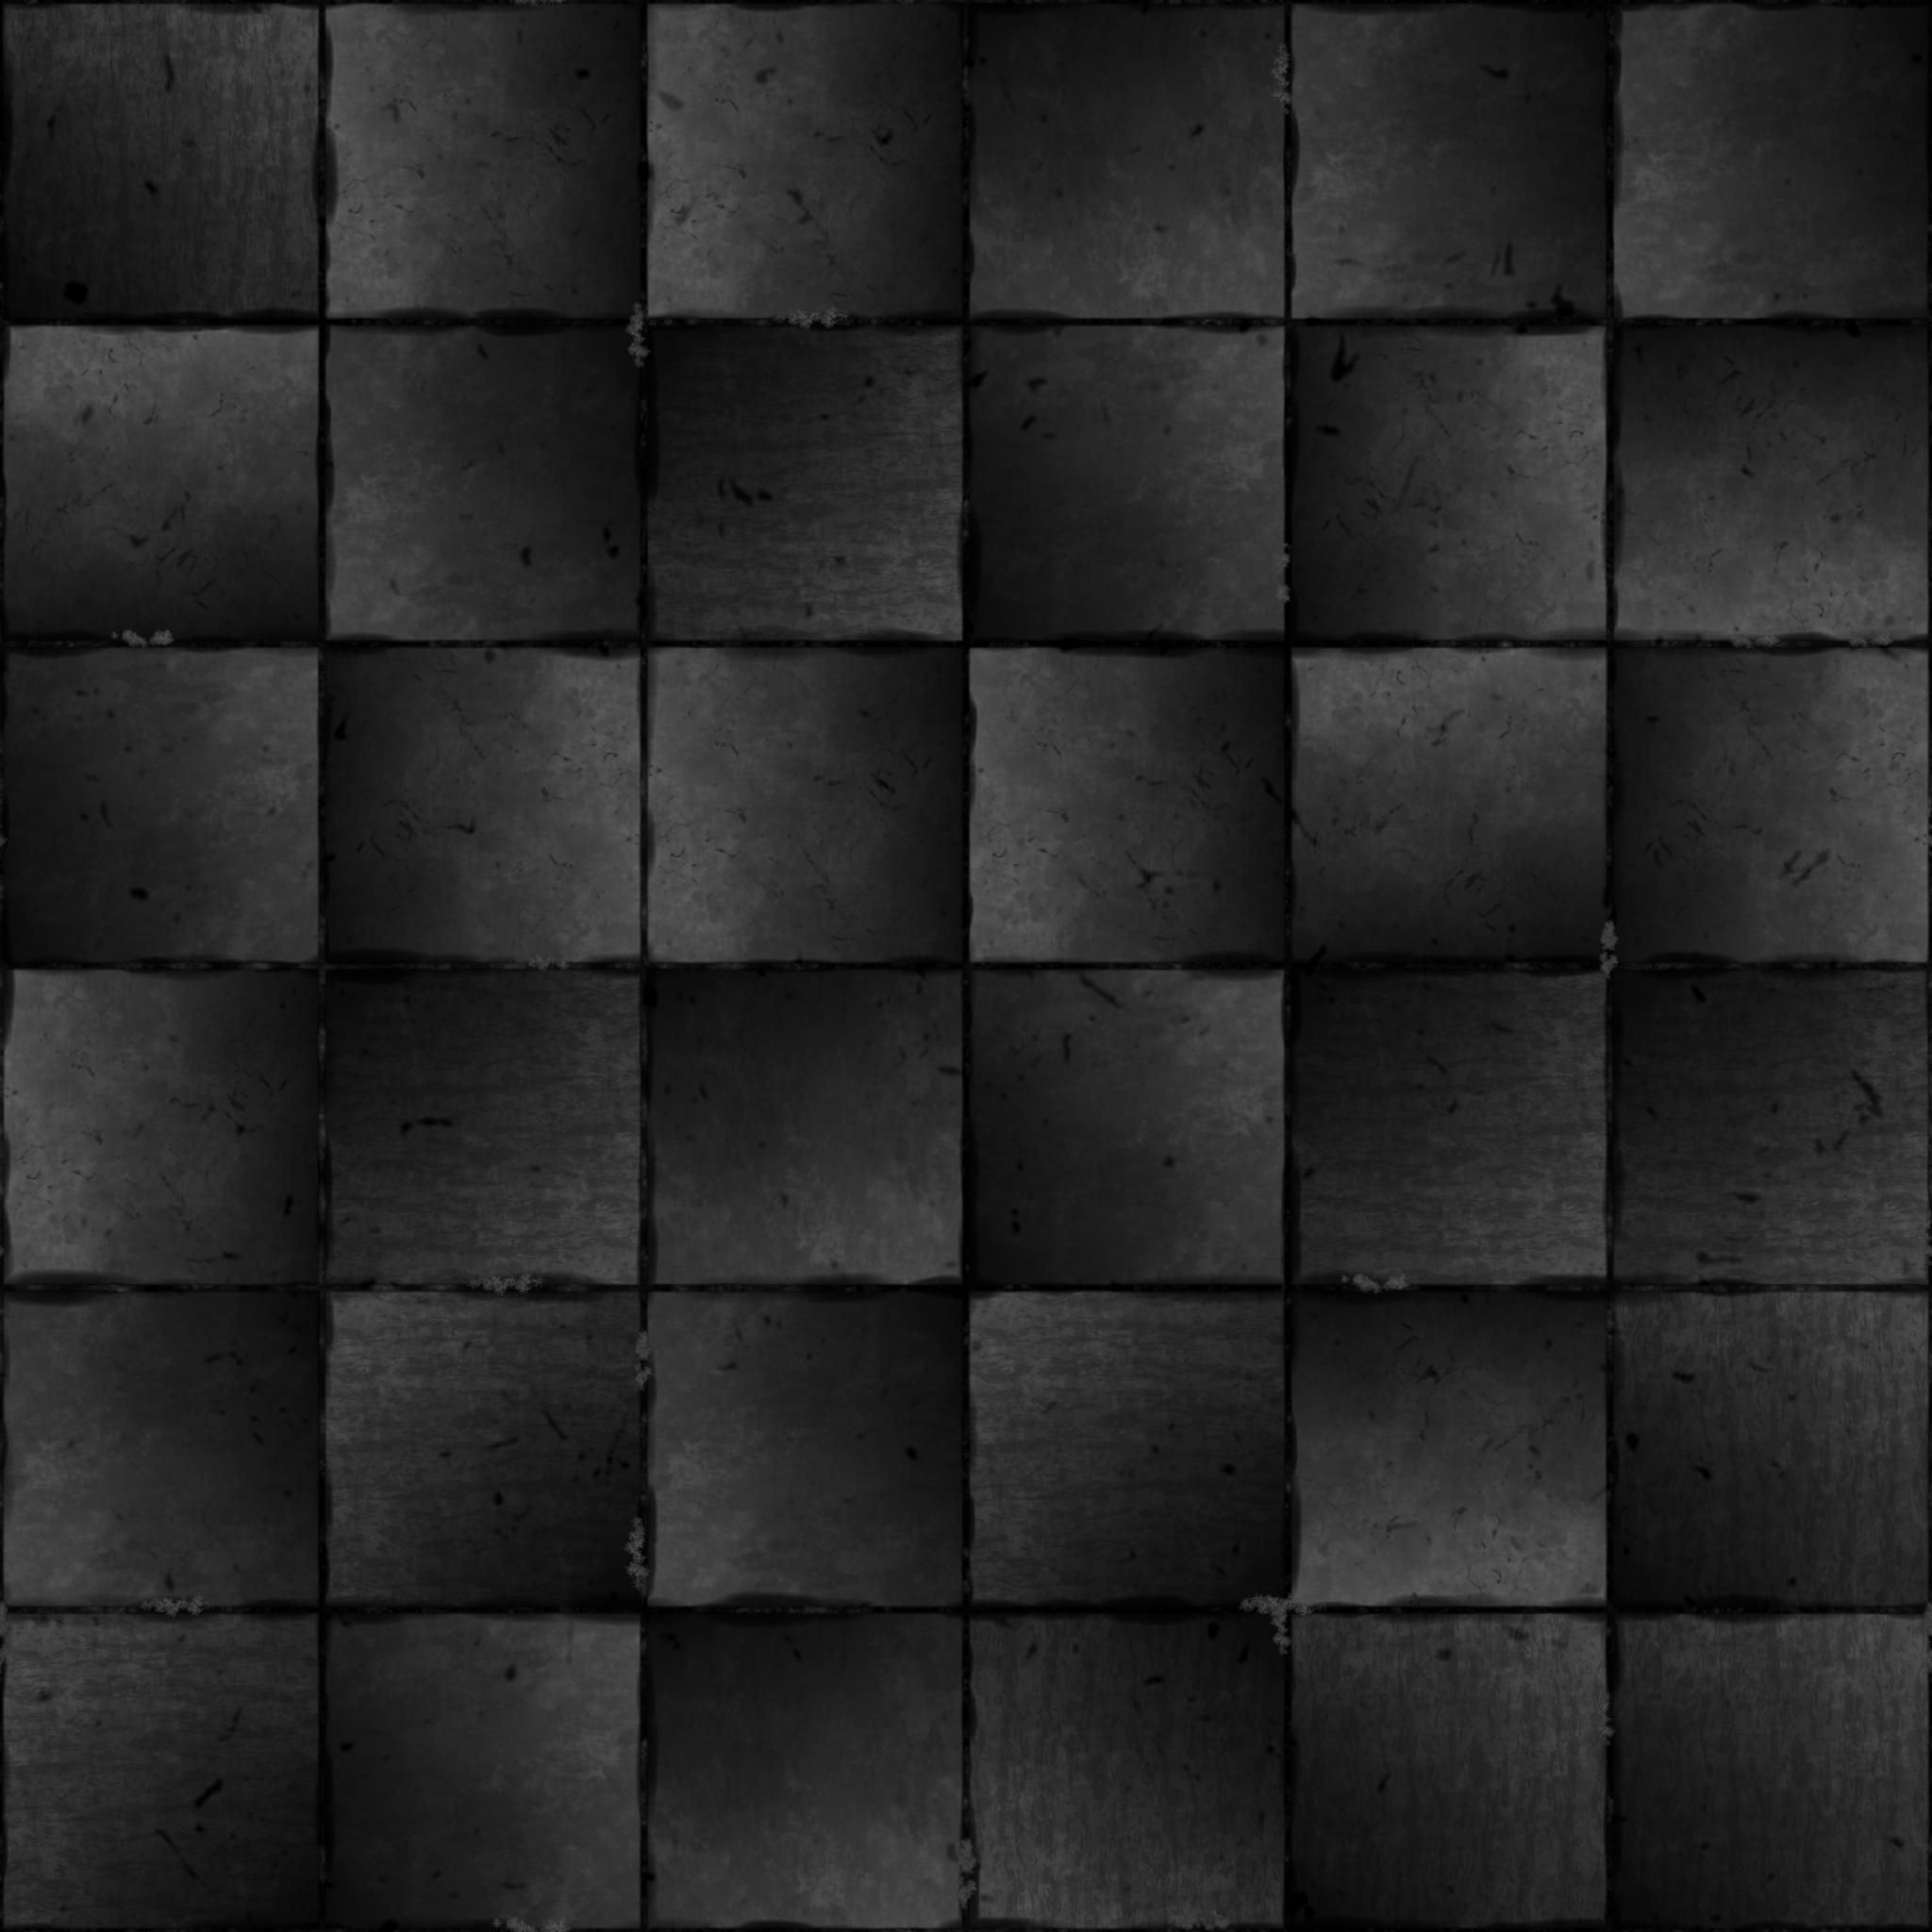
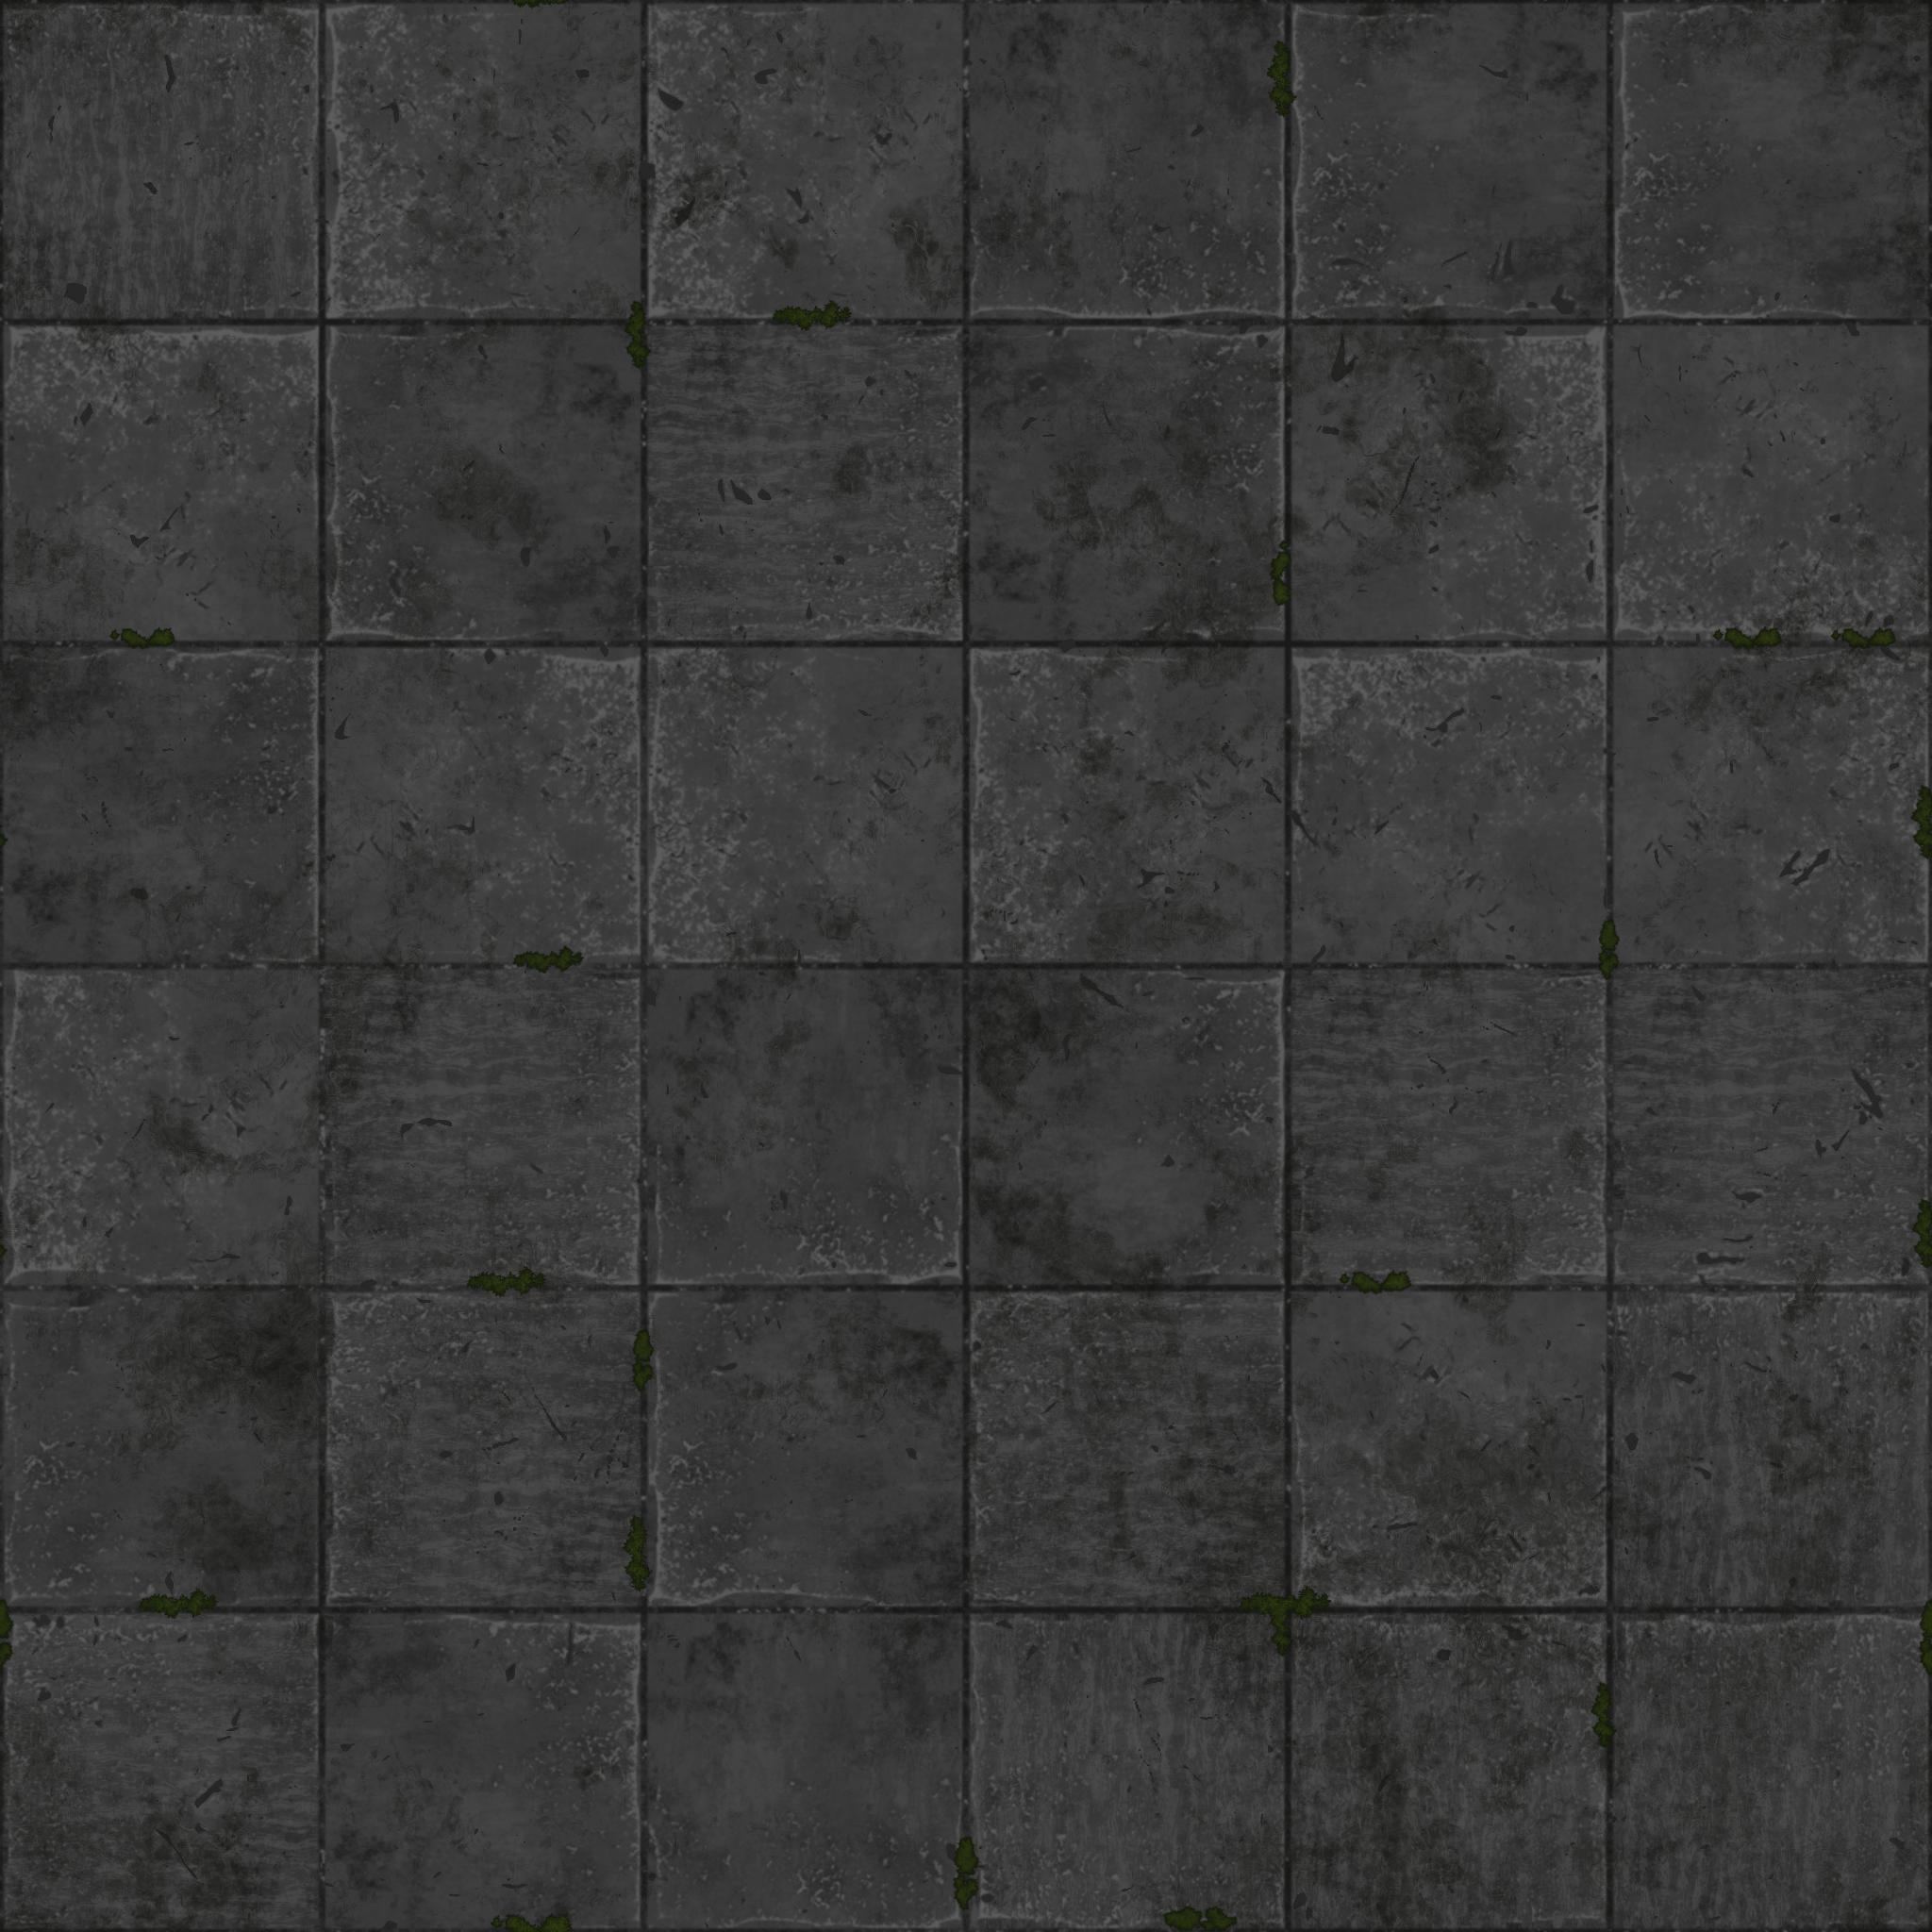
Every material used in the project was made from scratch by me.
Tiling materials were made in Substance Designer and model specific ones were made in Substance Painter
My workflow for creating them is very standard: I start with the height map, I then create the albedo, and use the created masks and maps to make the roughness, metallic, emission etc. maps.

Here you can see the rough breakdown of the floor material.

The final height and albedo maps:
For this, I dont really have a constant workflow, since every object requires different kinds of maps to work with and focus on.
While for an object made of wood I would start with the height map and work from there, for an object made of metal I would start with the albedo and roughness maps.
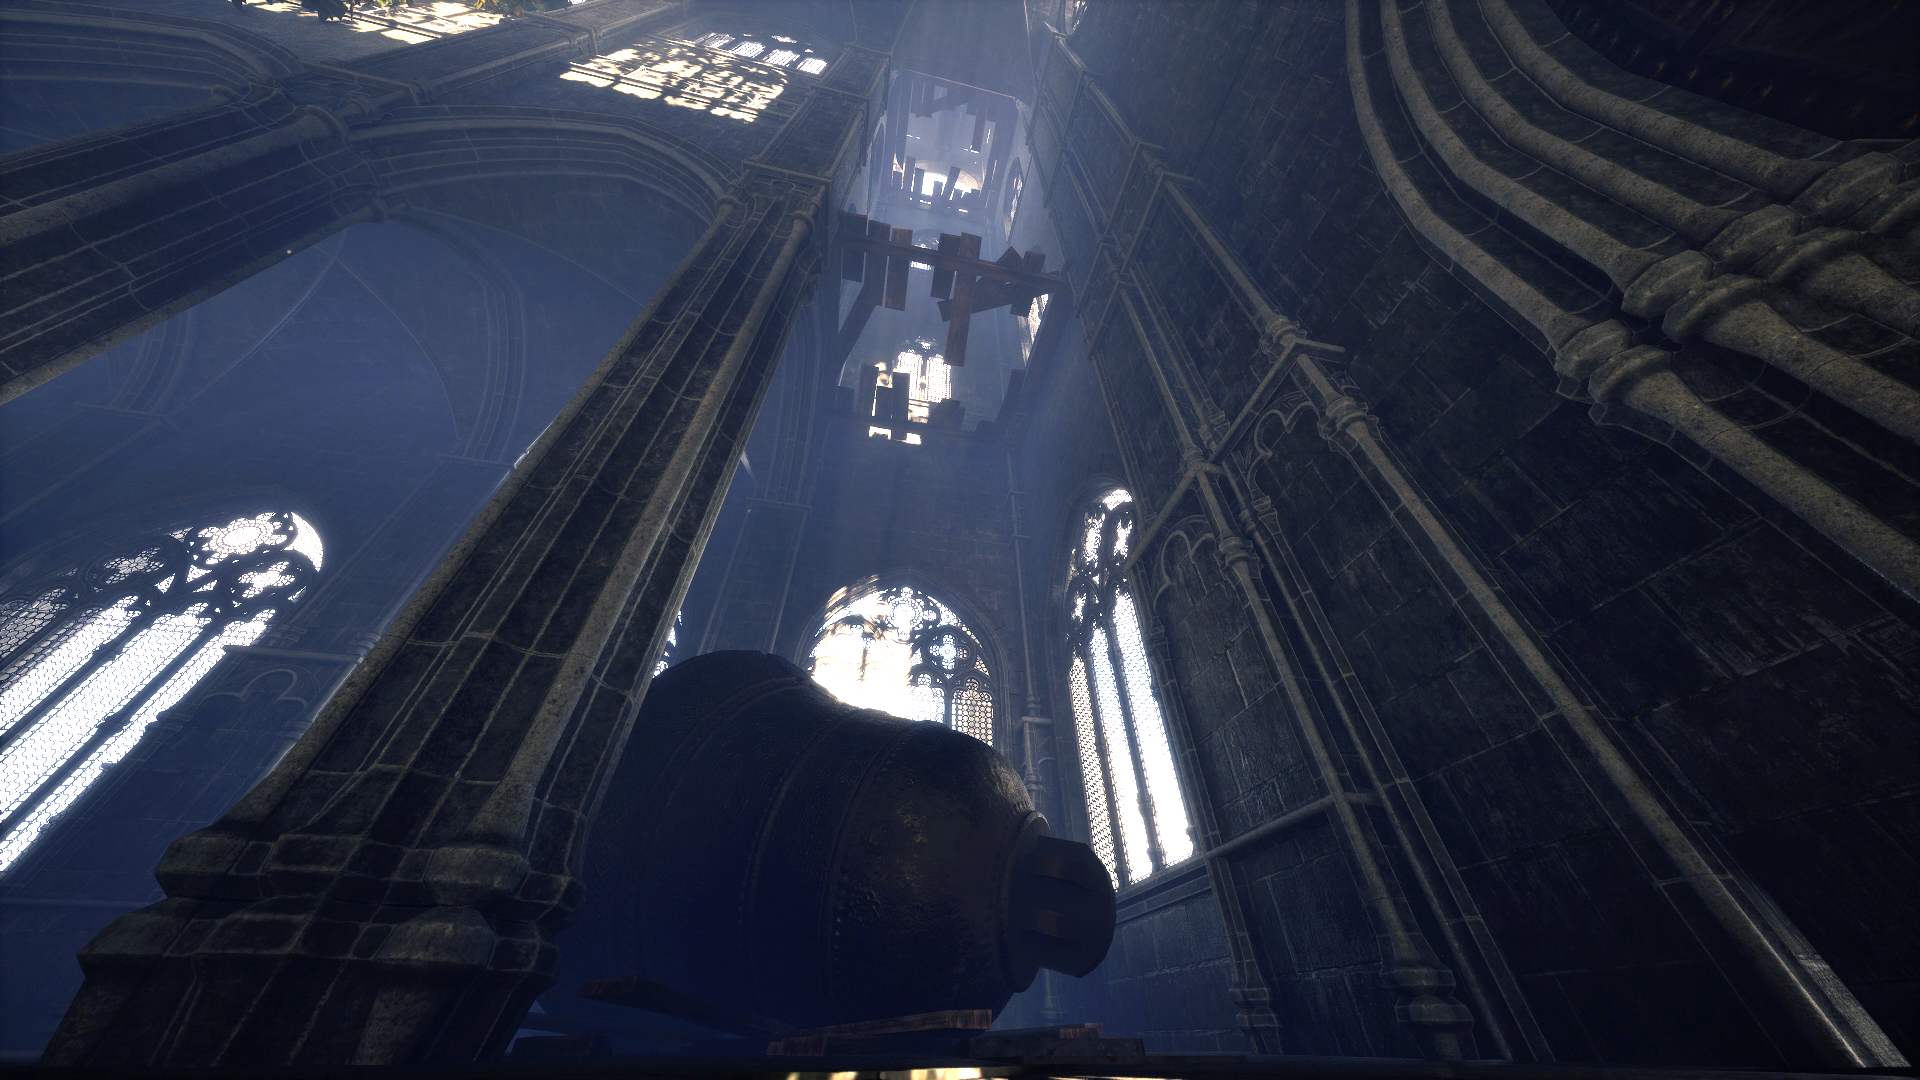
So to better demonstrate my workflow here is a breakdown of the bell.

I had to learn a lot about real time foliage rendering for this part of the projcet. I was familiar with fragment shaders, but havent really done any vertex shaders before.
Allow me to start with the creation of the textures first.
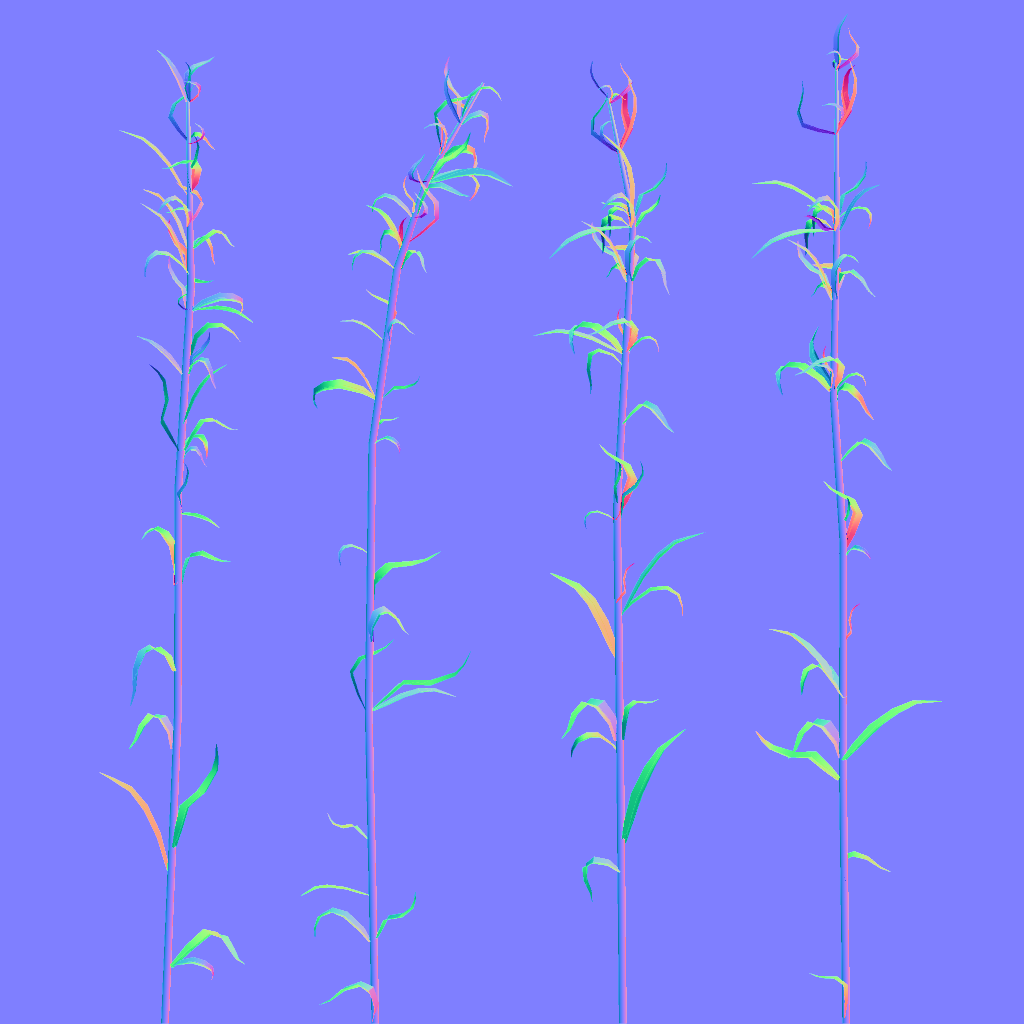
For my workflow I start with creating 3D models which I can bake onto planes later. I model some leaves, then distribute them along a stem procedurally.
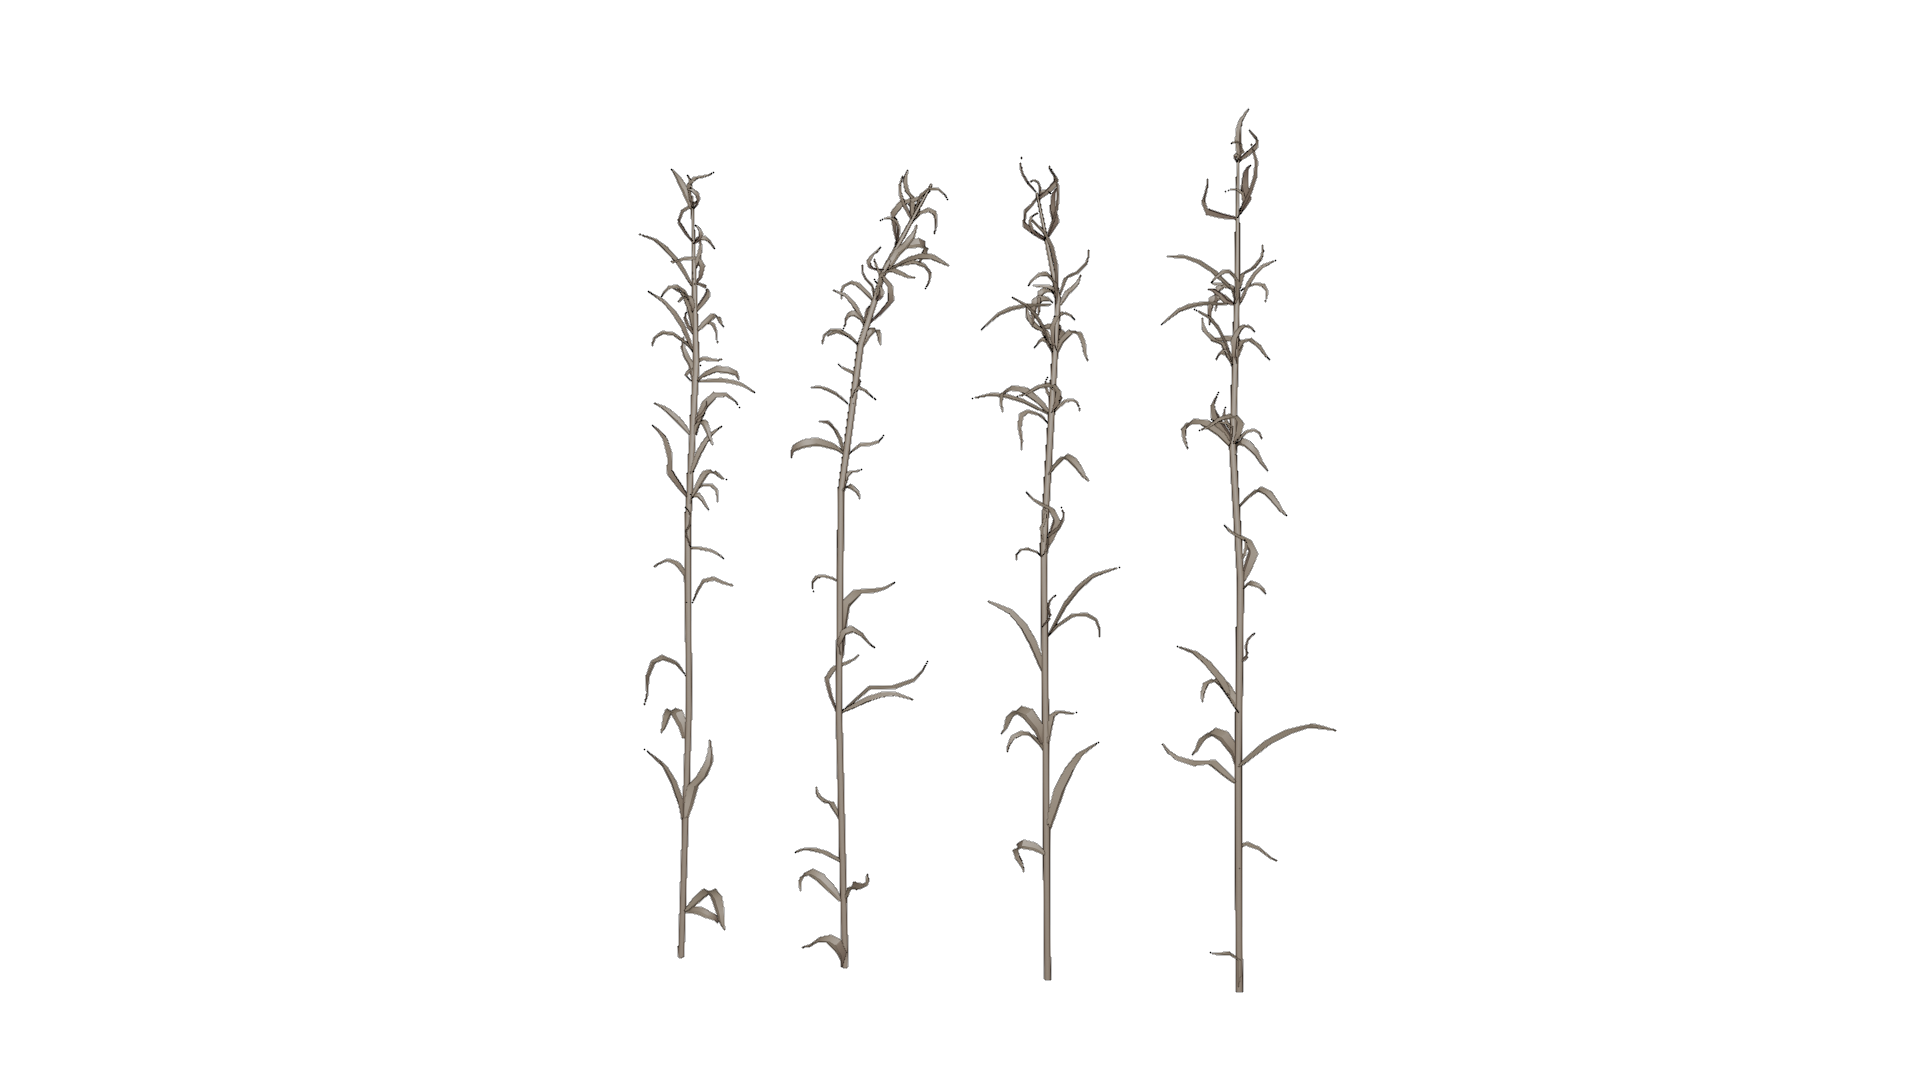
I then bake the normals onto a plane in Substance Painter, and begin texturing.
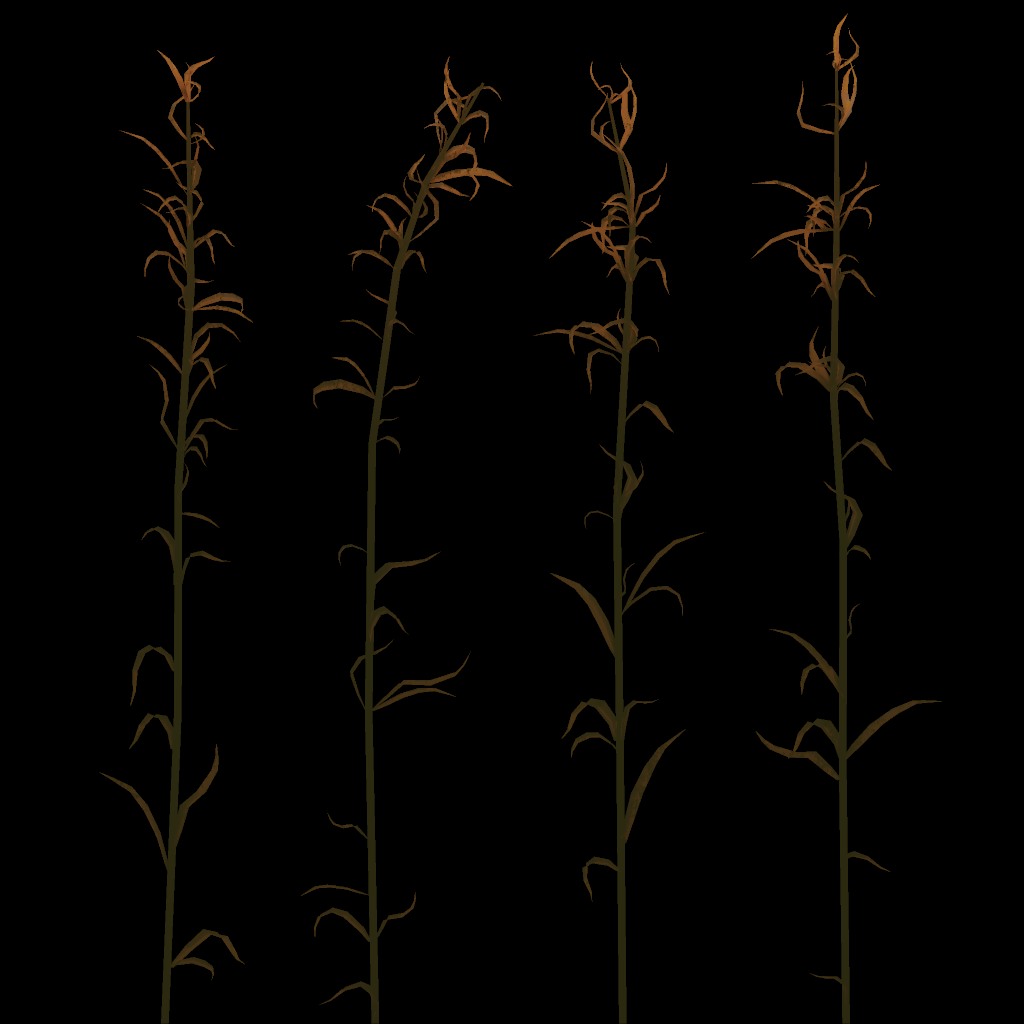
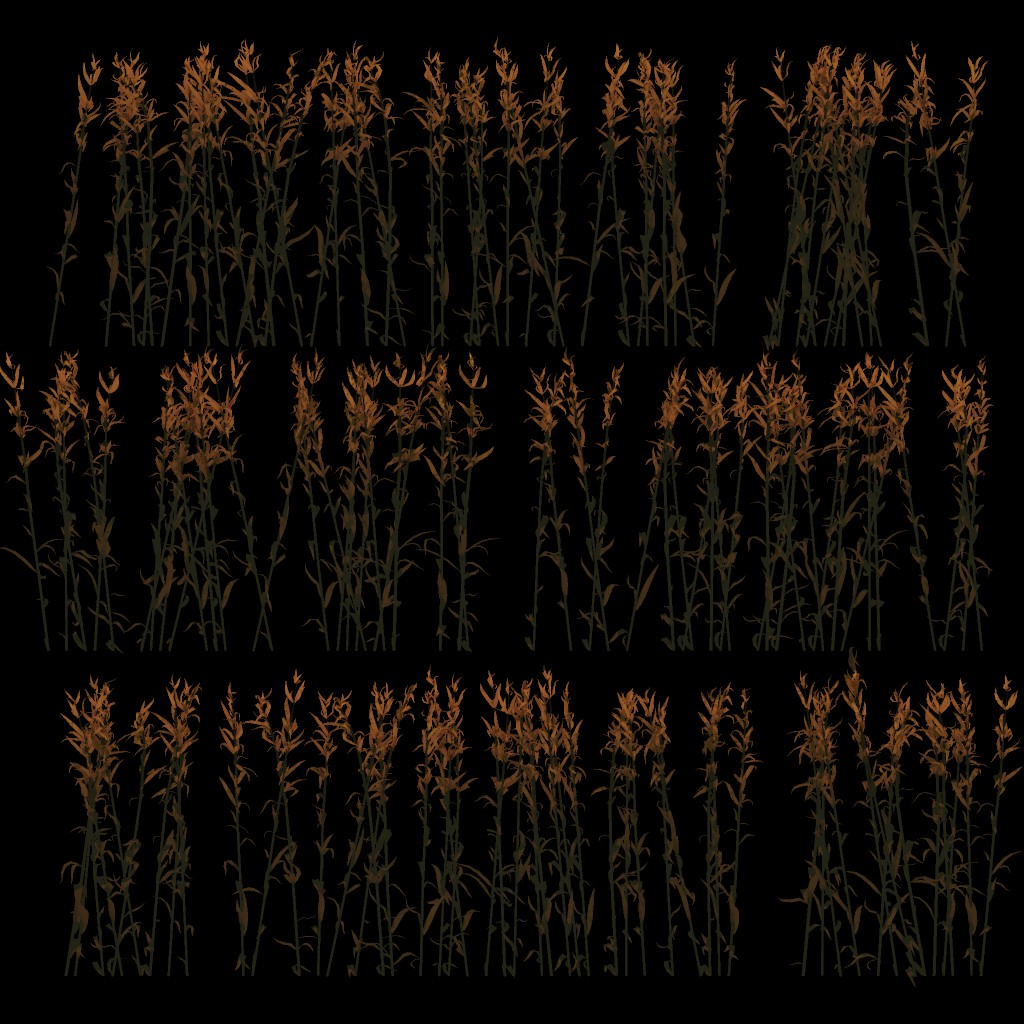
One important map to take note of is the "gradient map".
This is a custom map I added to the texturing pipeline of my foliage, and it is always a linear gradient starting from the bottom of the plant.
Here I added the siluettes of the grass that uses this texture for demostration.
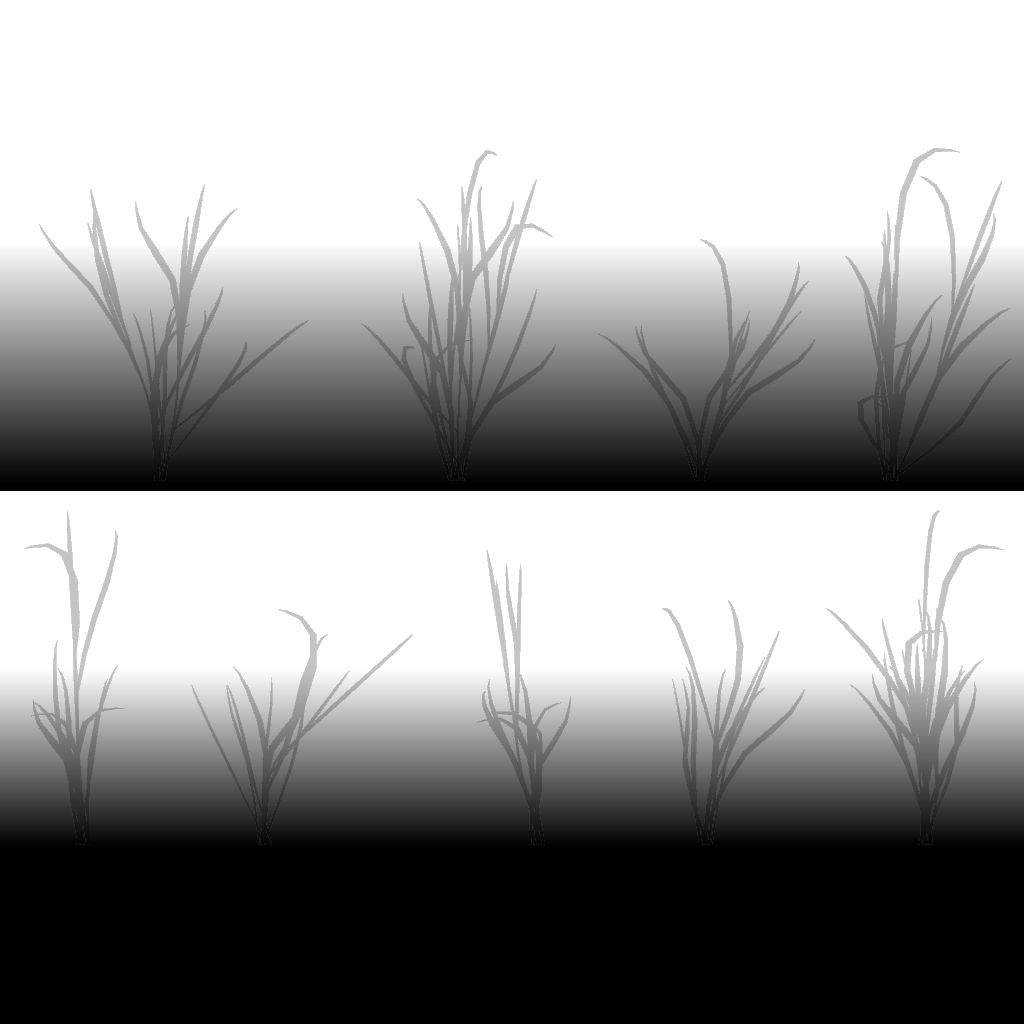
This will be very useful later when I need the foliage to bend in the wind.
Once the maps are done, I go back to Blender and create the cards.
Its important to strike a balance between tri count and quad overdraw. If the mesh of your card is very faithful to the shape of the grass, you will end up with too much tris for optimized rendering, and if you have too few tris, the opacity overlaps will create intense quad-overdraw, again slowing down rendering.
Additionally you need tris for the mesh to bend in the wind and look natural.
Once the cards are done, its time to import them to the engine, and apply my cutom made foliage shader.
Im going to use this prototype grass to more clearly show the steps the shader takes.
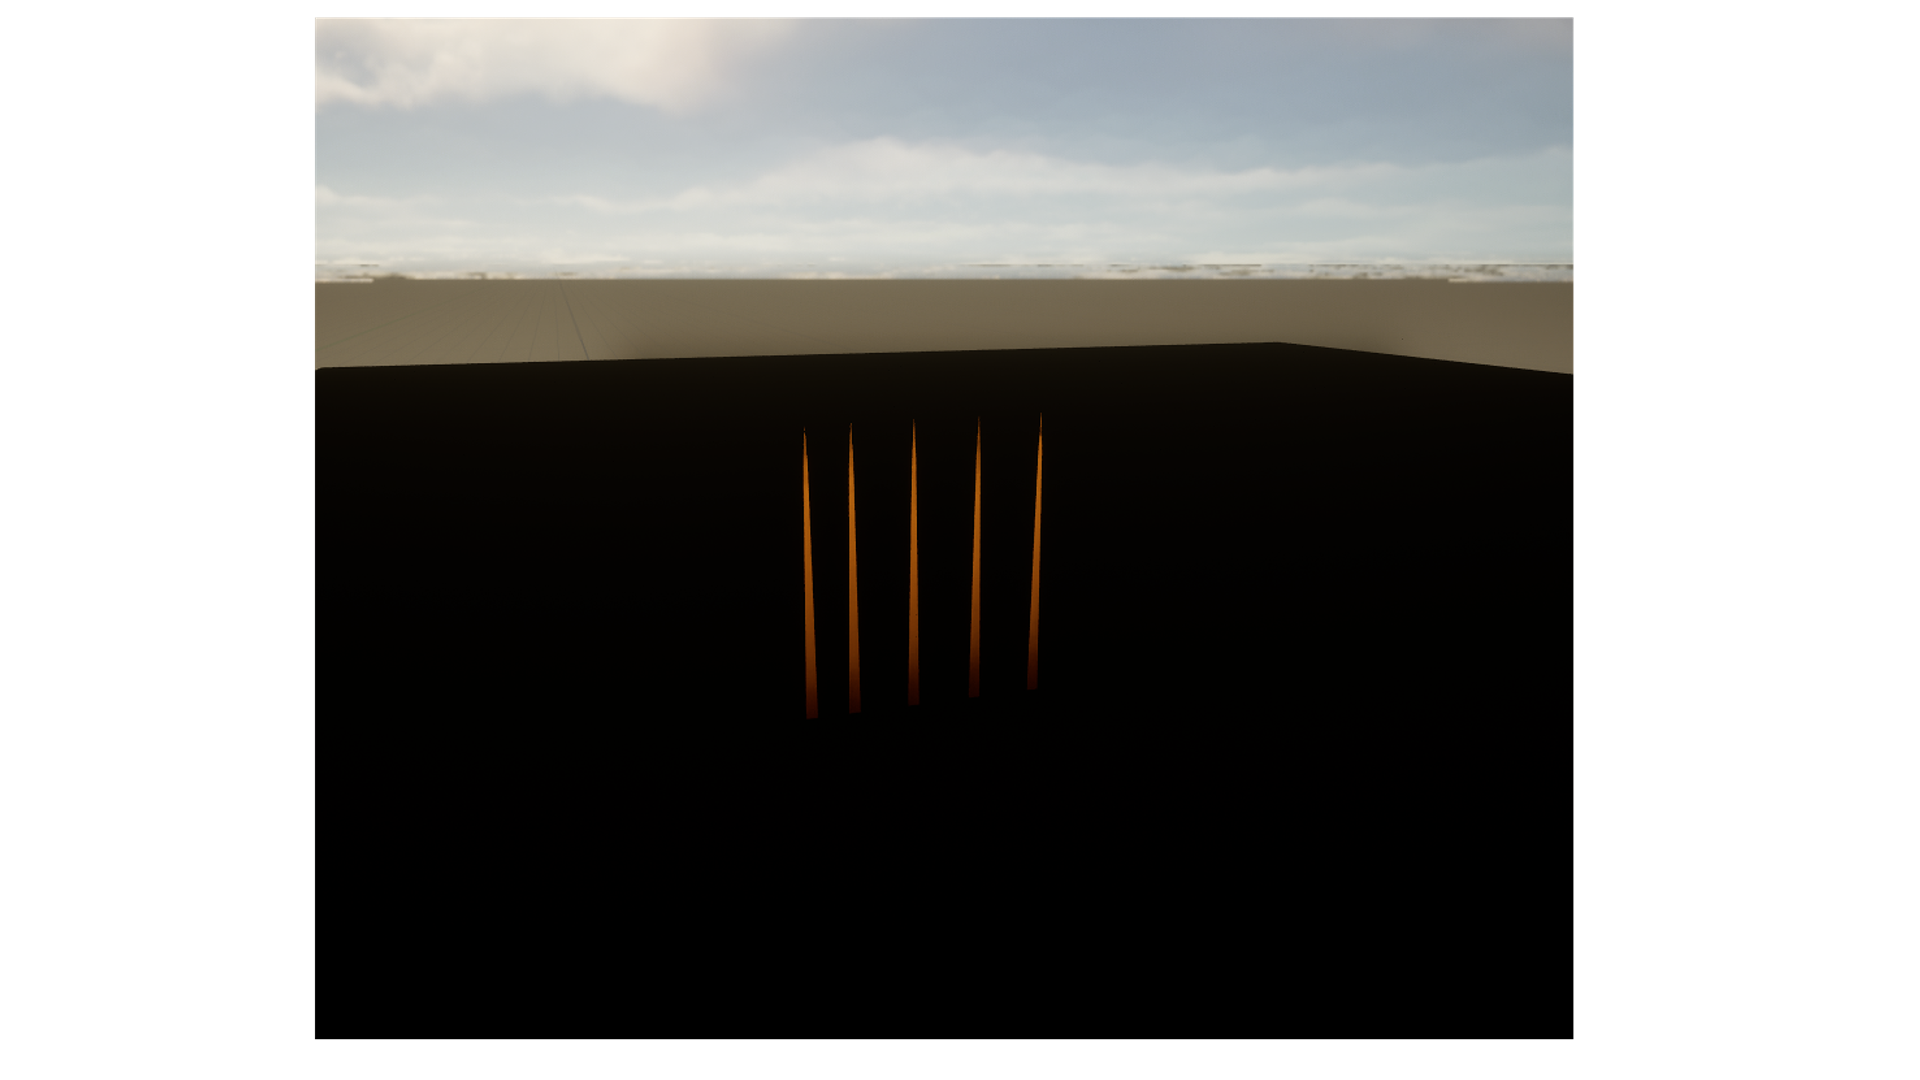
Gradient map:
First, the gradient map is remapped by an easing function. I use two main ones, a simple exponential one and a circular one.
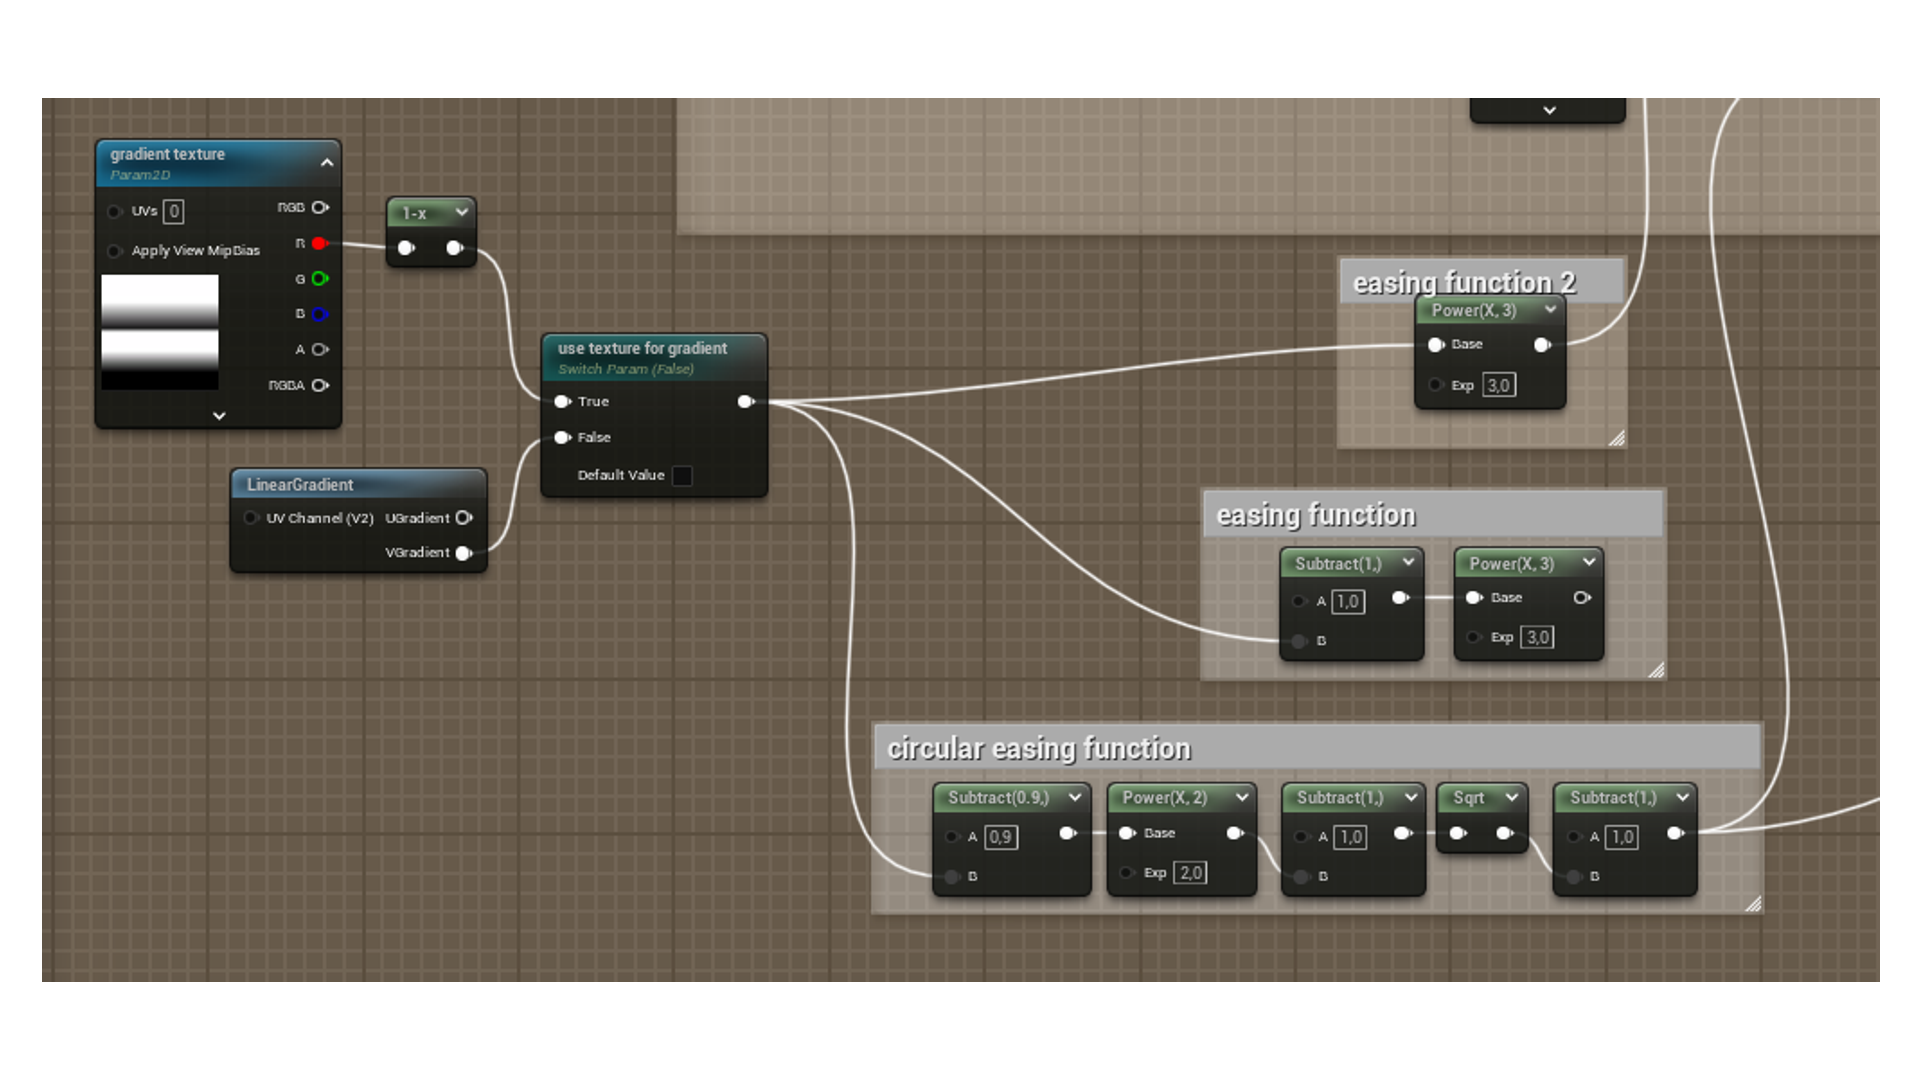
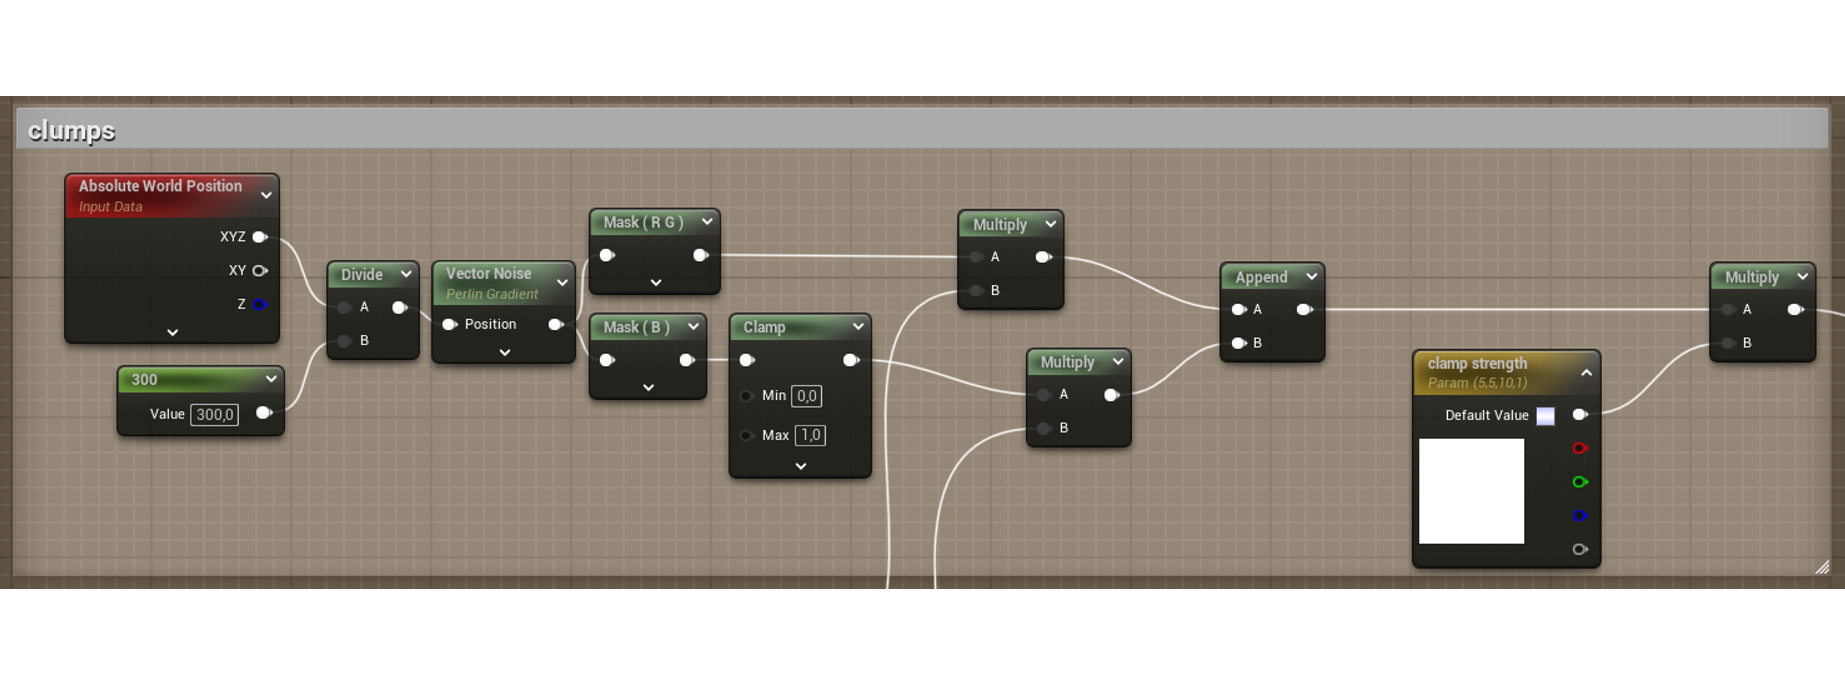
Clumping:
In order to achieve a natural look, the distriubution of the grass has to be changed. In real life, grass grow in clumps, so this steps aims to imitate that.
It moves the bottom of the grass towards each other using a vector noise. It achieves this effect by multiplying the gradient with the RG values of the vector noise. As a bonus, it uses the B value of the noise to create height differences between the clumps as well.
Its a small detail but it really works to sell the naturalistic look of a field of grass.

Wind:
The wind is applied as a sum of two procedurally animated noises: "wind big" and "wind small".
Again, before being added to the vertex positions, its multiplied by the eased gradient to acheieve the bending look.
This is not a real bending calculation, it just gradually displaces the verticies along an axis. It does not actually rotate the actual mesh. For this reason, the value of the wind in the blue channel is negative, so it squishes down vertically the grass as it stretches, to sell the illusion of bending.


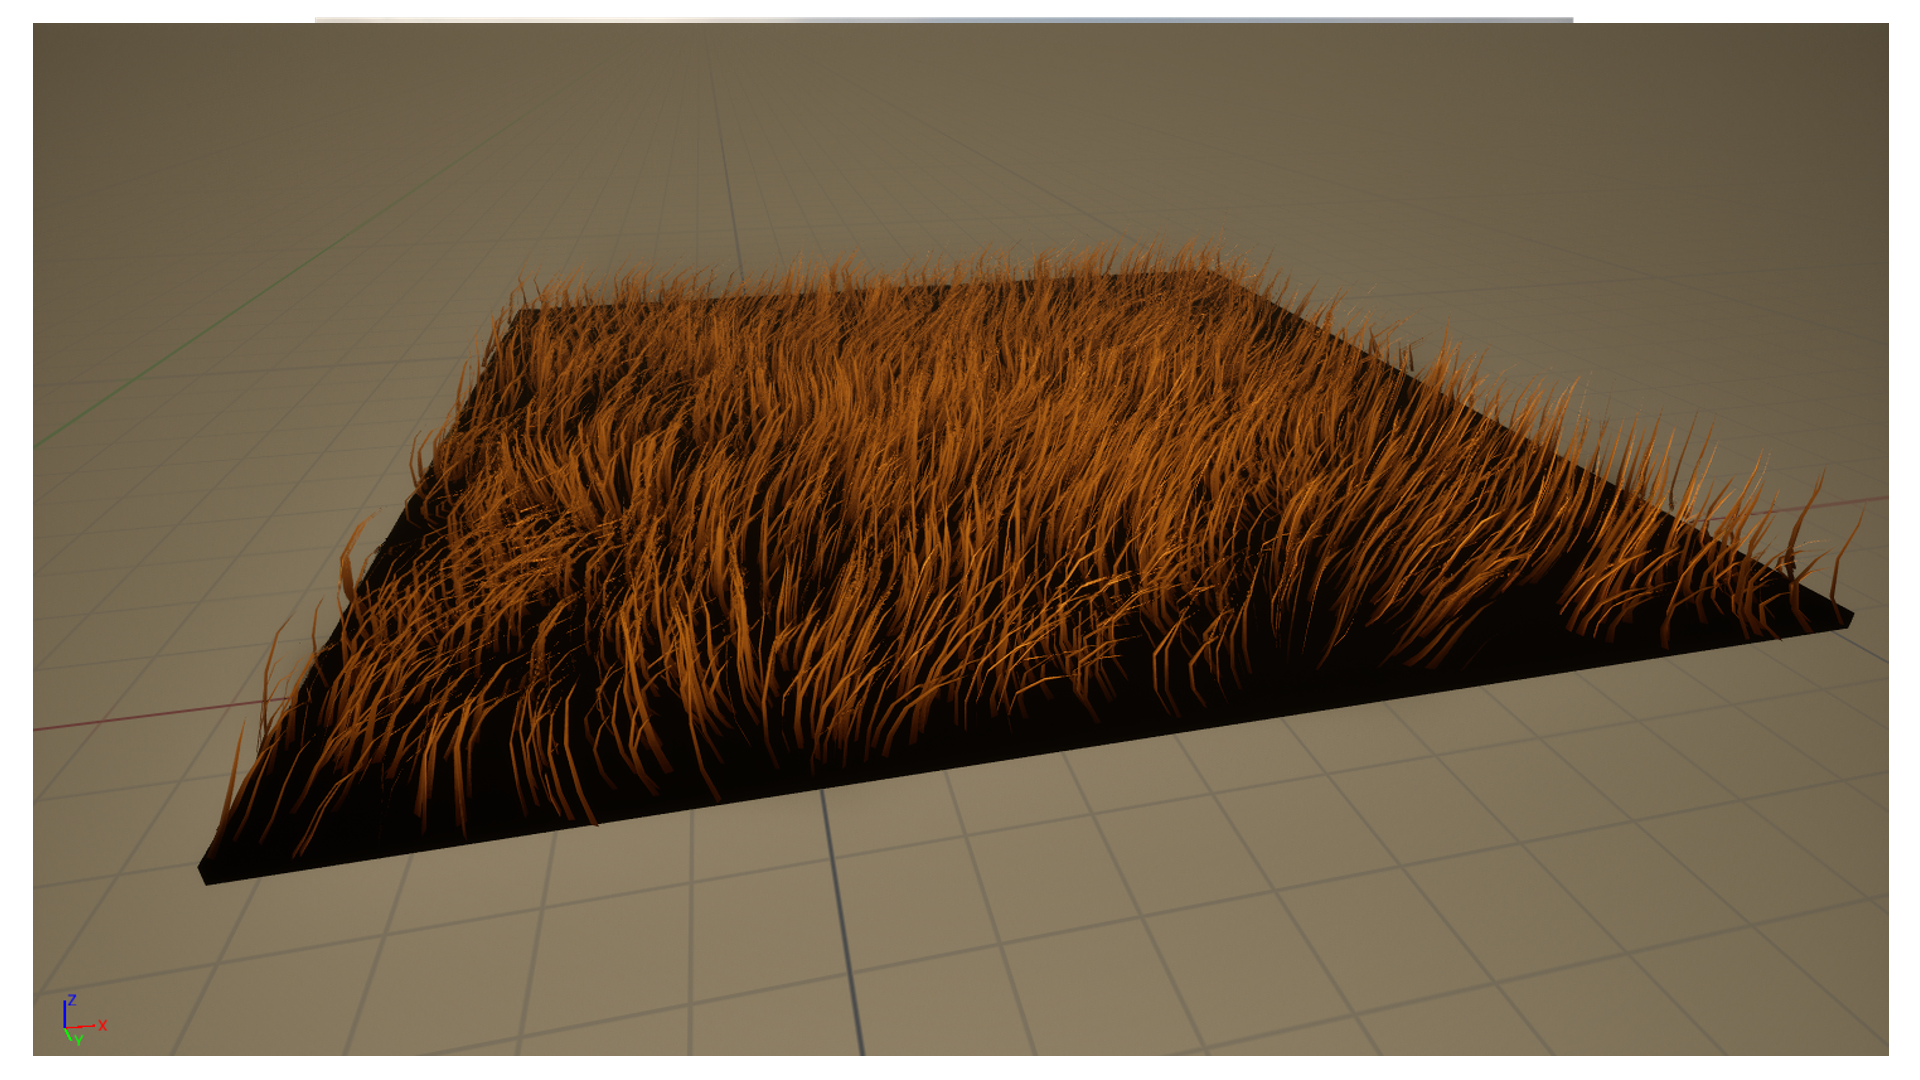
Adding all the steps so far together we achieve a nice looking grassfield.
Also note, that I add some random scale and rotation through the Unreal foliage tool.
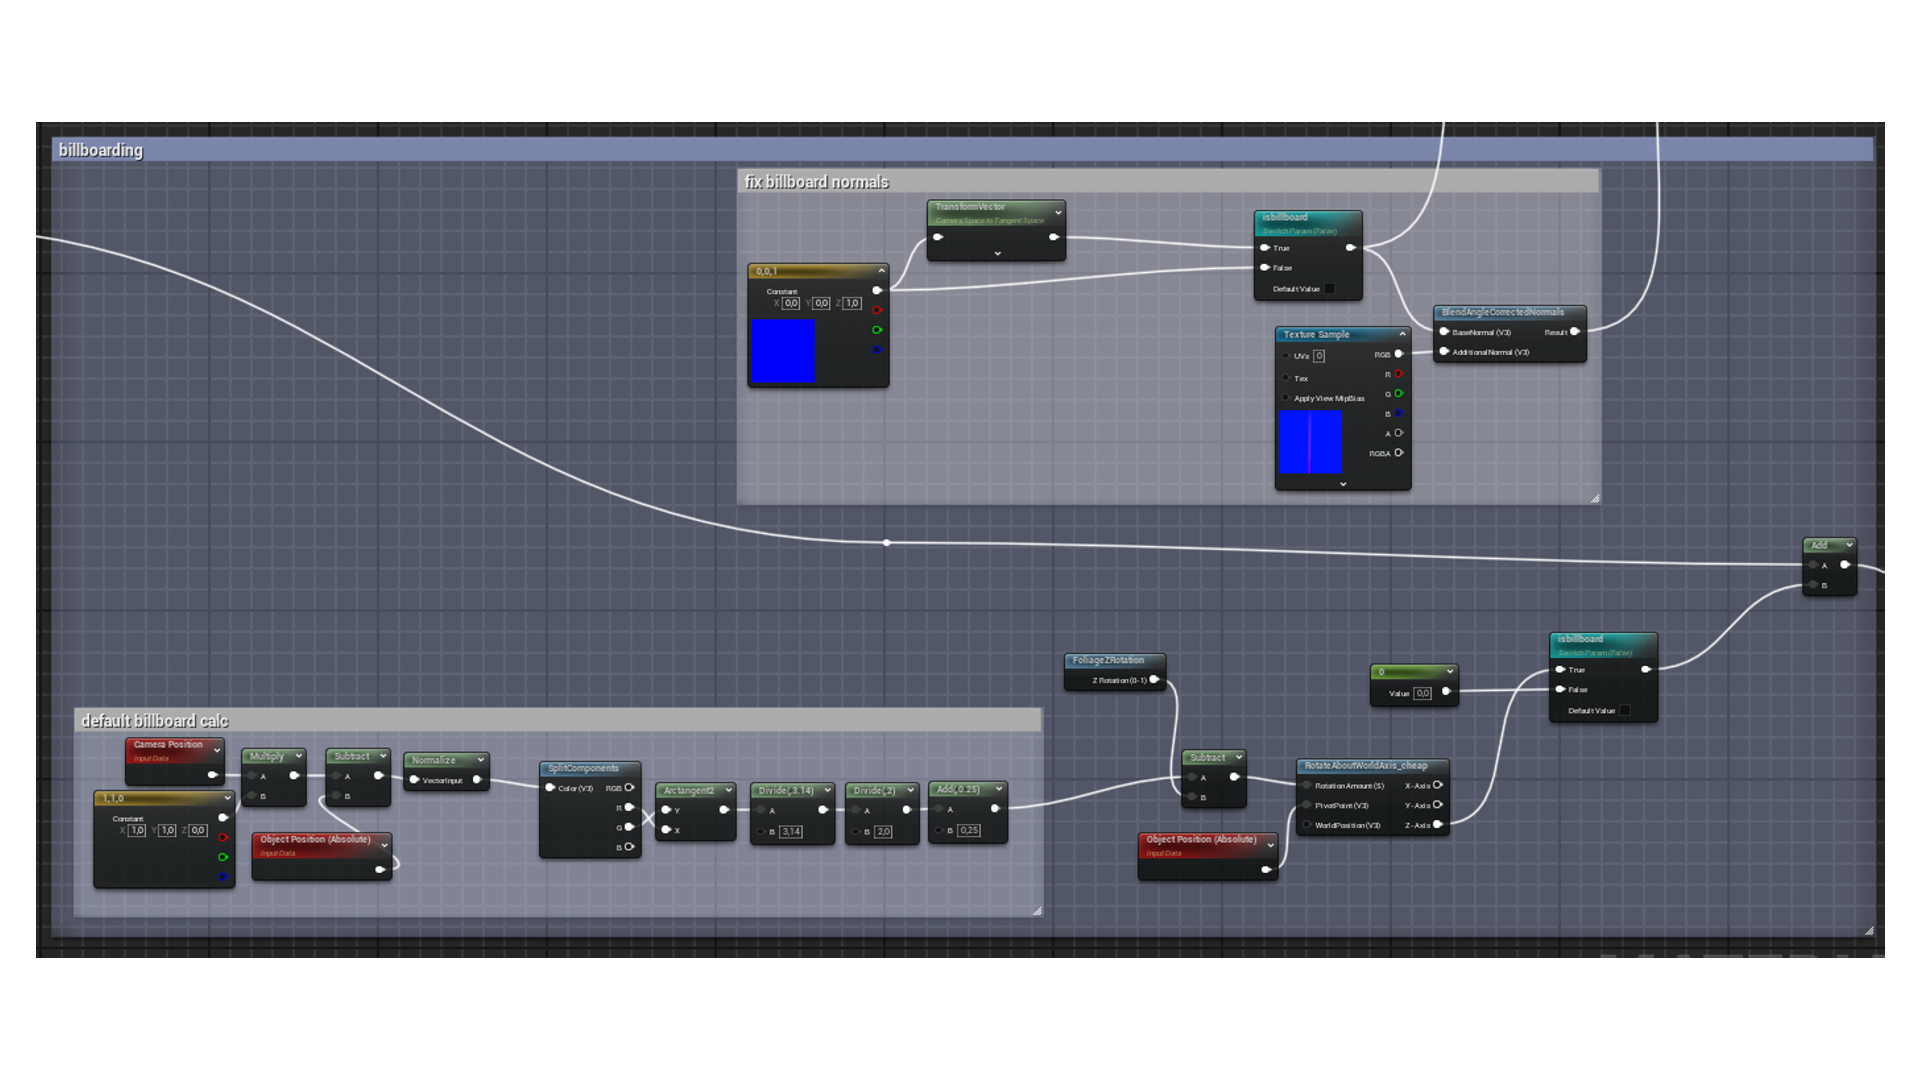
Billboarding:
Originally I used billboarding for all the foliage, but I didnt like the uniform lighting of the grass it created.
For what I did use billboarding in the end is the fake distant grass.
I made these bigger grass cards to imitate dense grass in the distance, and they work suprisingly well.
The billboarding calculations also account for the rotation applied through the foliage tool, and for the rotation of the normals.
Inverse distance culling:
Unreal by itself has built in distance culling for foliage, so I didnt need to do that. What I did need to do is inverse distance culling, meaning culling things that are too close to the camera.
My attempt at this is pretty crude, it just turns the alpha value of the cards to zero and disables all the vertex offset for optimization.
I mainly use this to turn invisible the above mentioned cards that are meant to be in the distance, and foliage that would be very near to the camera and obstruct its view.
With all these implemented, we have a nice grass field.
The leaves of the ivy and the cloth part of the flags use a very similar vertex shader.
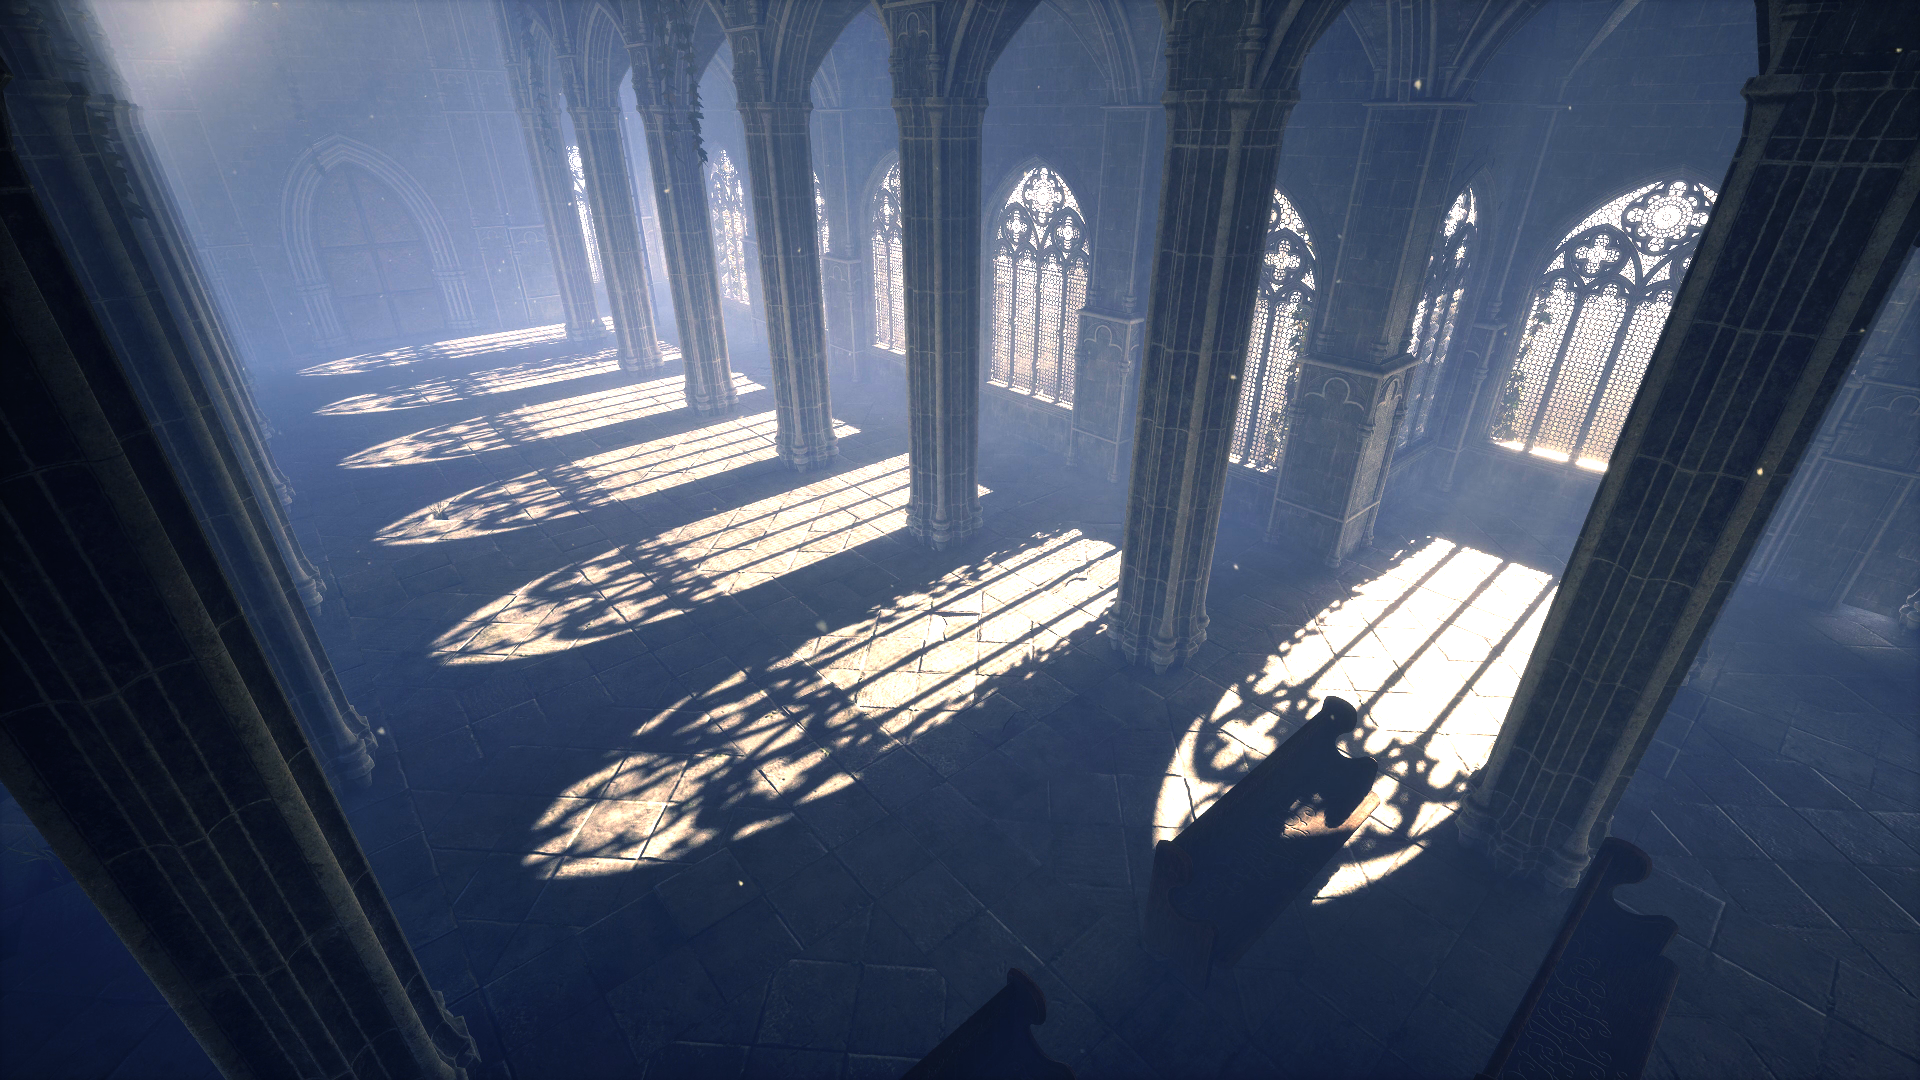
Something I want to mention here is everything else that contributes to the visuals of the scene, like the sky shader, volumetric fog, post processing fog, particle fog, ambient particle effects.
I wouldnt go into much detail since these are not really the focus of the project.
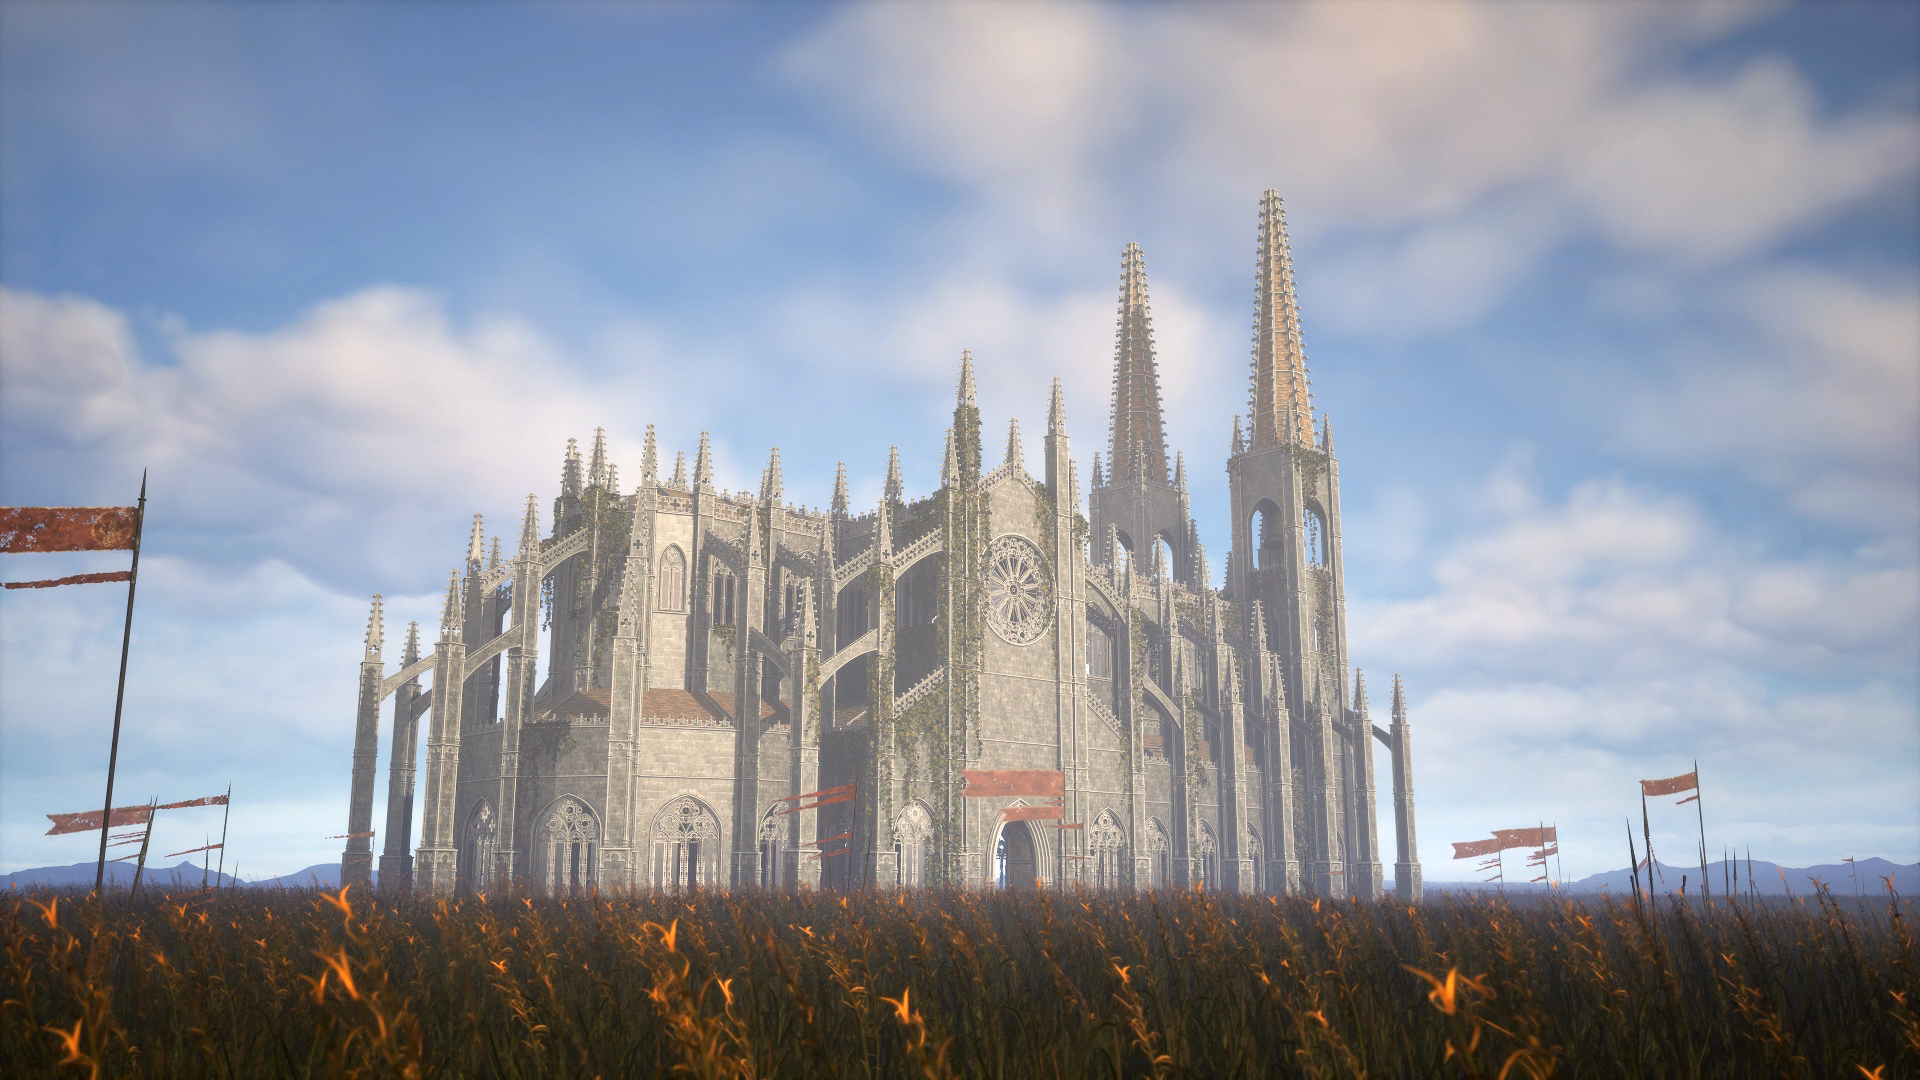
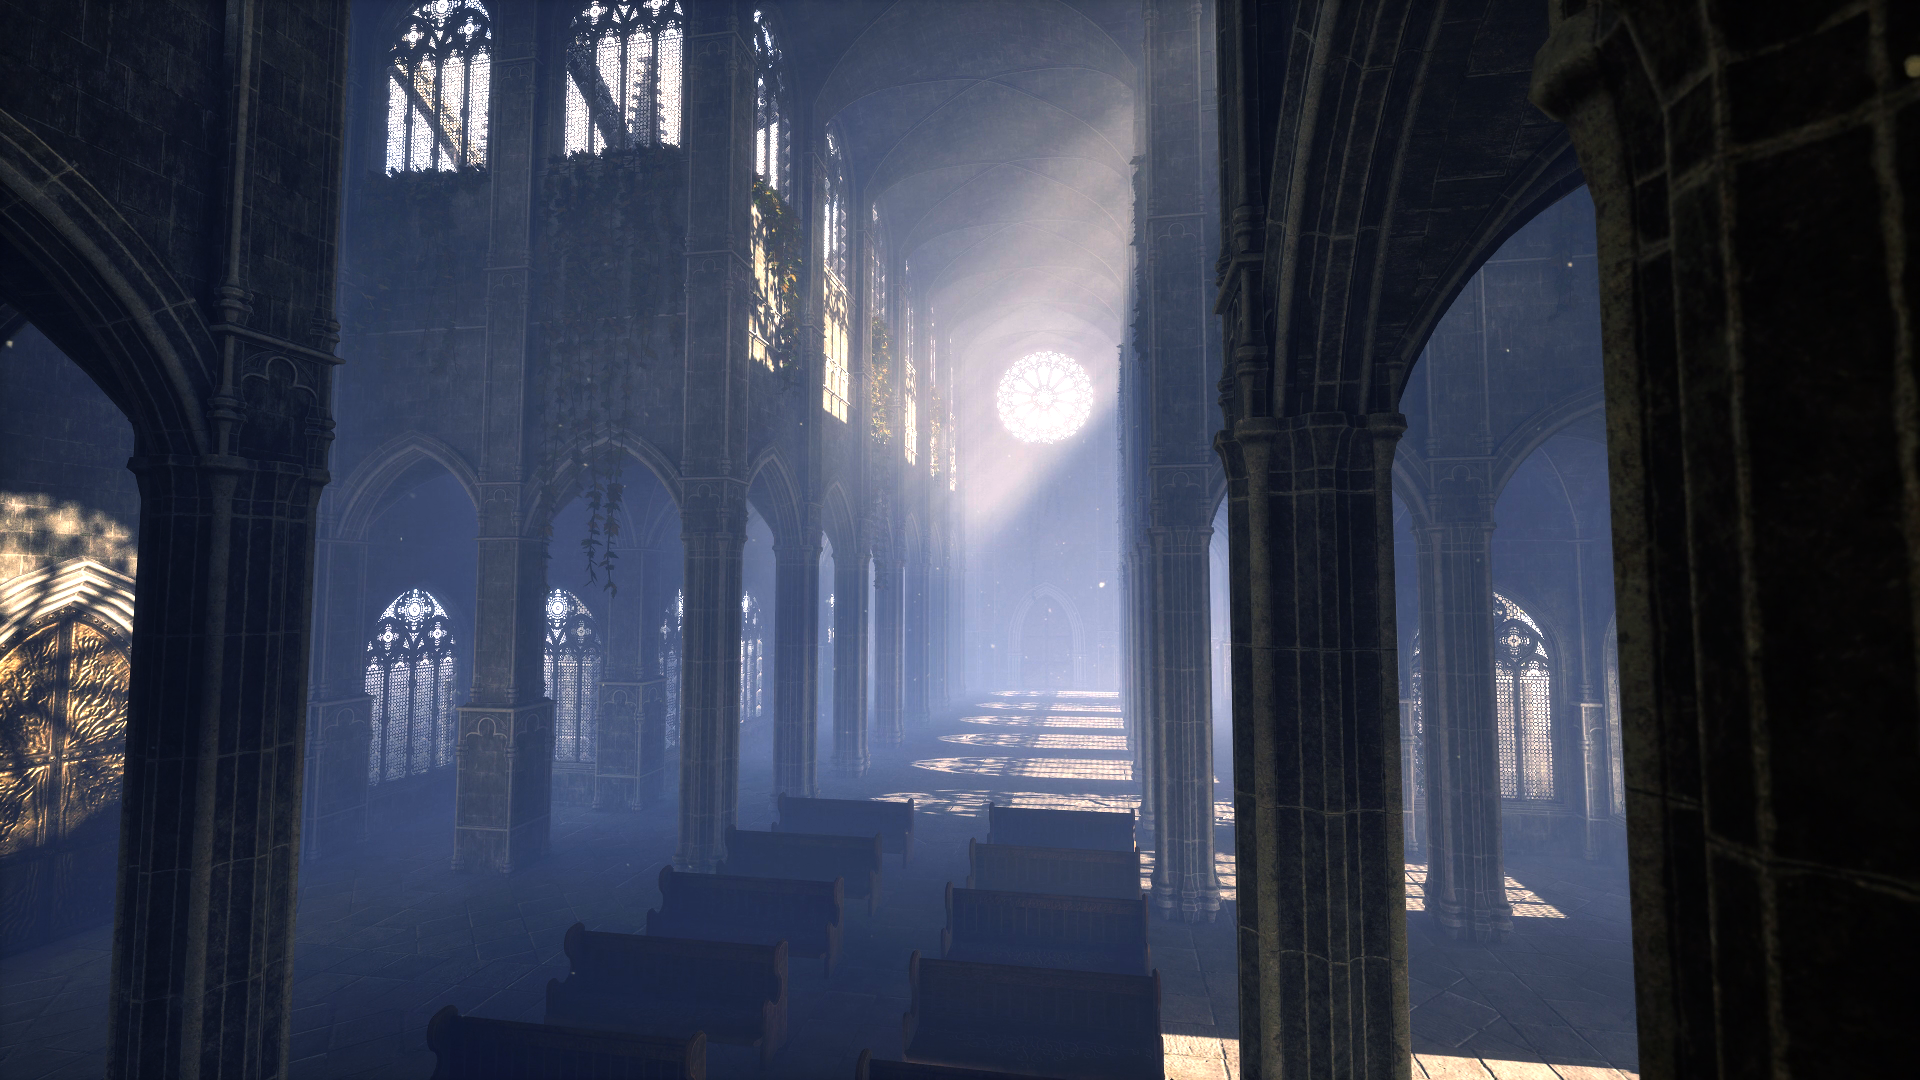
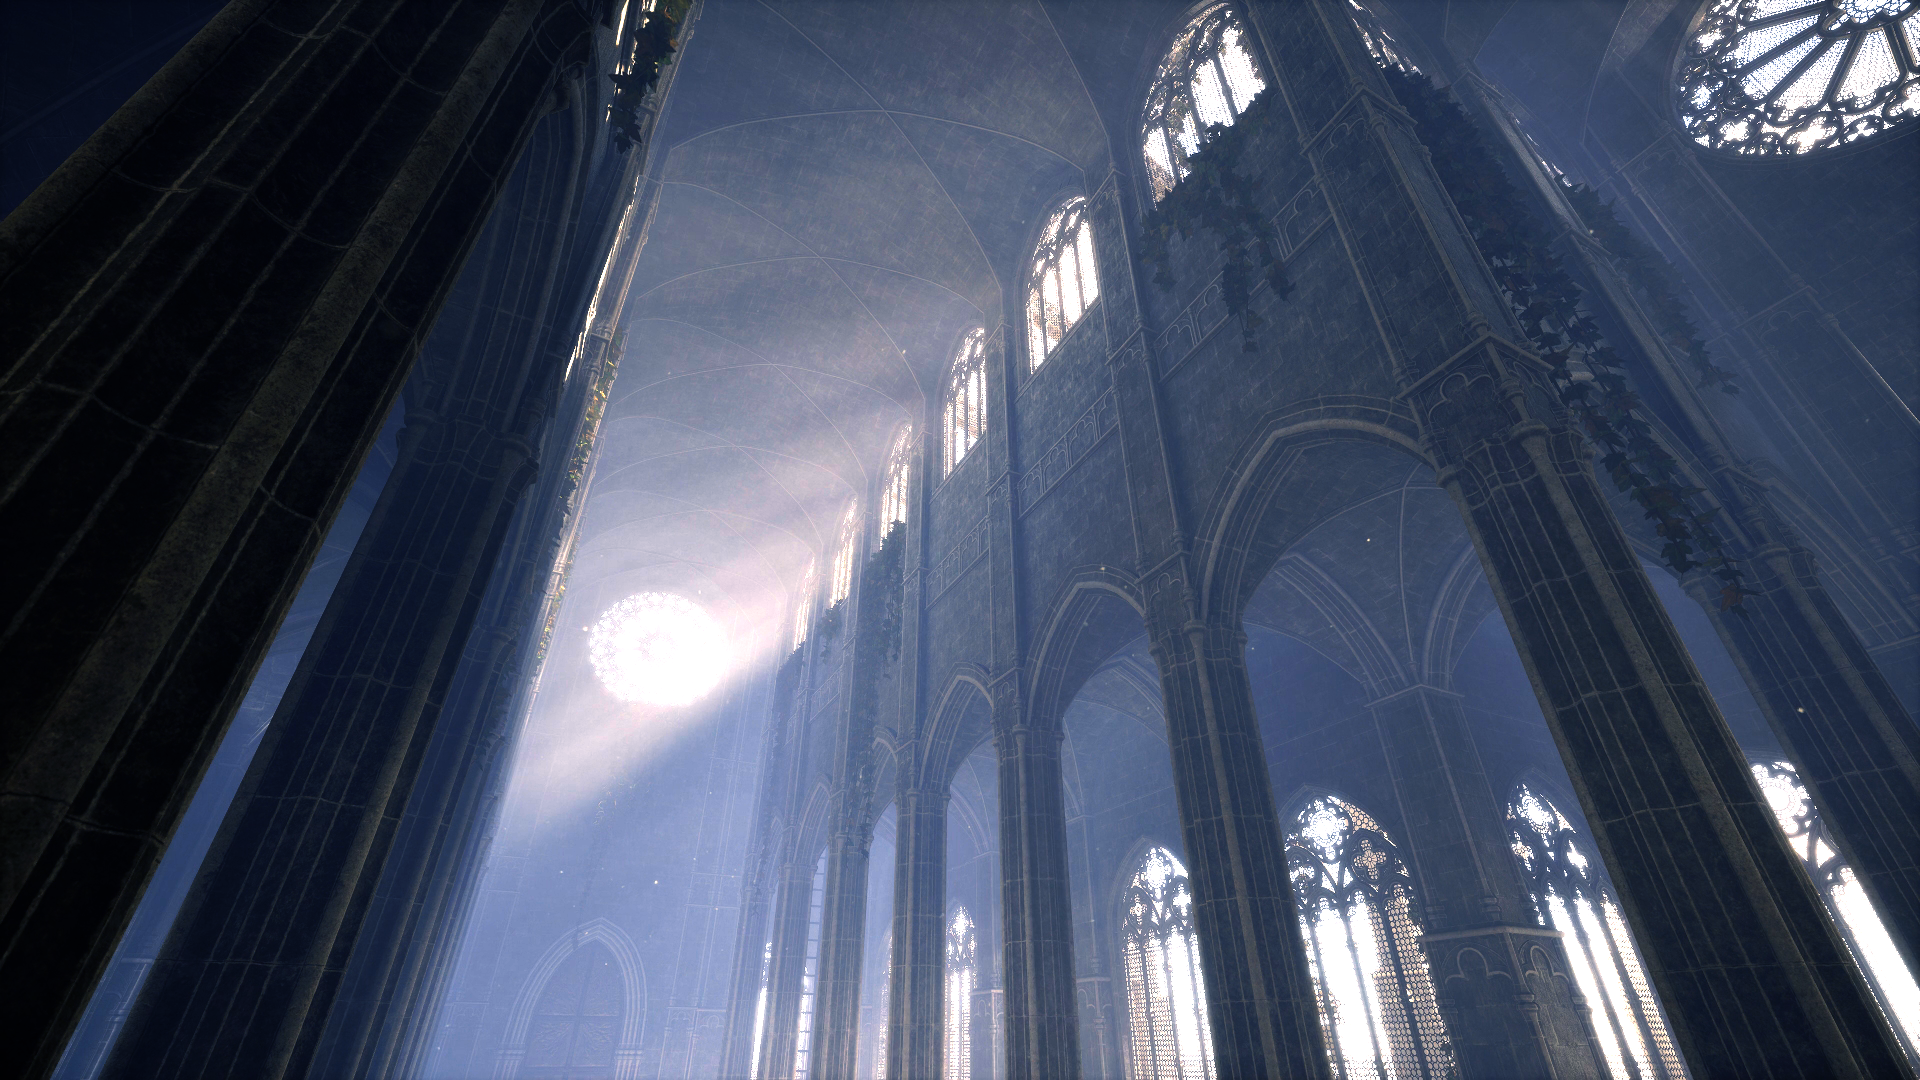
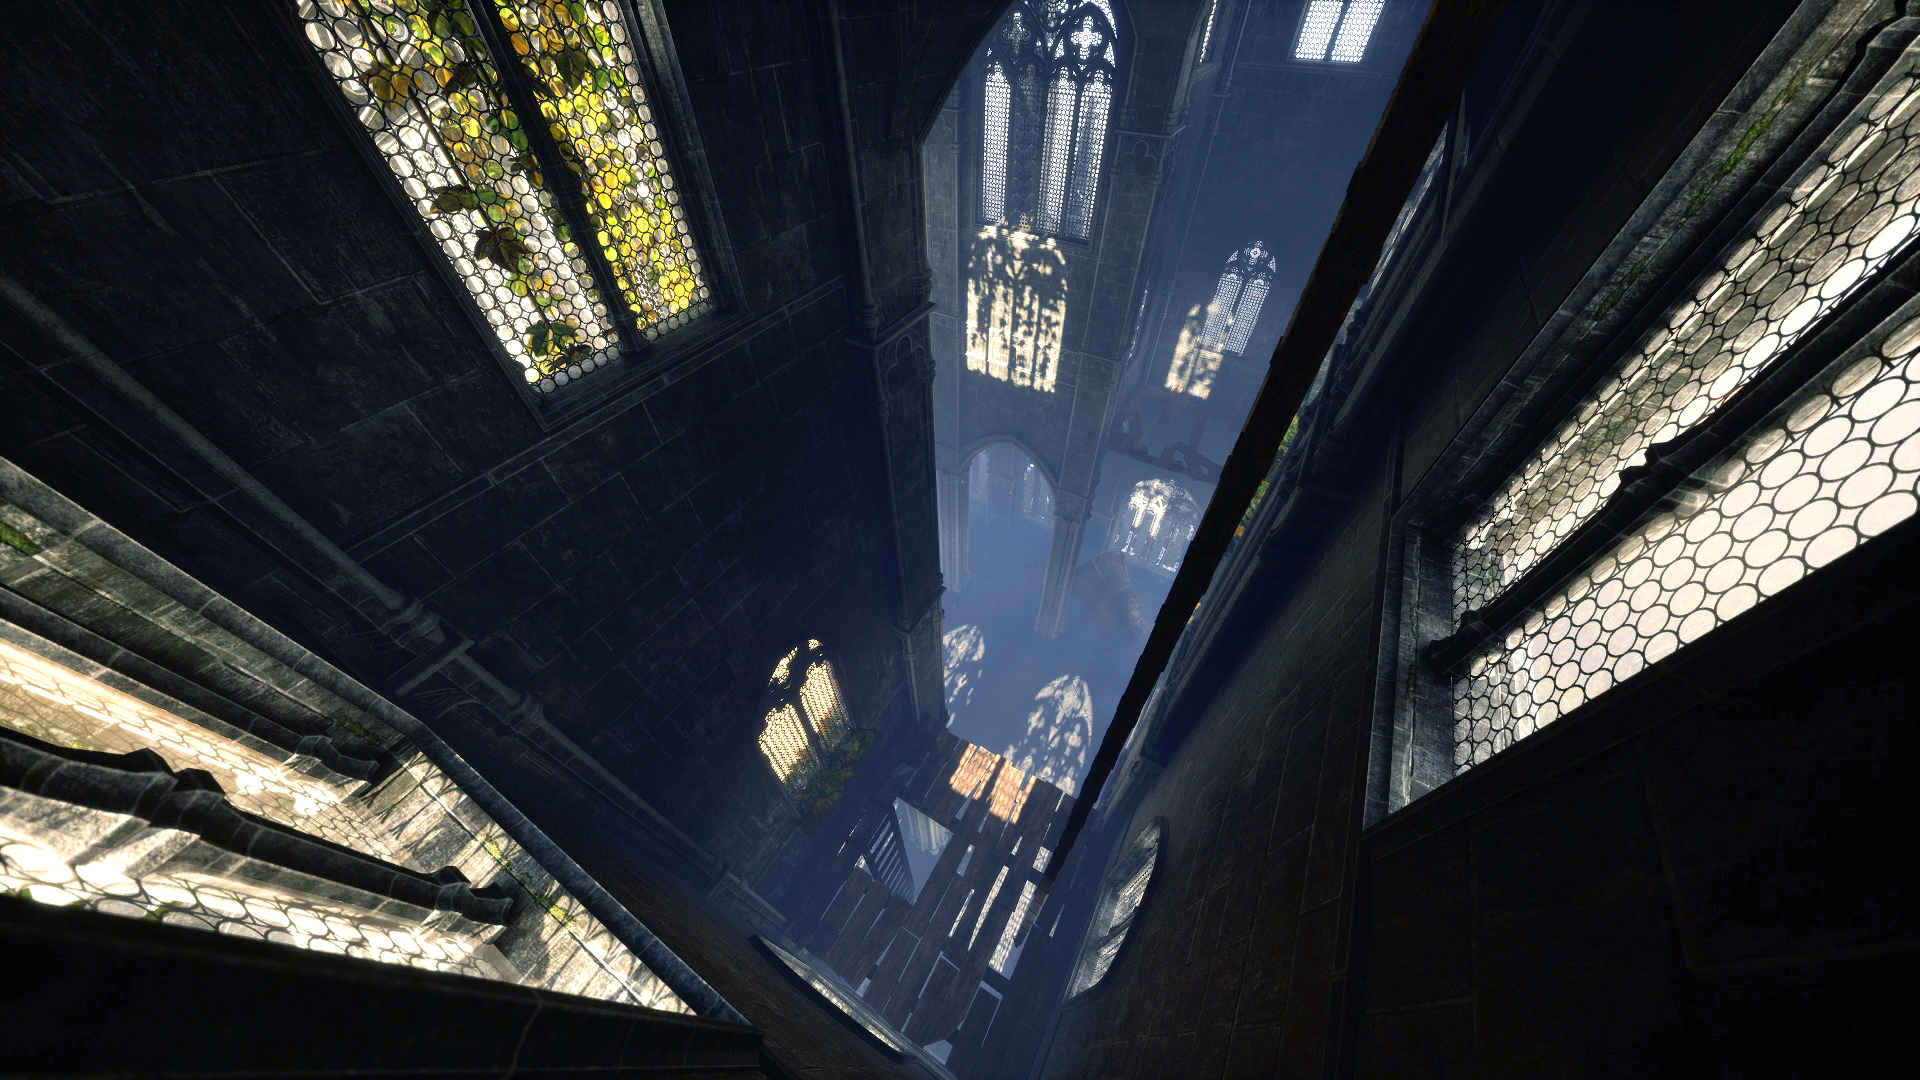
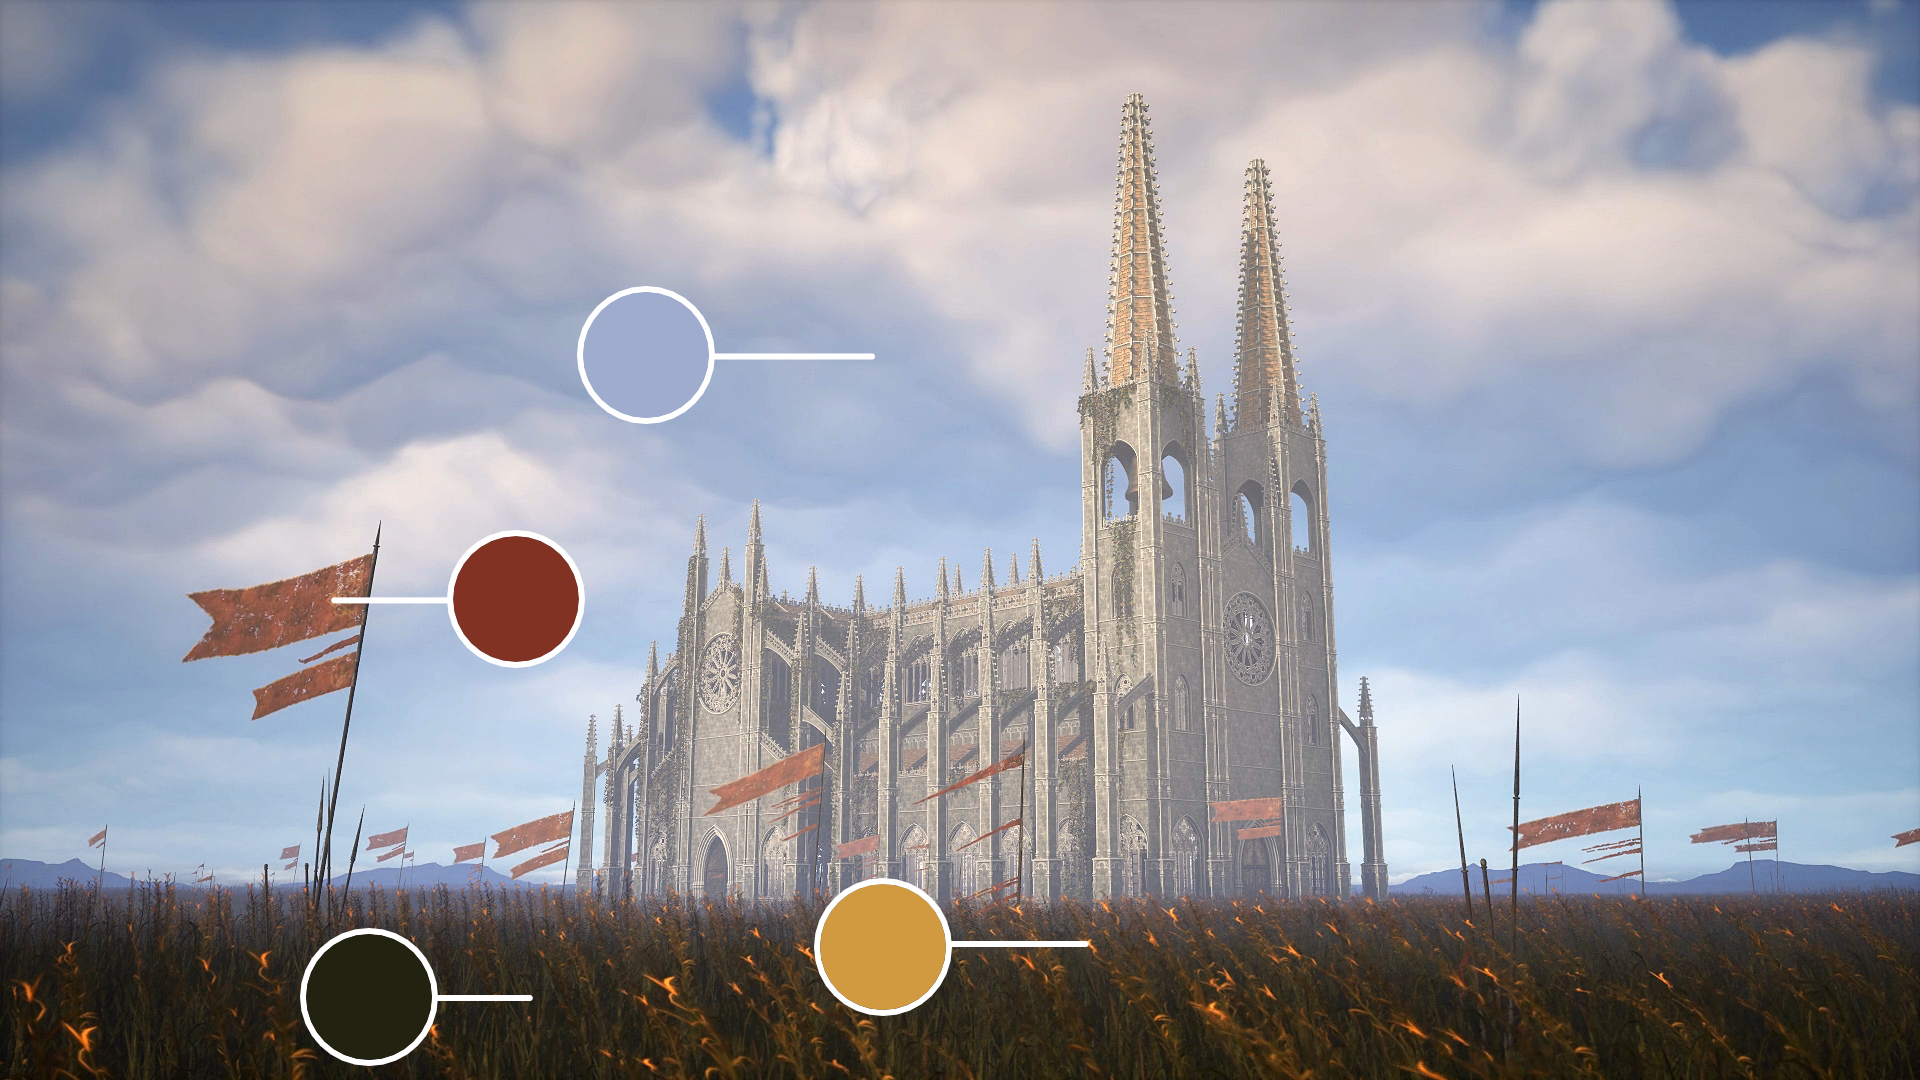
For the composition of the scene I wanted to follow the composition of the original concept art: the cathedral is the focus point with it emerging and dominating the scene.
There is a pretty strict color palette for the majority of the scene: gold, blue, green and red.
These are complementary color pairs: the gold tips of the grass and roof tiles complement the blue sky, and the green grass and ivy complement the red flags.
There is also a rough analogous color harmony, from green to red.
Going into the project I knew I wanted to make a video at the end to really sell the athmosphere. For this I used the built in video sequencer and cinematic renderer tools of Unreal, then put together all the shots and sound effects in Kdenlive.
Anti aliasing is temporal supersample for the shots, but basic temporal works just fine for a more realistic video game approach.
General color correction was done inside Unreal as a first pass, then every shot was additionally color corrected in Kdenlive for the final video.
For this part, quite a bit of Elden Ring lore is required, so I will do a quick rundown of all the important stuff.
Recap:The story of the game mainly revolves around Queen Marika. She was born as a Shaman, a race that lives in small rural villages. Their flesh happened to be perfect for molding, so they were slaughtered by the Hornsent.
The Hornsent are a race who have horns all over their bodies, resembling their primal nature. They wanted to reach godhood, so they tried all kinds of things, one of them was molding the shamans together to create a diety, the other one was the Gate of Divinity.
Marika survived the slaughter of her people, and made becoming a god her goal. She manipulated the hornsent, rose to the top of the hierarchical ladder, betrayed the hornsent and used the Gate of Divinity to ascent to godhood, and become a vessel for the Elden Ring.
Marika started a war against the hornsent, to avange the shamans. The leader of this war was one of her sons, Messmer, who (literally) burnt away the age of the hornsent.
Marika, now queen, wished to bring order to the world, so she planted the Erdtree. She removed the Rune of Death from the Elden Ring, and created the Golden Order.
Marika counquered the whole world, and the Golden Order stood still, until the Rune of Death was stolen, and one of her sons was murdered. Marika, facing the mortality of her family once again, sobered from her idea of the Golden Order, and attempted to destroy the Elden Ring. This caused the Shattering, a great war that basically destroyed the world. The game picks up here.
Marika's story is about trauma, and her response to it.
She was born into a chaotic world, so she wished to create order.
This idea is mainly represented by the hornsent (pagans) against her religious order.
She watched her family die, so she whished to create immortality.
She became a god, and (literally) removed death from the world.
But in the end, the perfect world she imagined could not be created. Her regime was built upon
countless wars and oppression, contradicting her origin of the peaceful Shamans. Her obsession of
creating immortality was surreal, and only backfired to hurt her more.
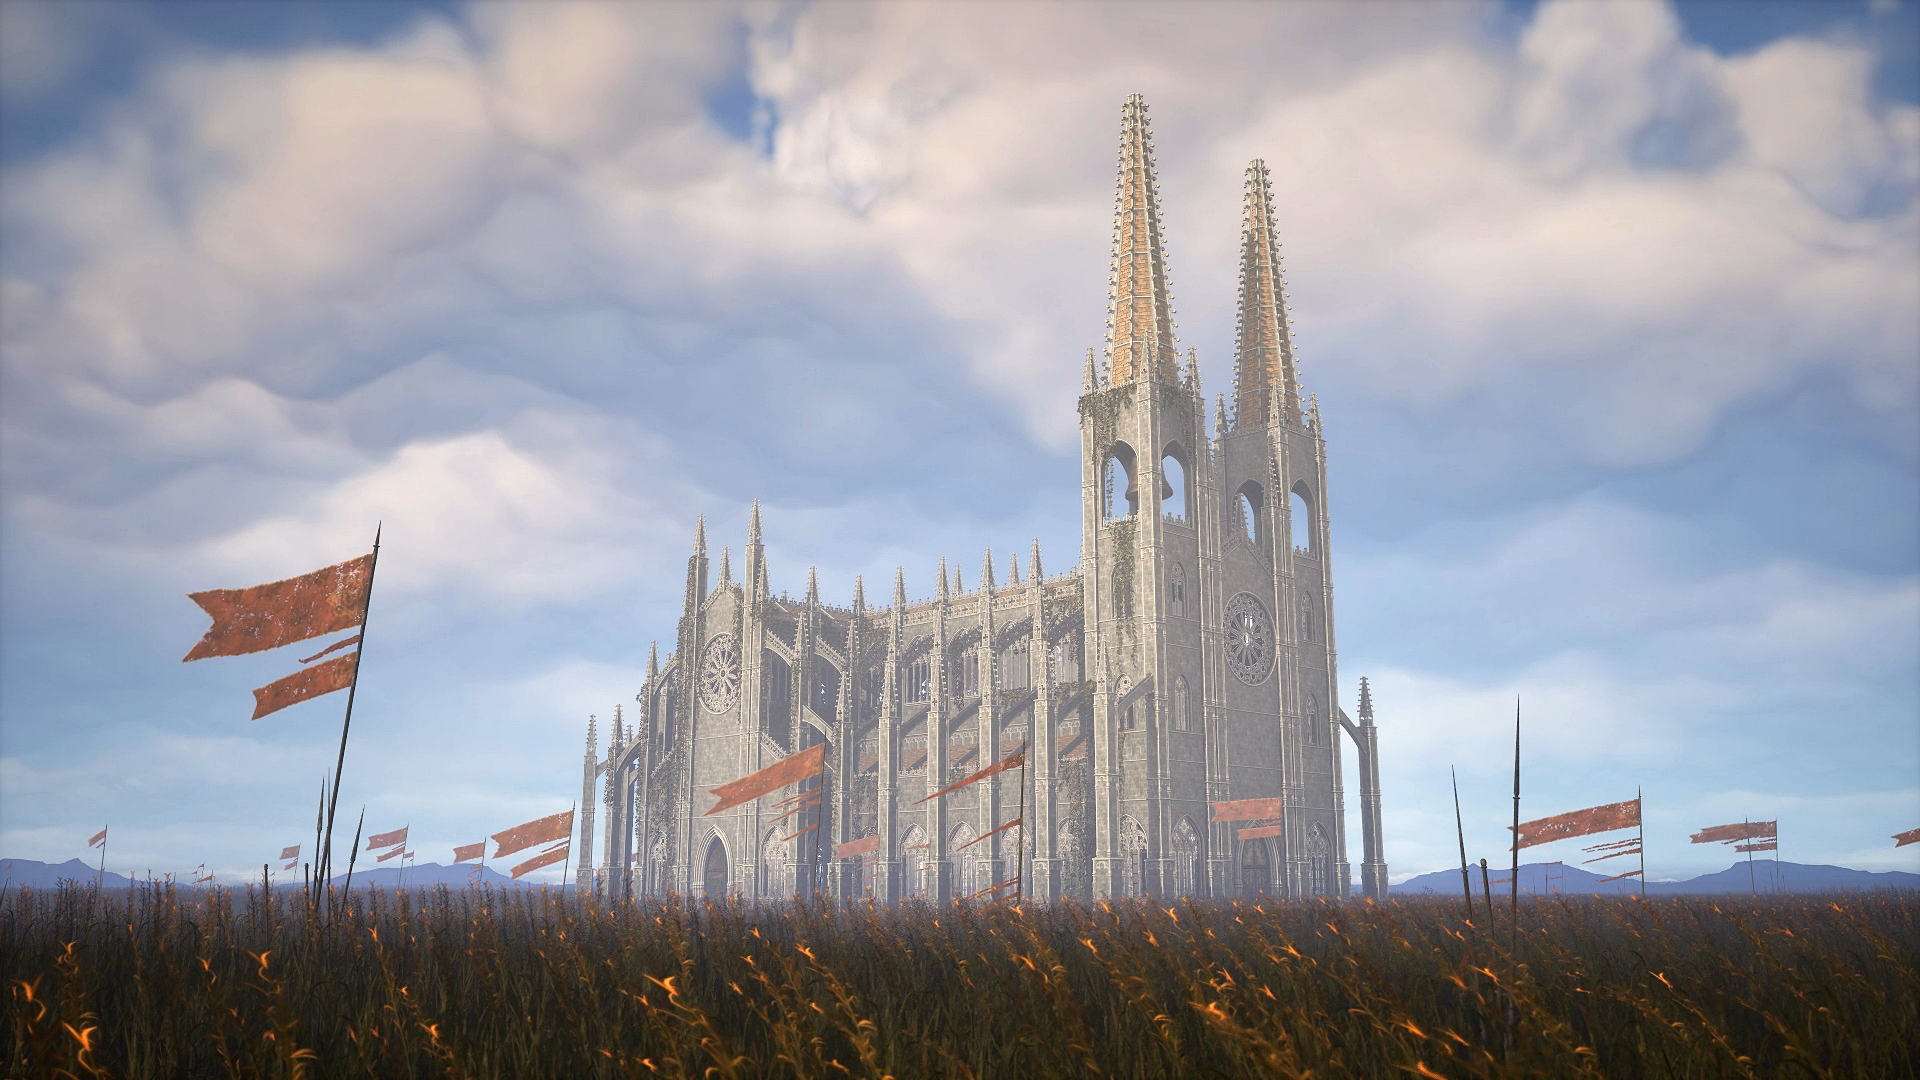
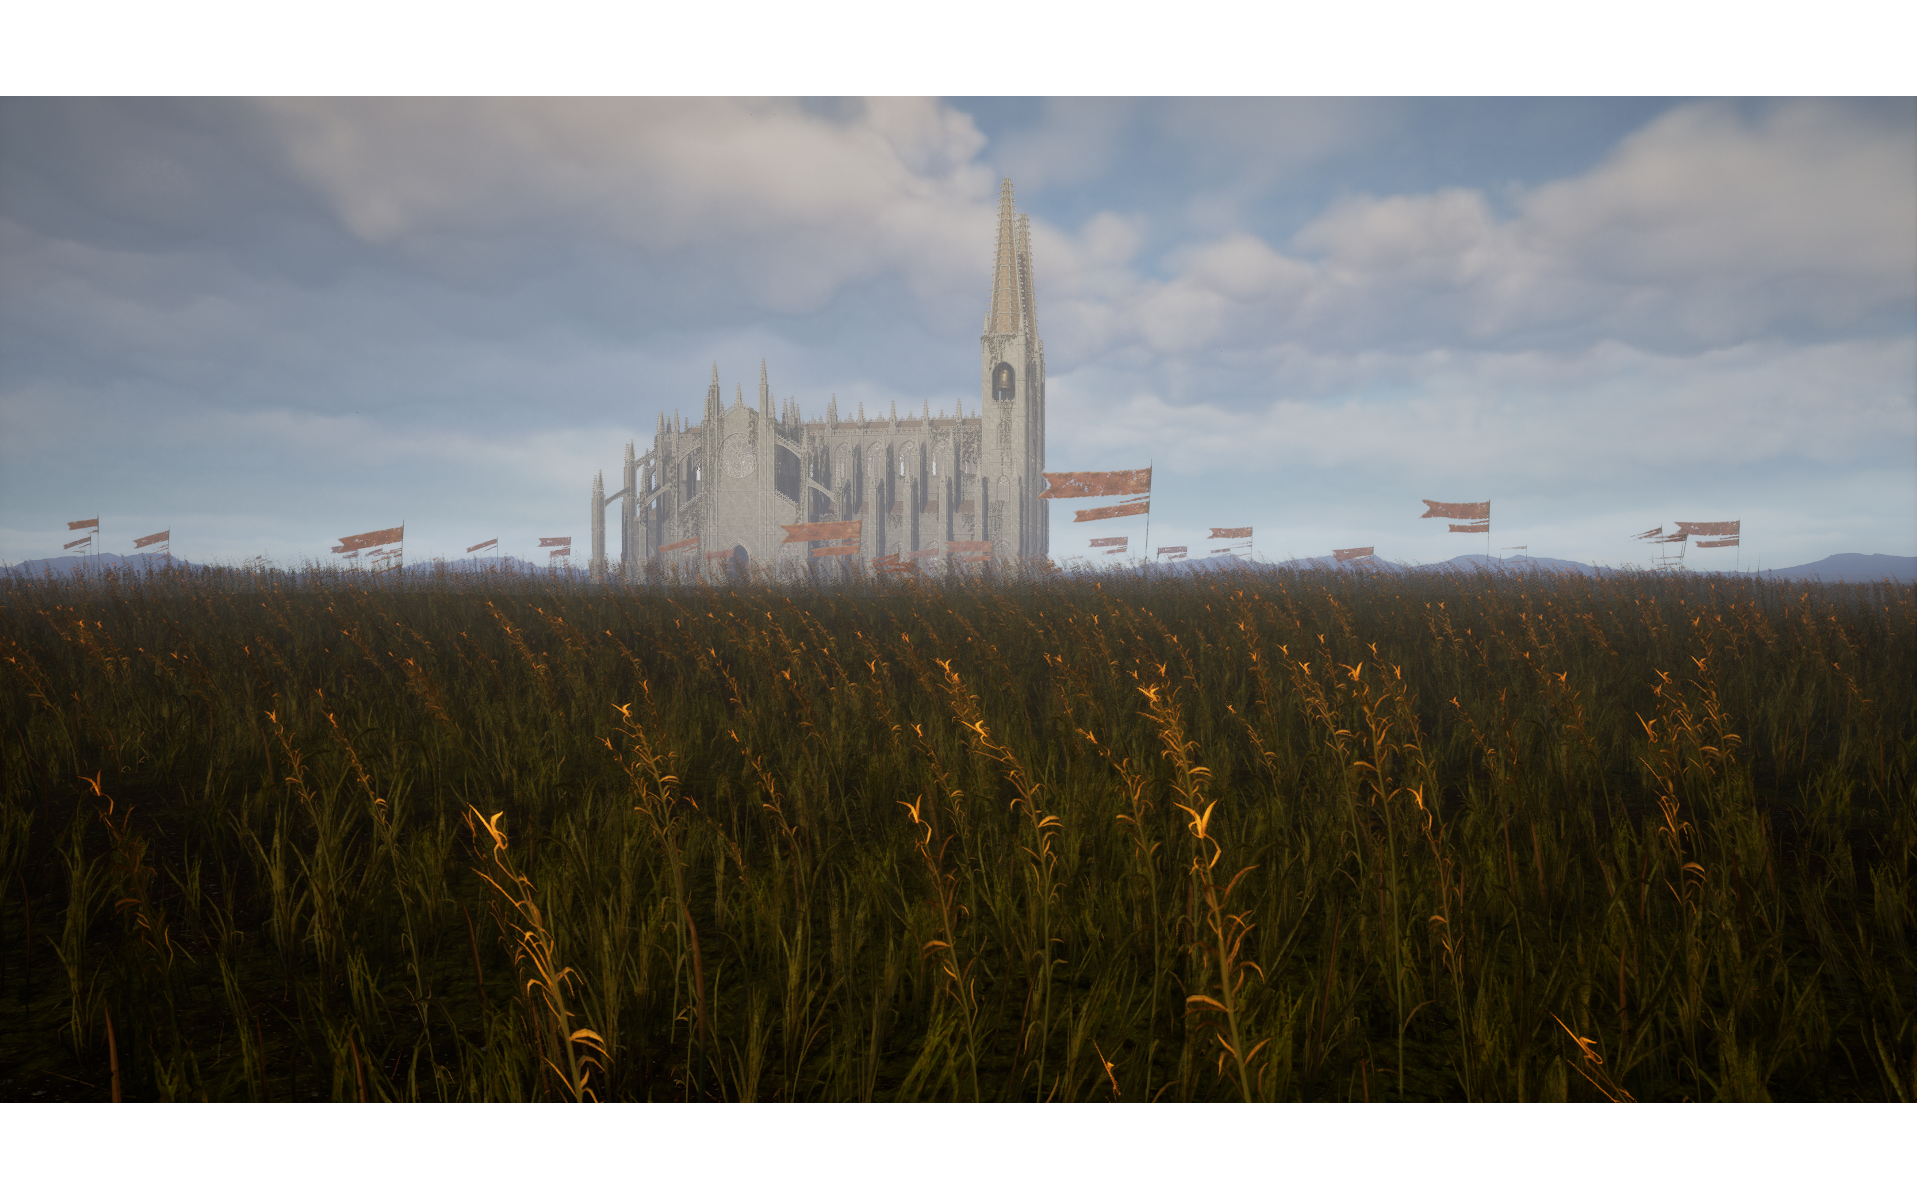
We find ourselves on a golden field littered with spears. On the spears, we see giant red flags: this was a battlefield ages ago where Messmer's army and the Hornsent clashed.
Its golden hour, a time period during sunrise, where the clouds appear yellow. The Golden Order was born, to create order.
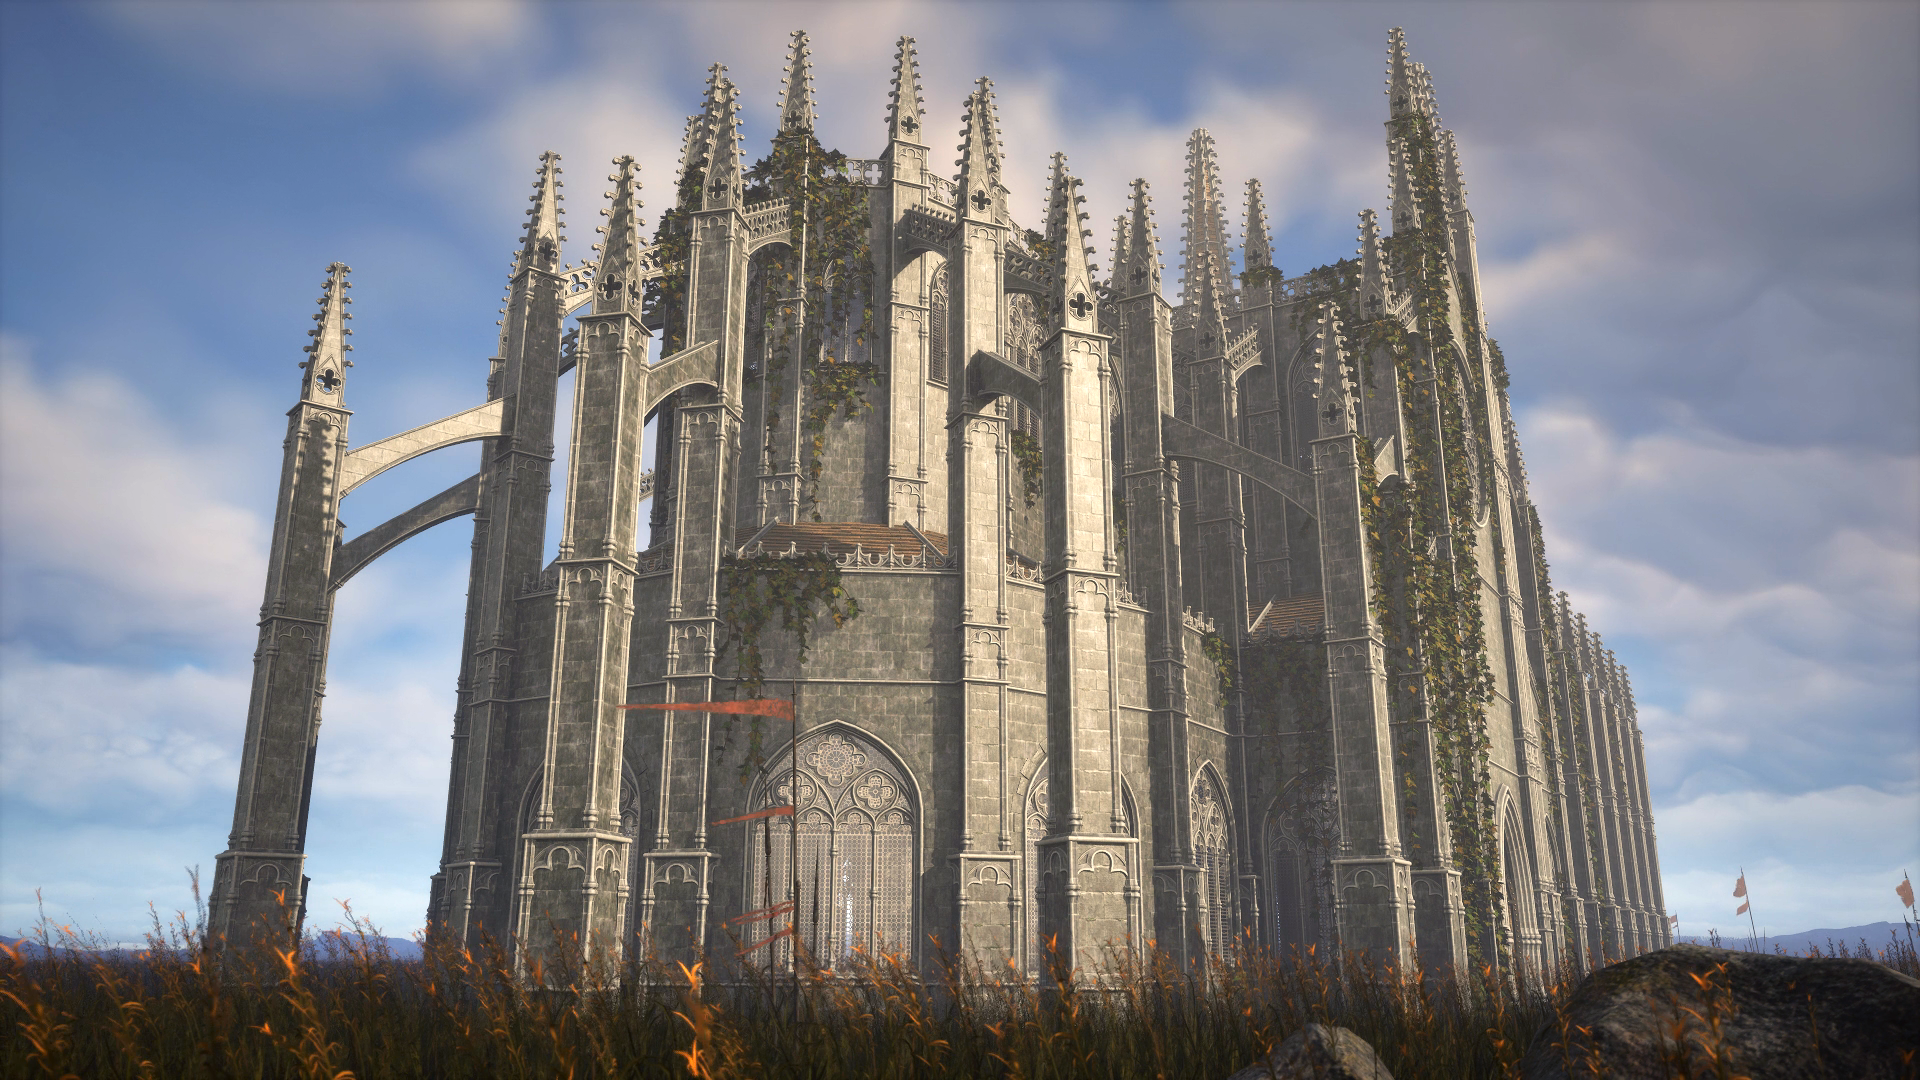
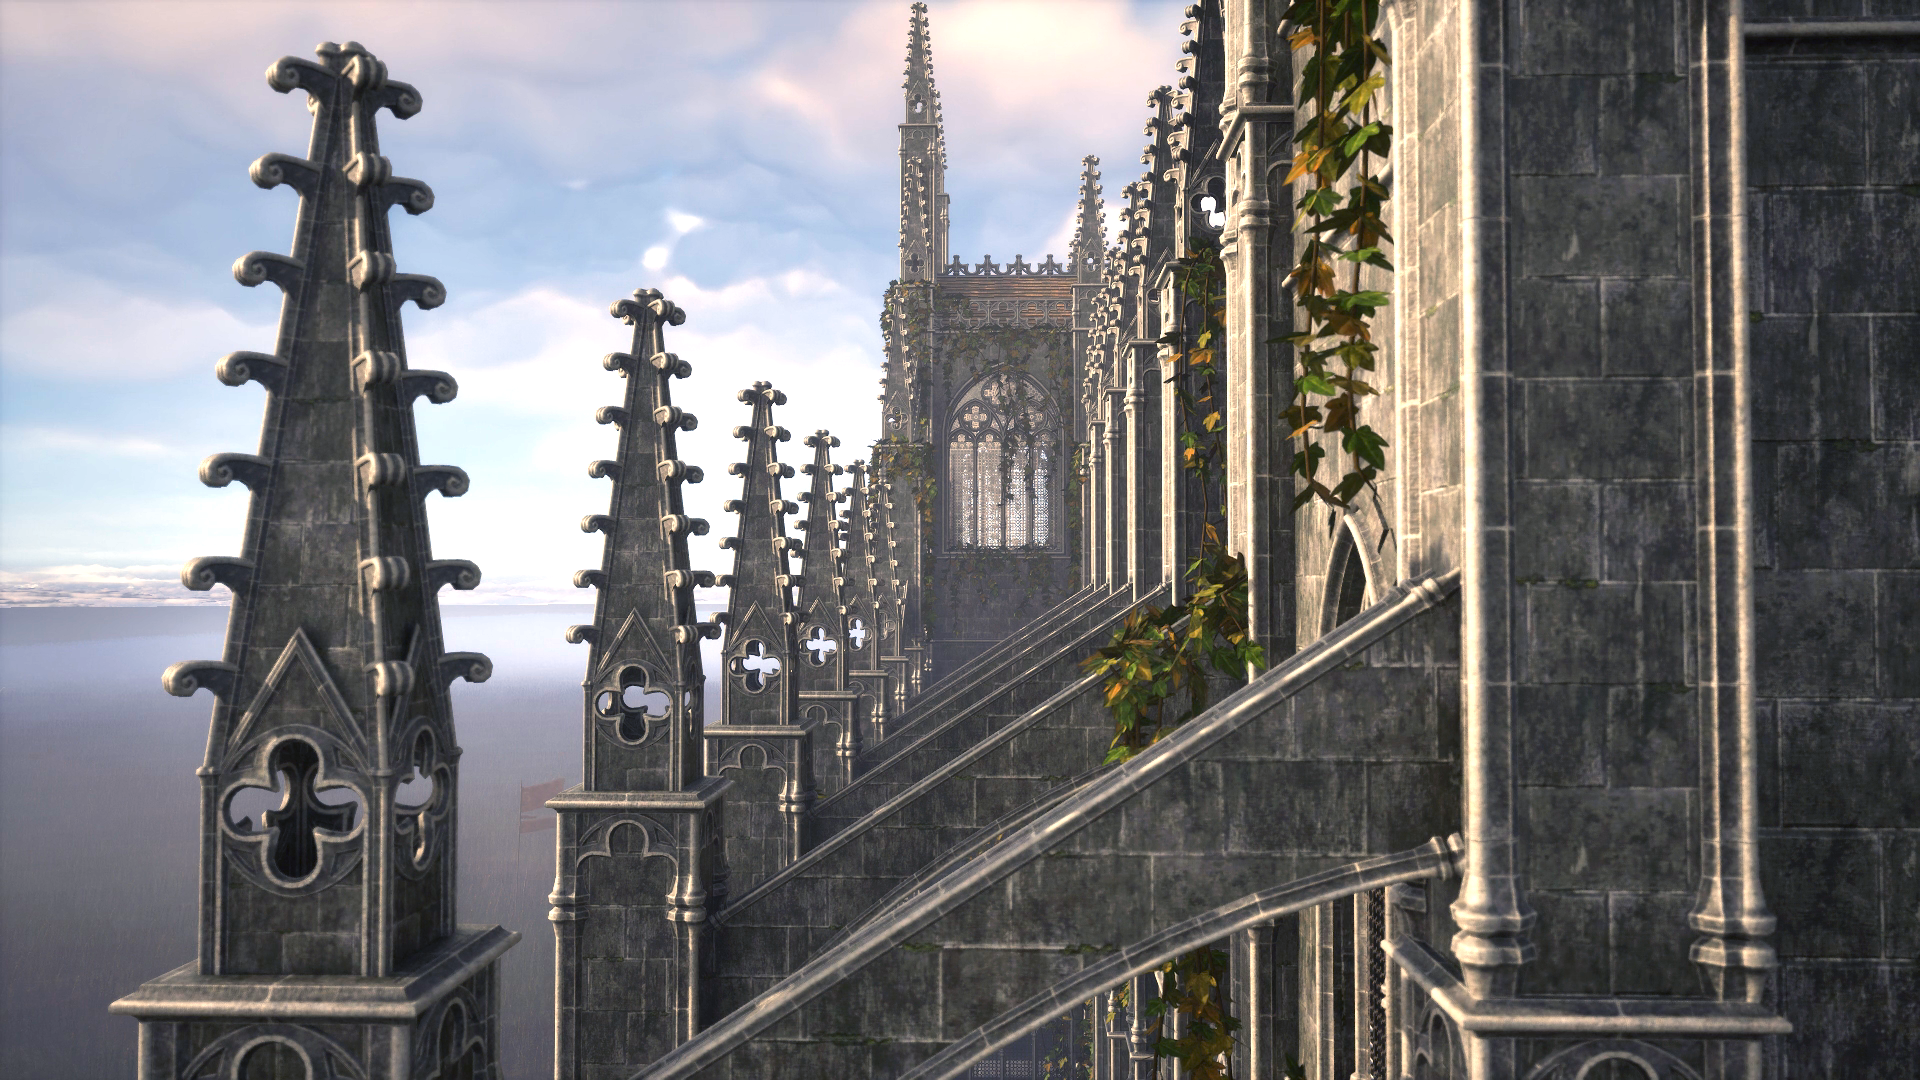
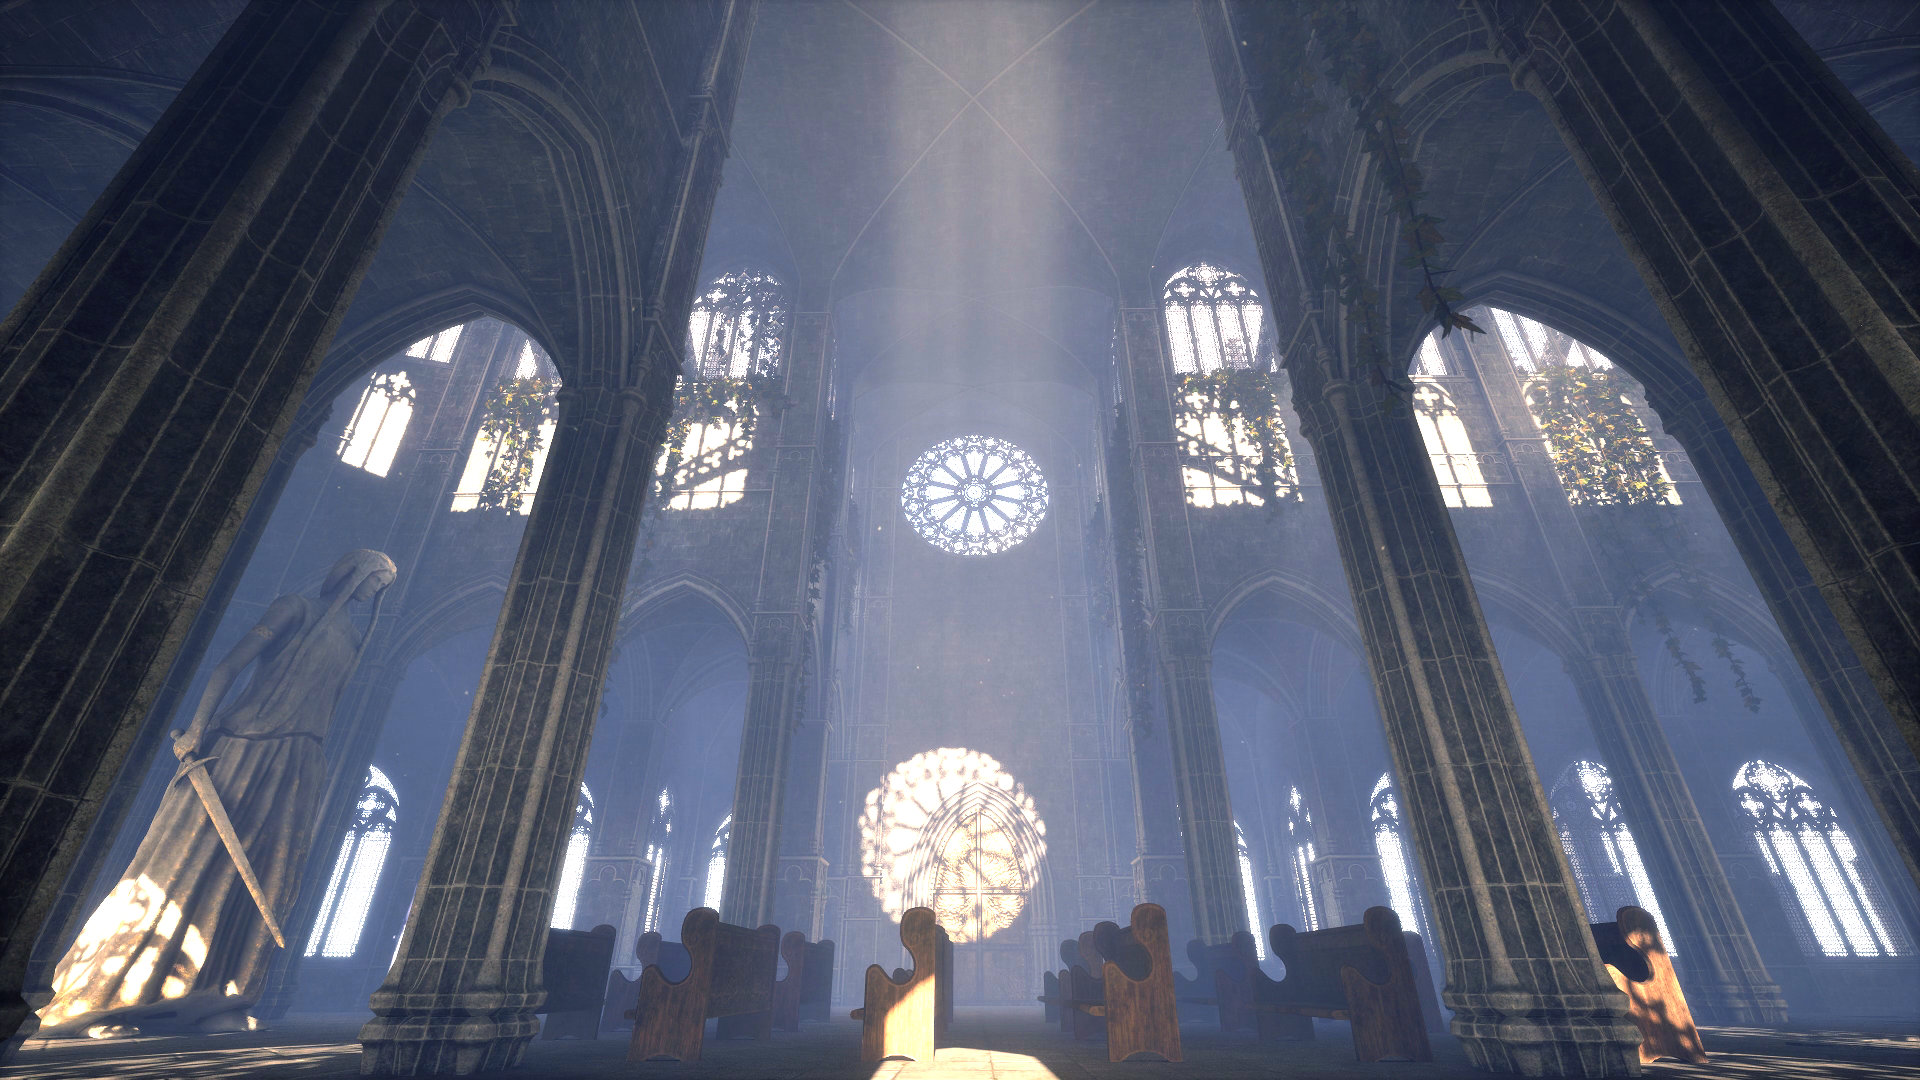
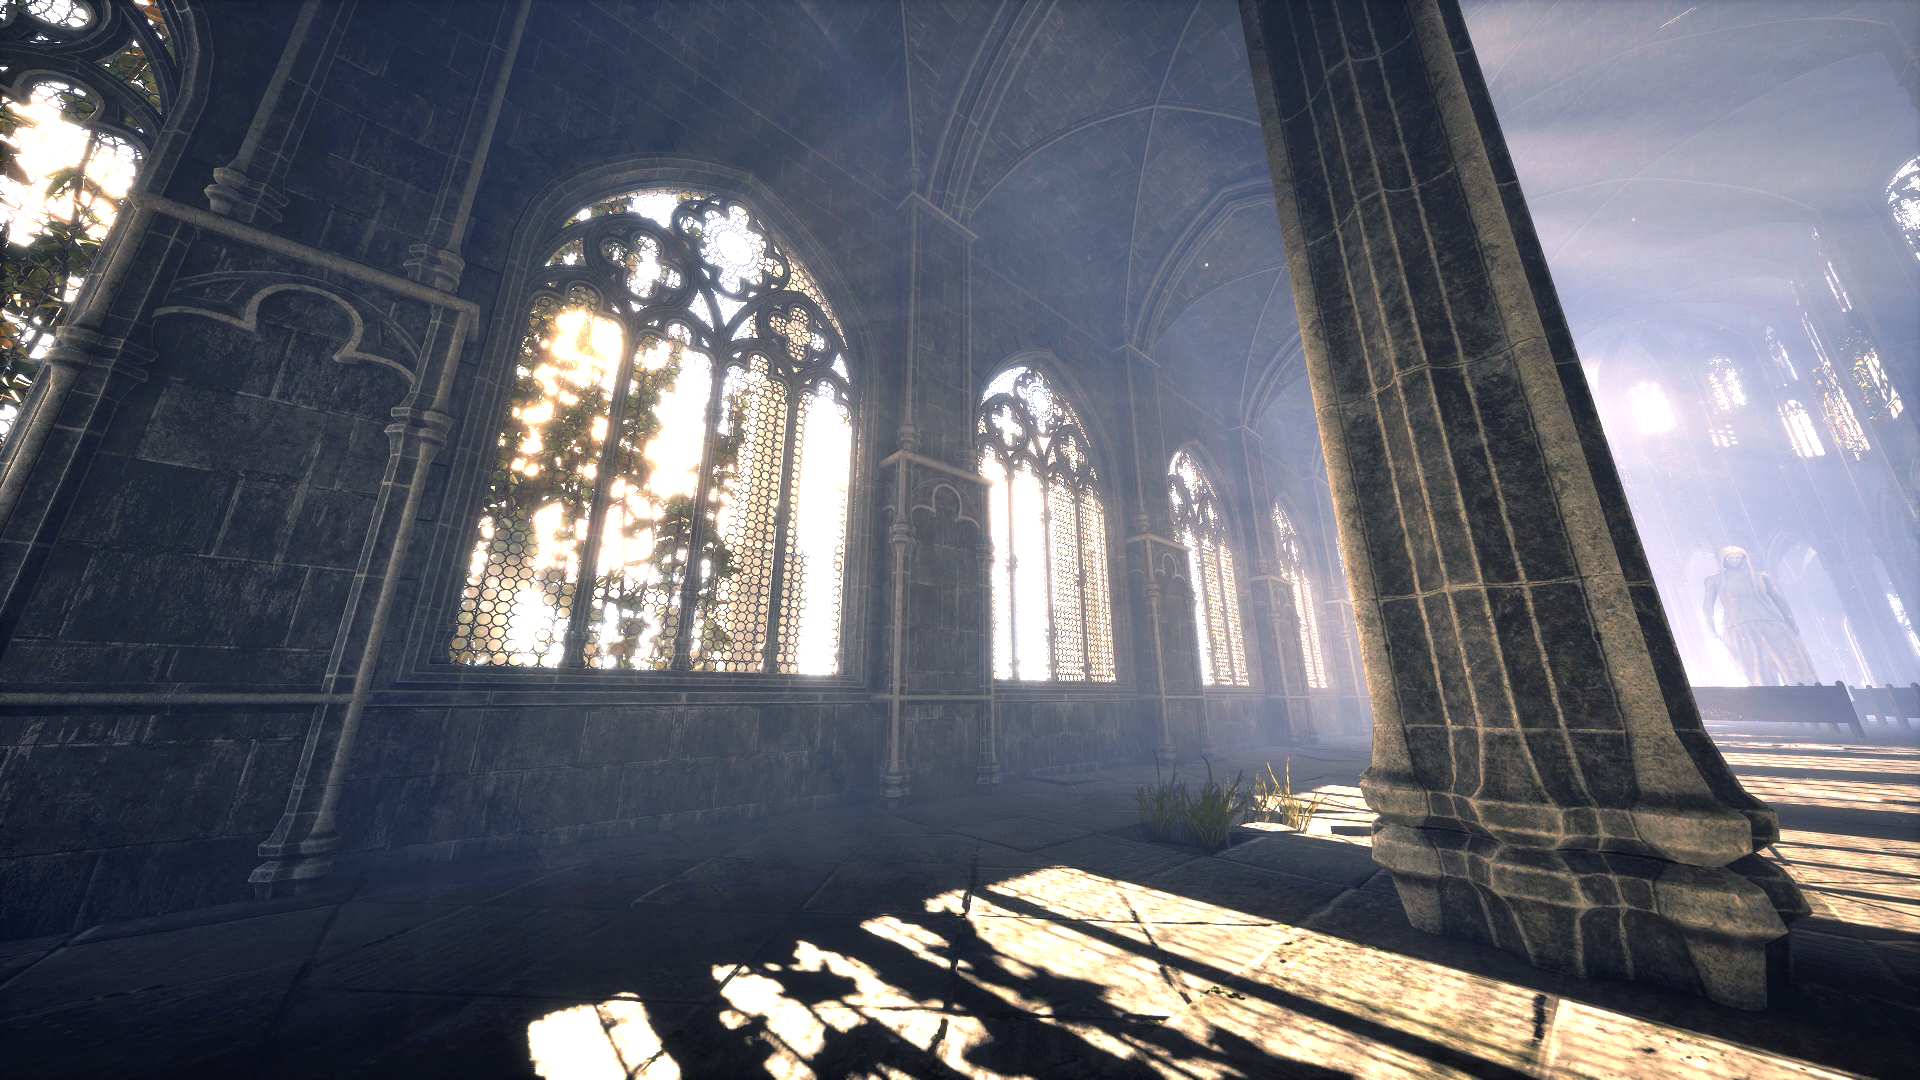
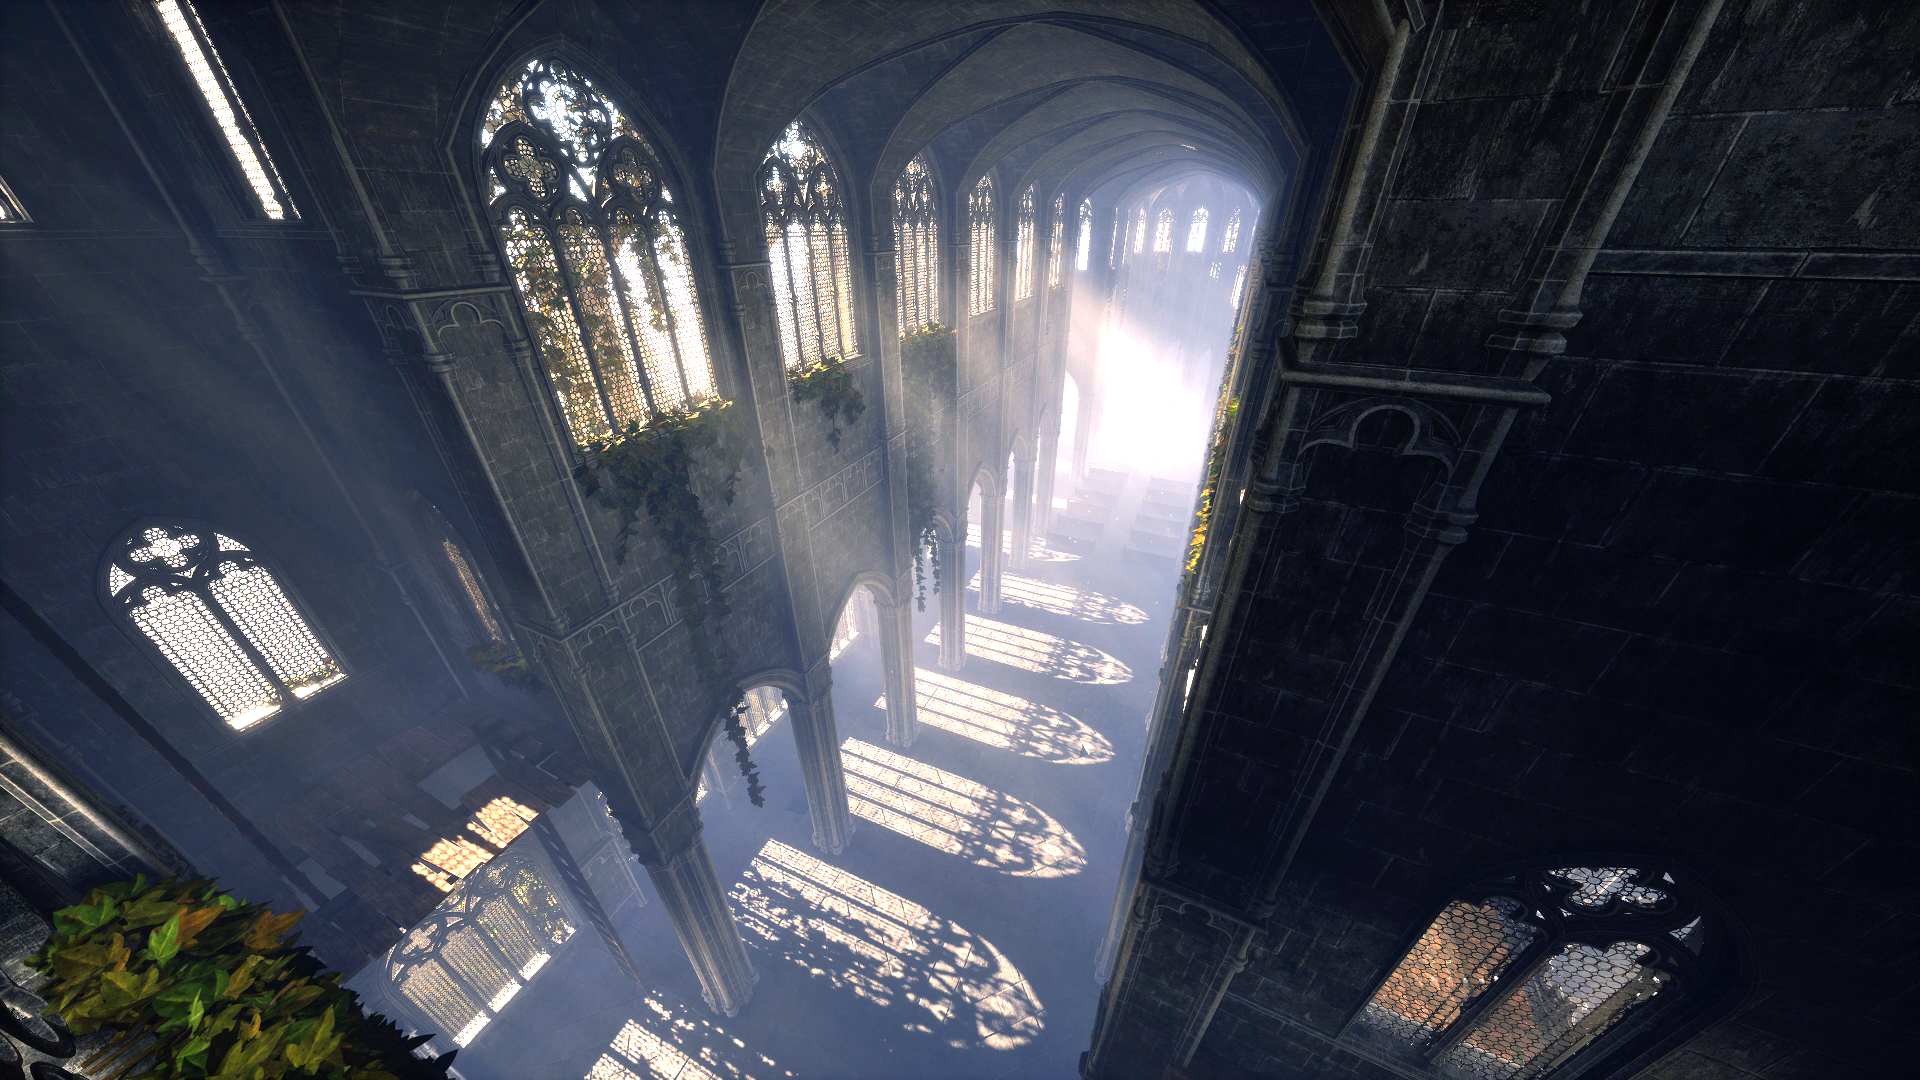
A cathedral is standing on top of the battlefield. Made of stone, designed to last forever.
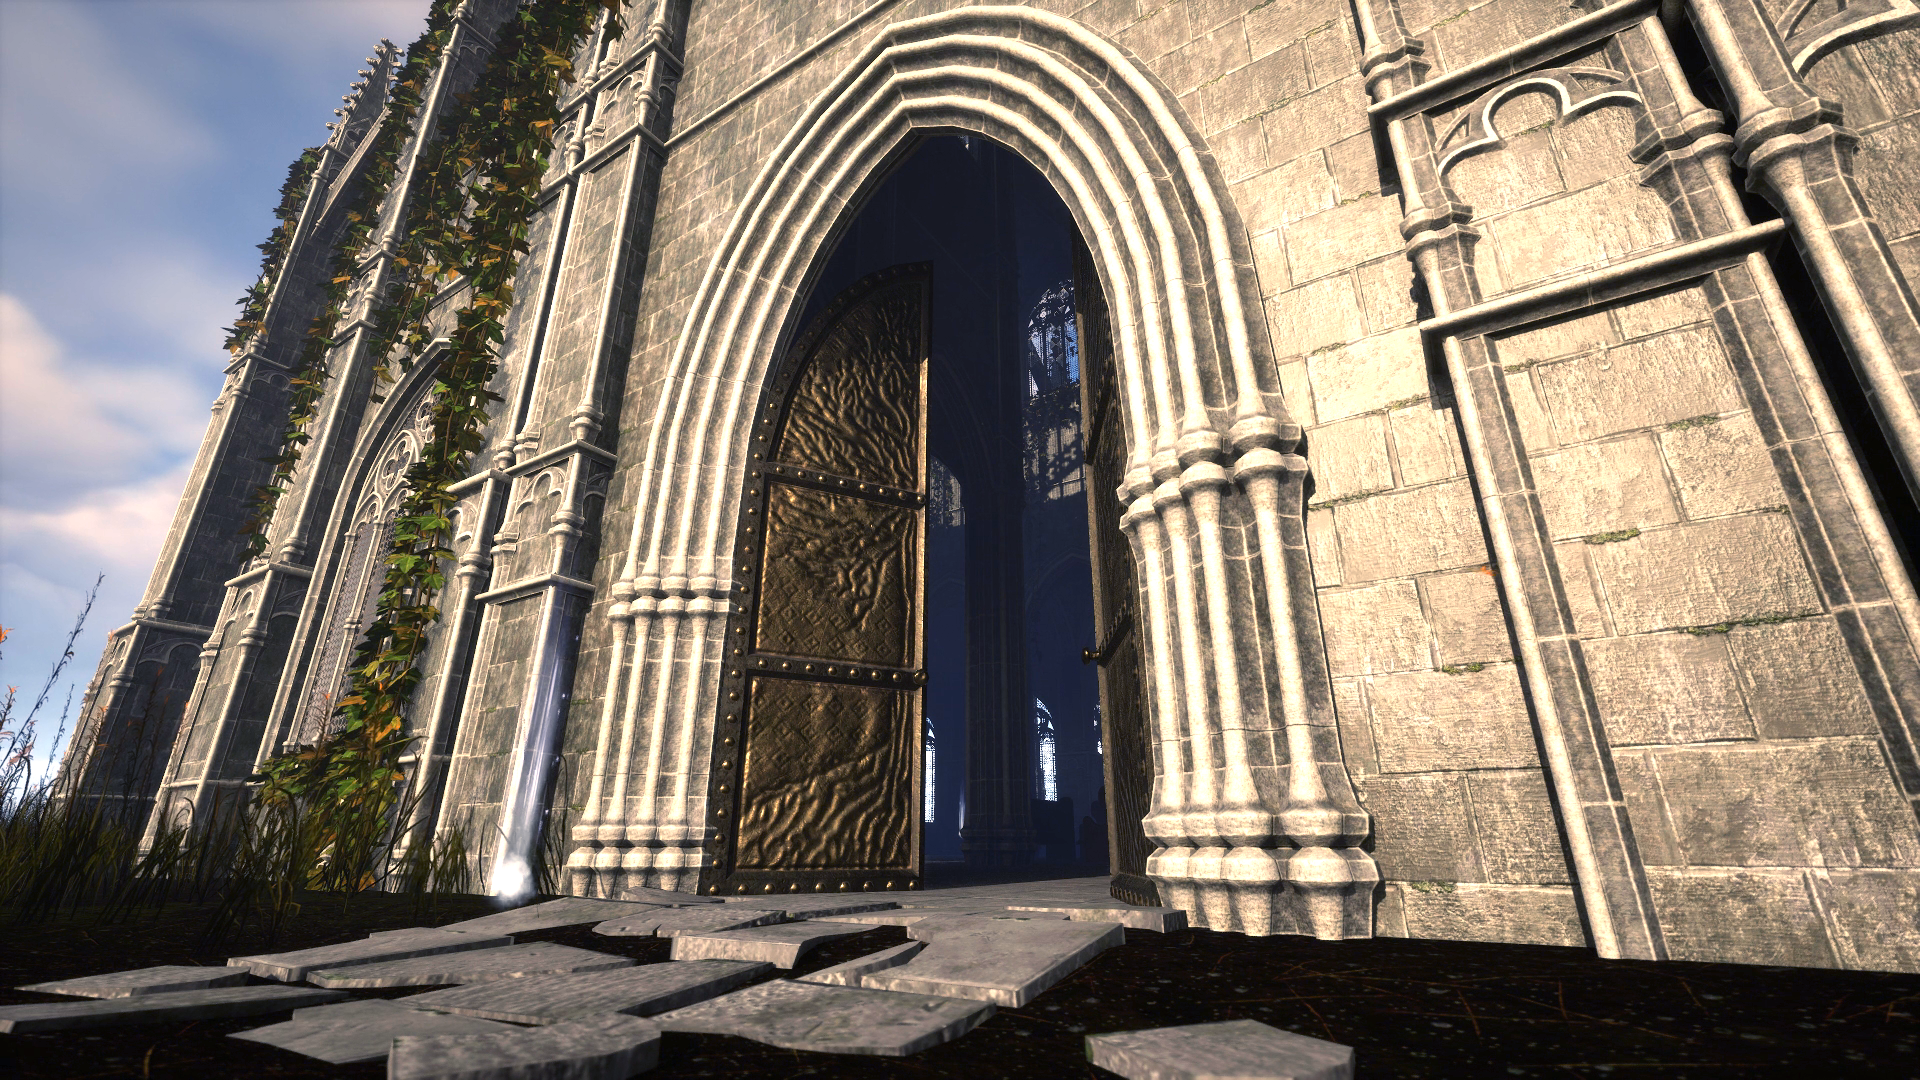
The giant golden doors of the cathedral are decorated with the Erdtree. The Erdtree was the first stepping stone, and the gate to the age of the Elden Ring.
We find a statue of Queen Marika inside, covered in gold blood, holding a sword. She is standing in an environment alien to her, looking at a row of empty desks. Her everlasting order, built with blood, for the people she could not save.
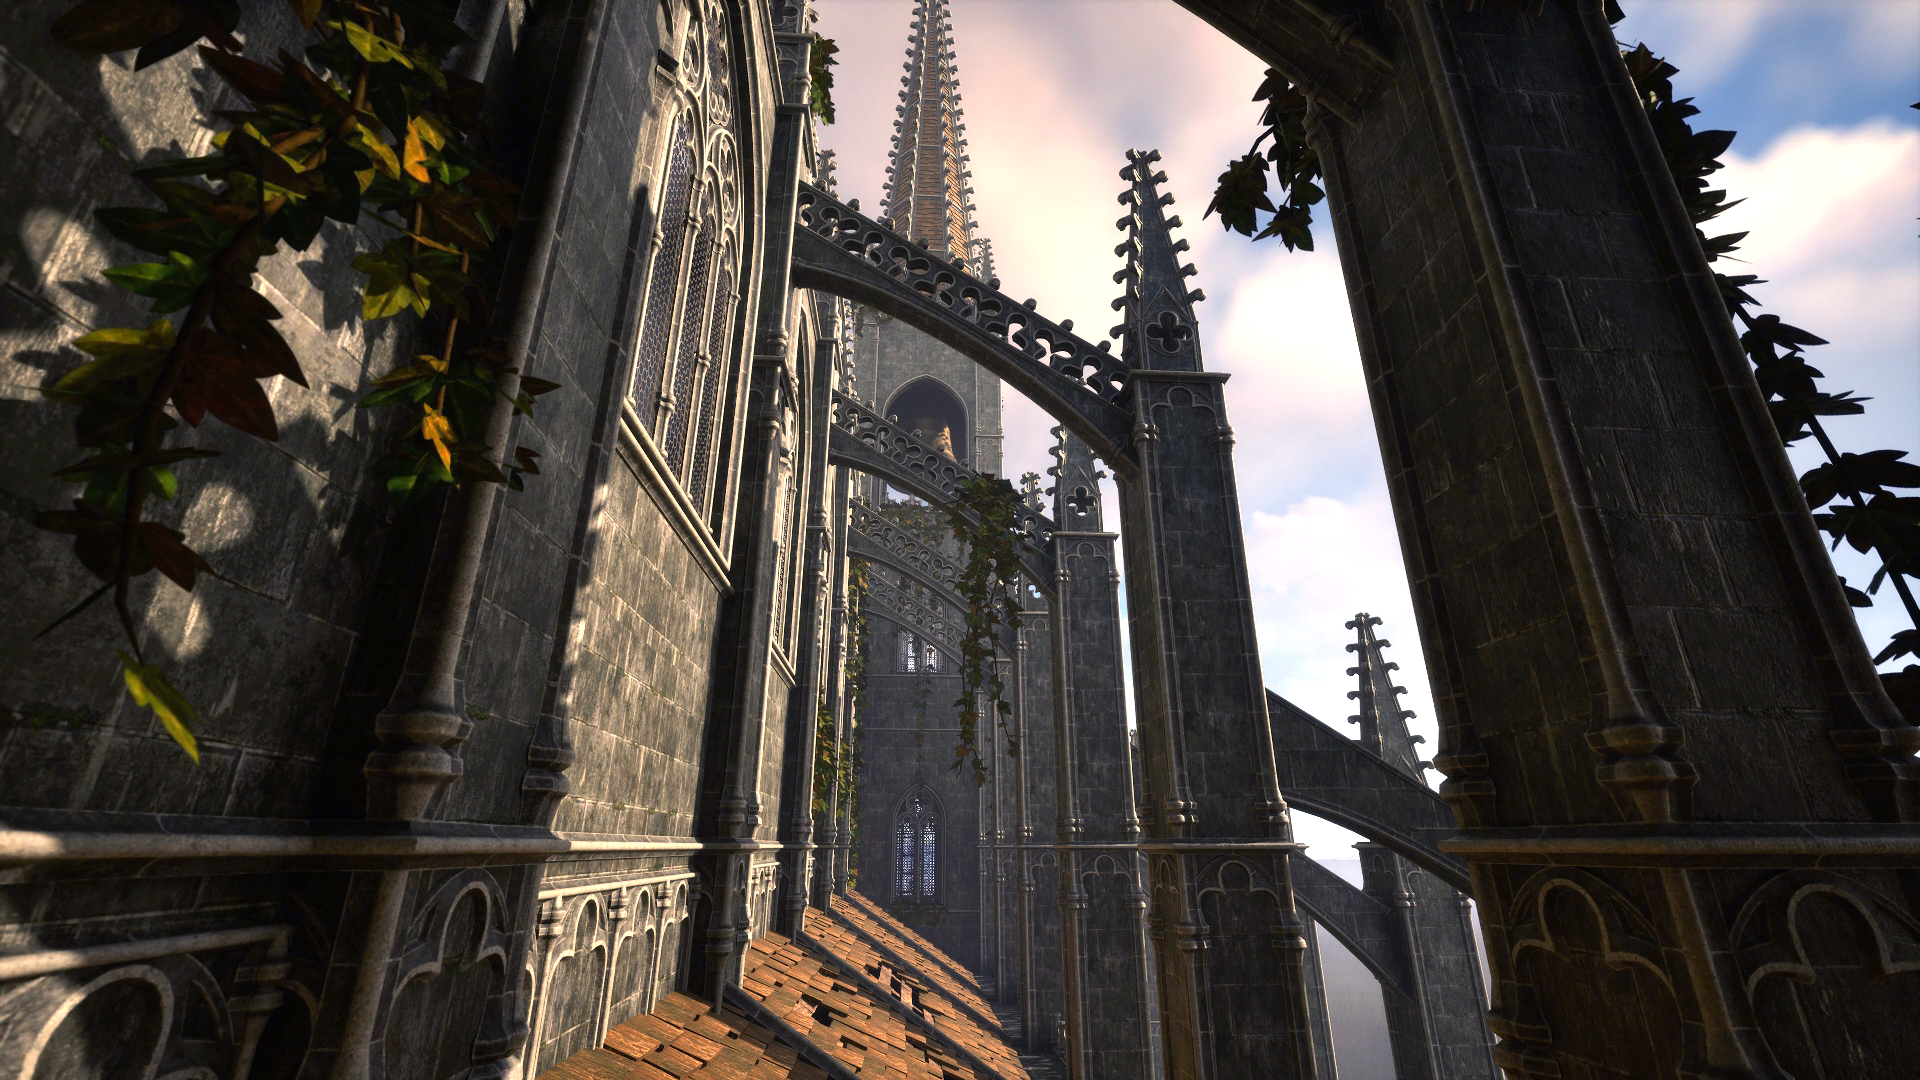
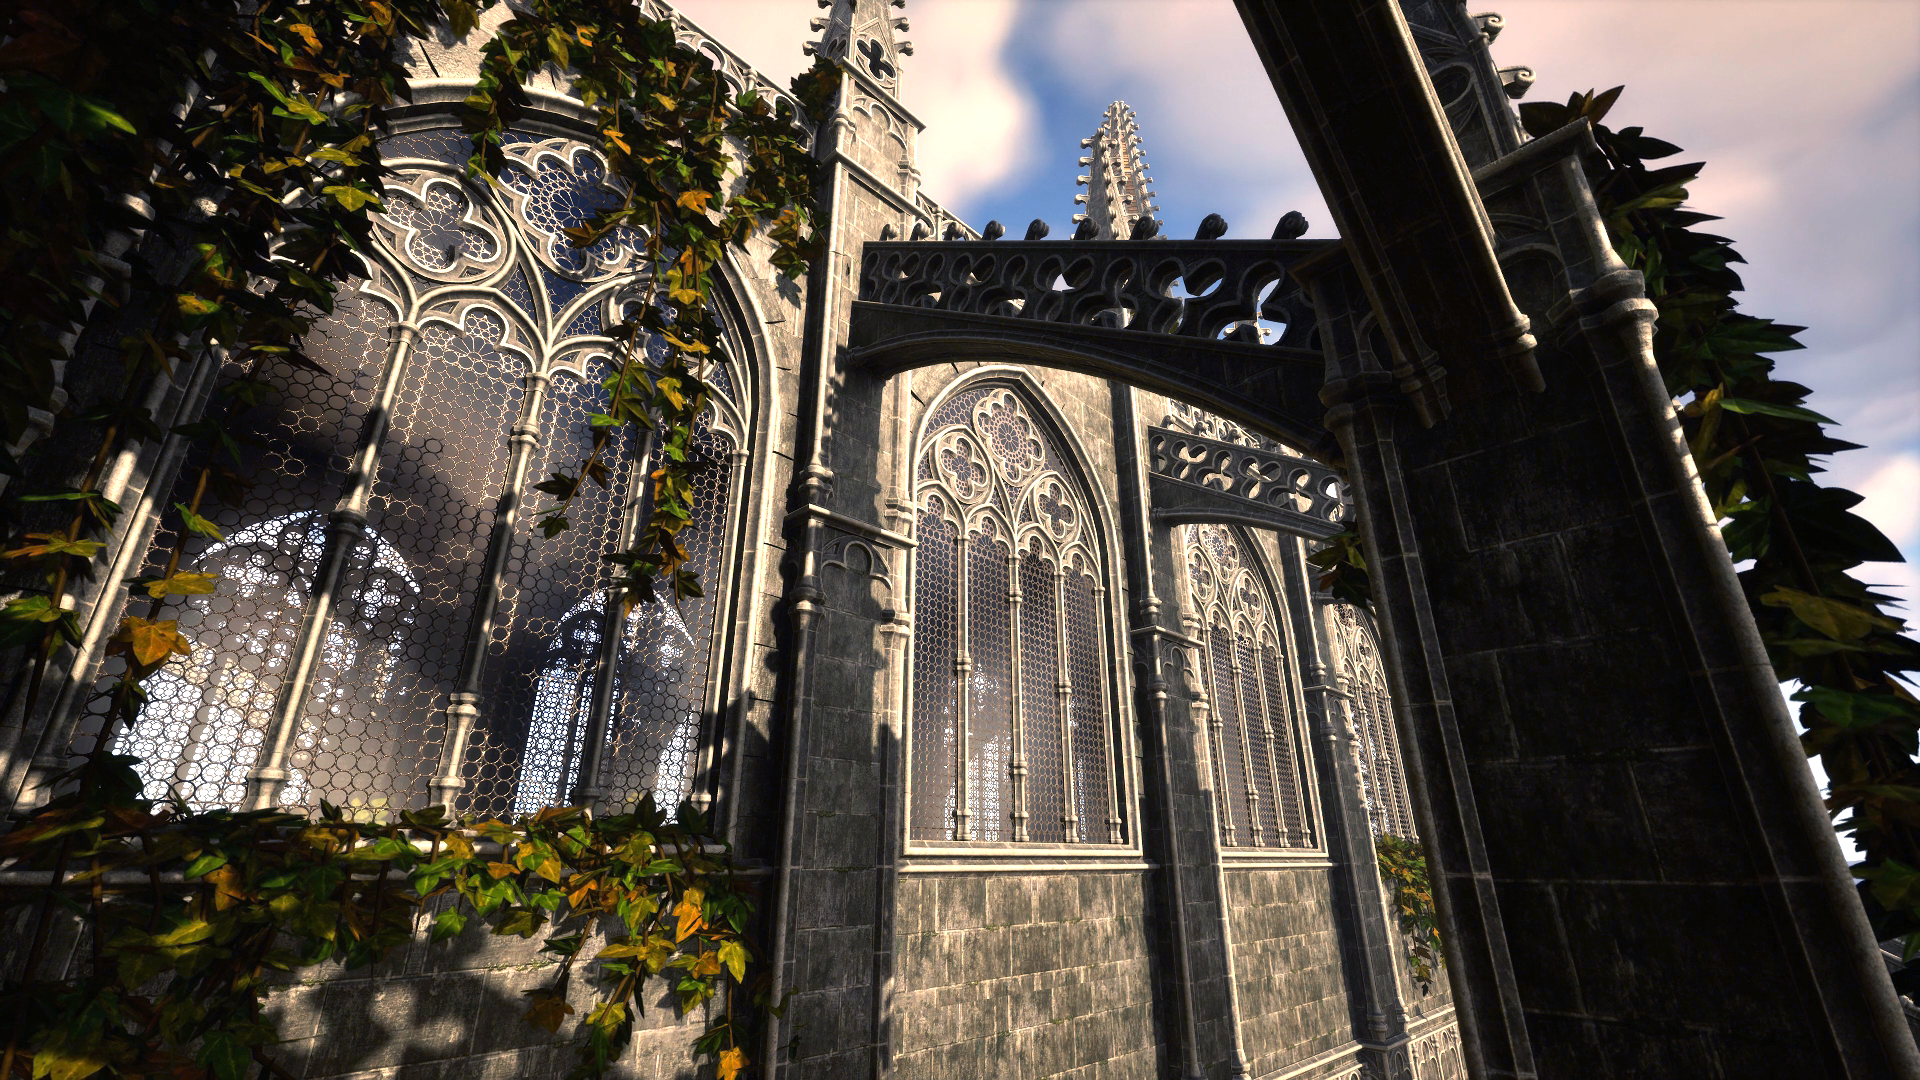
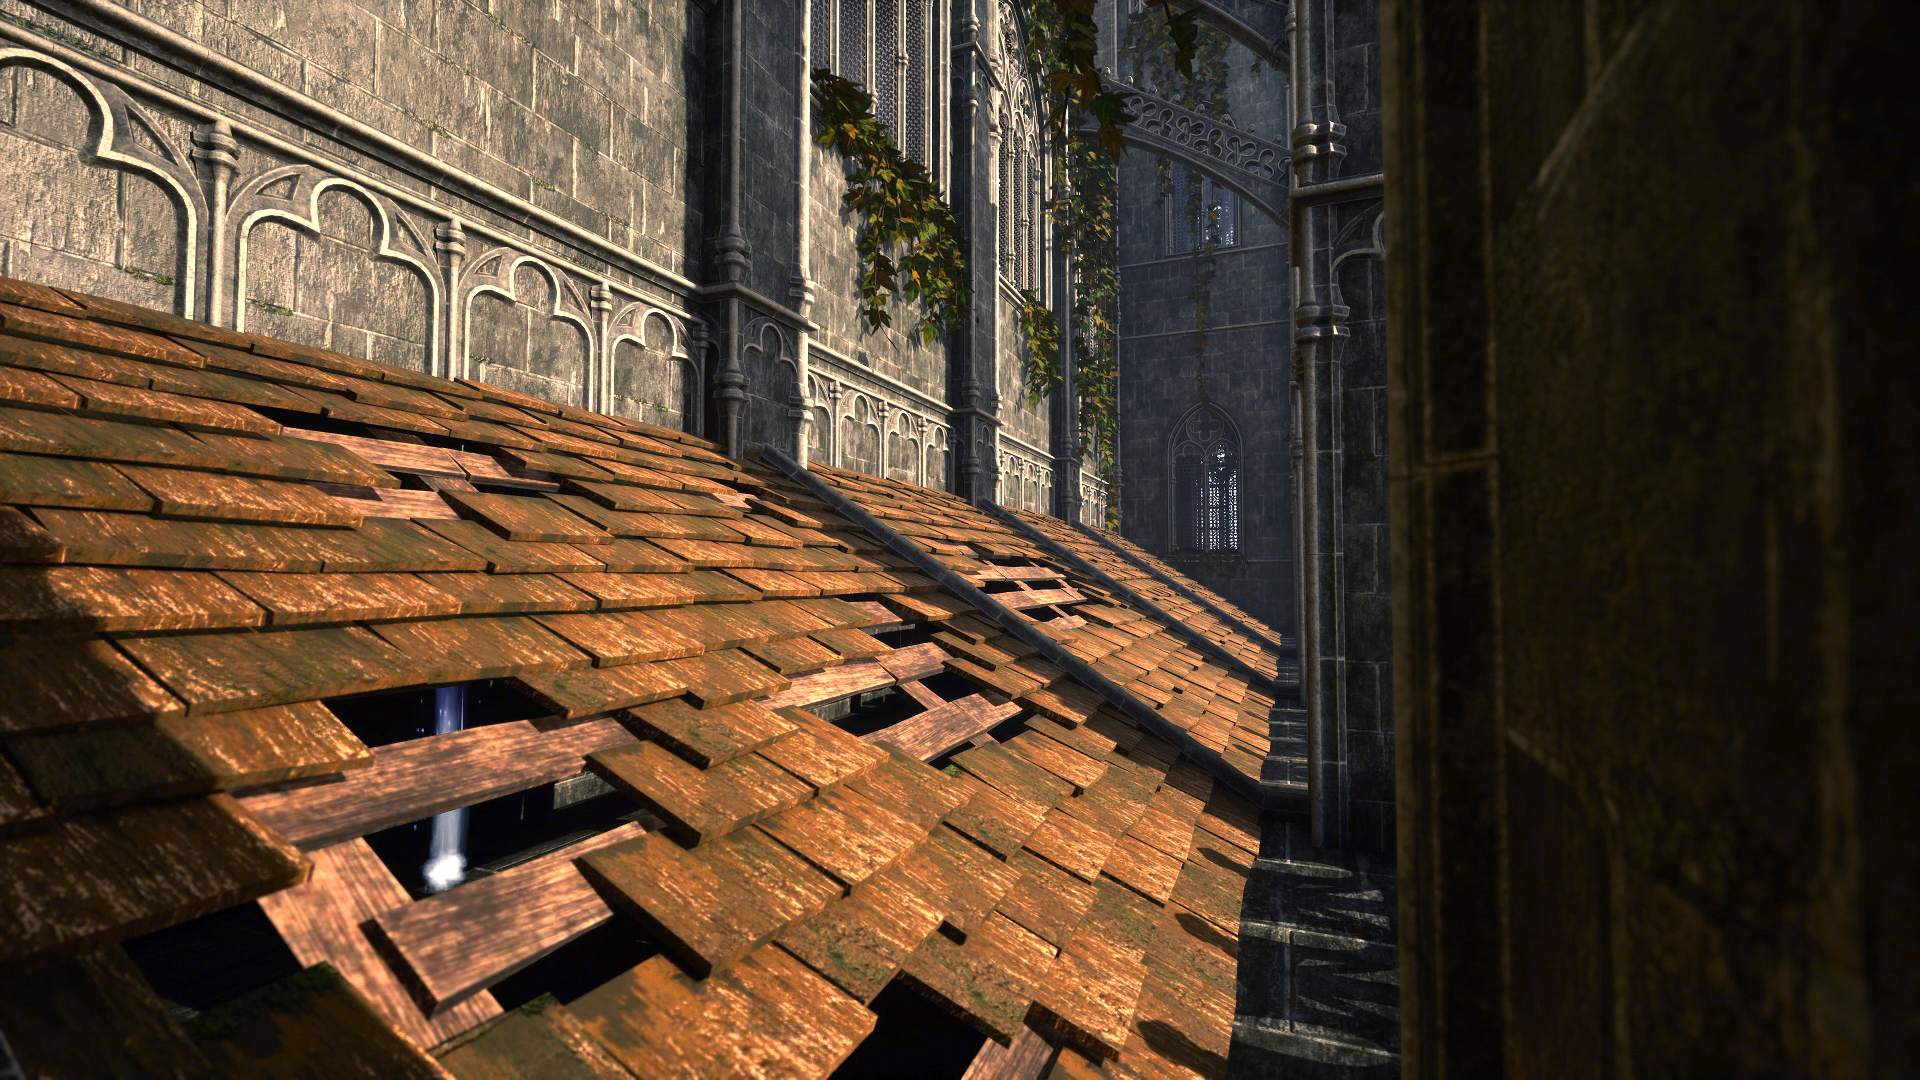
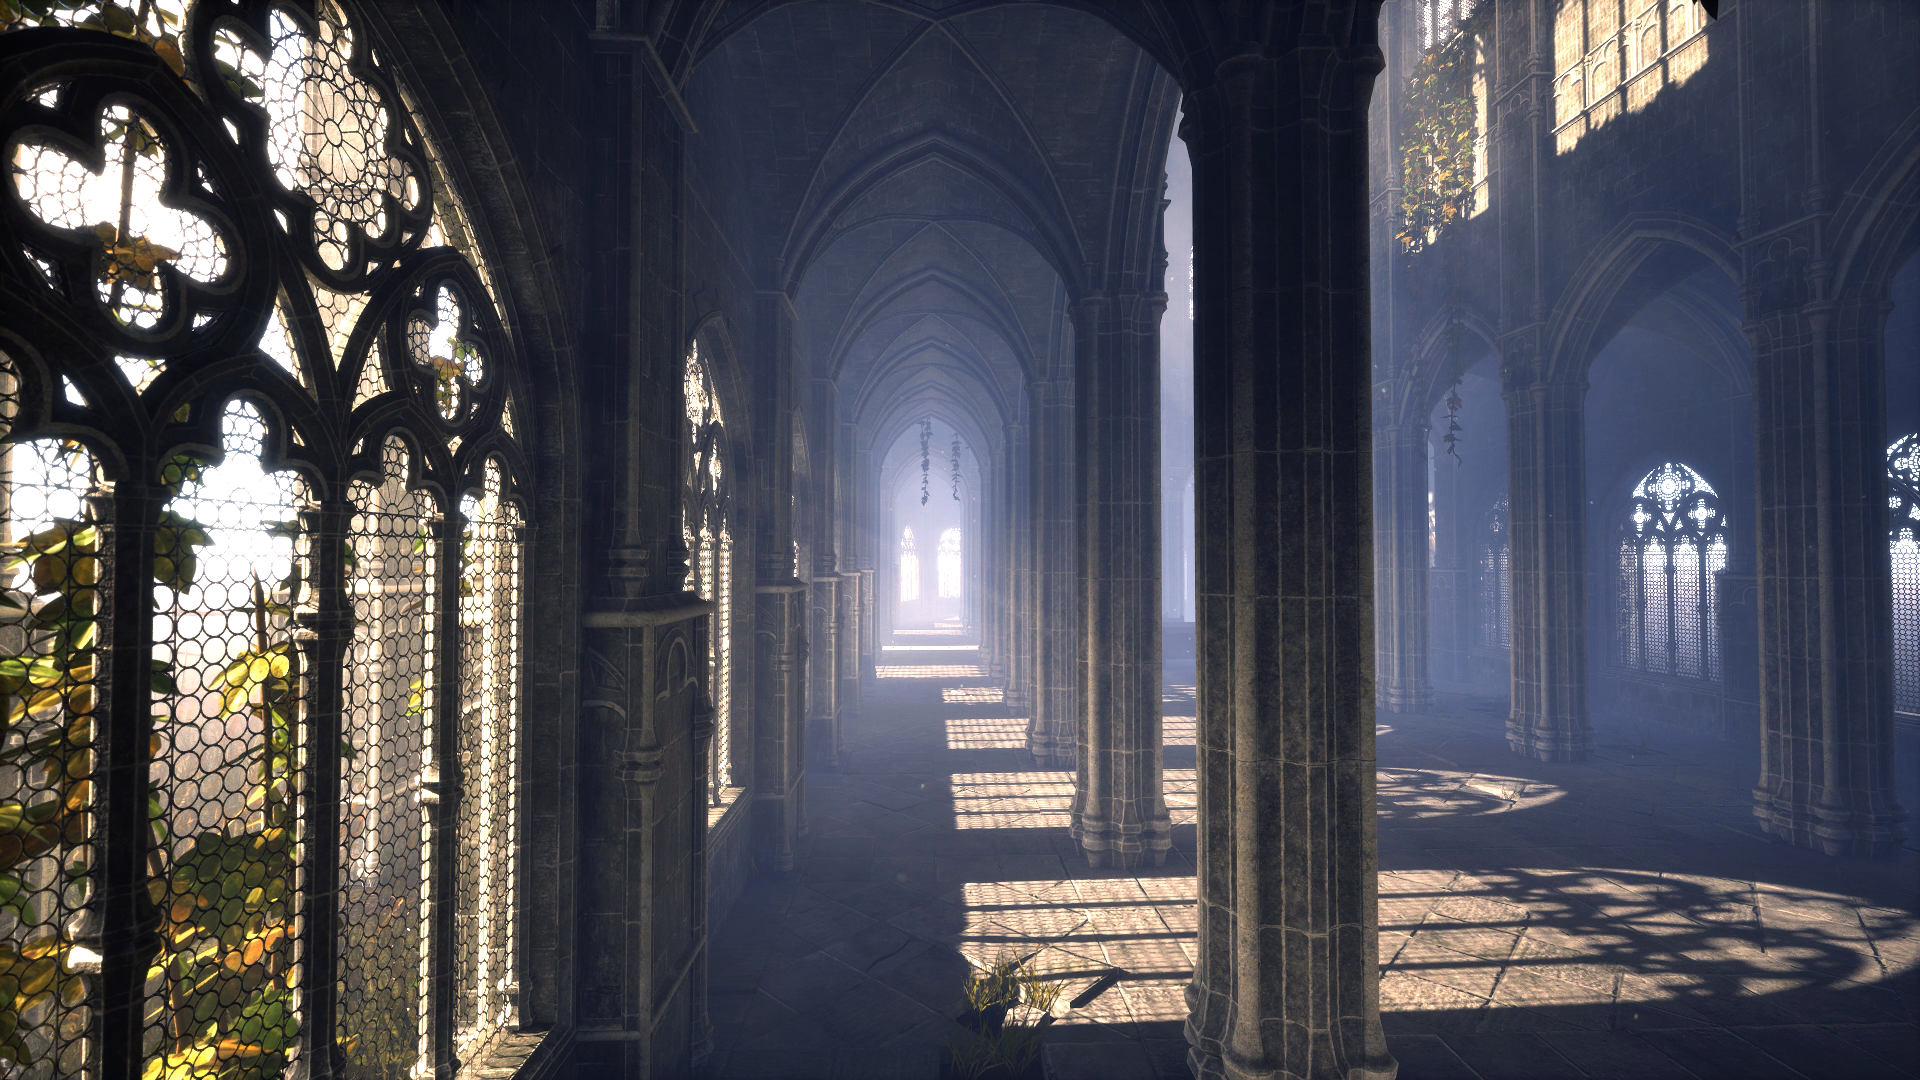
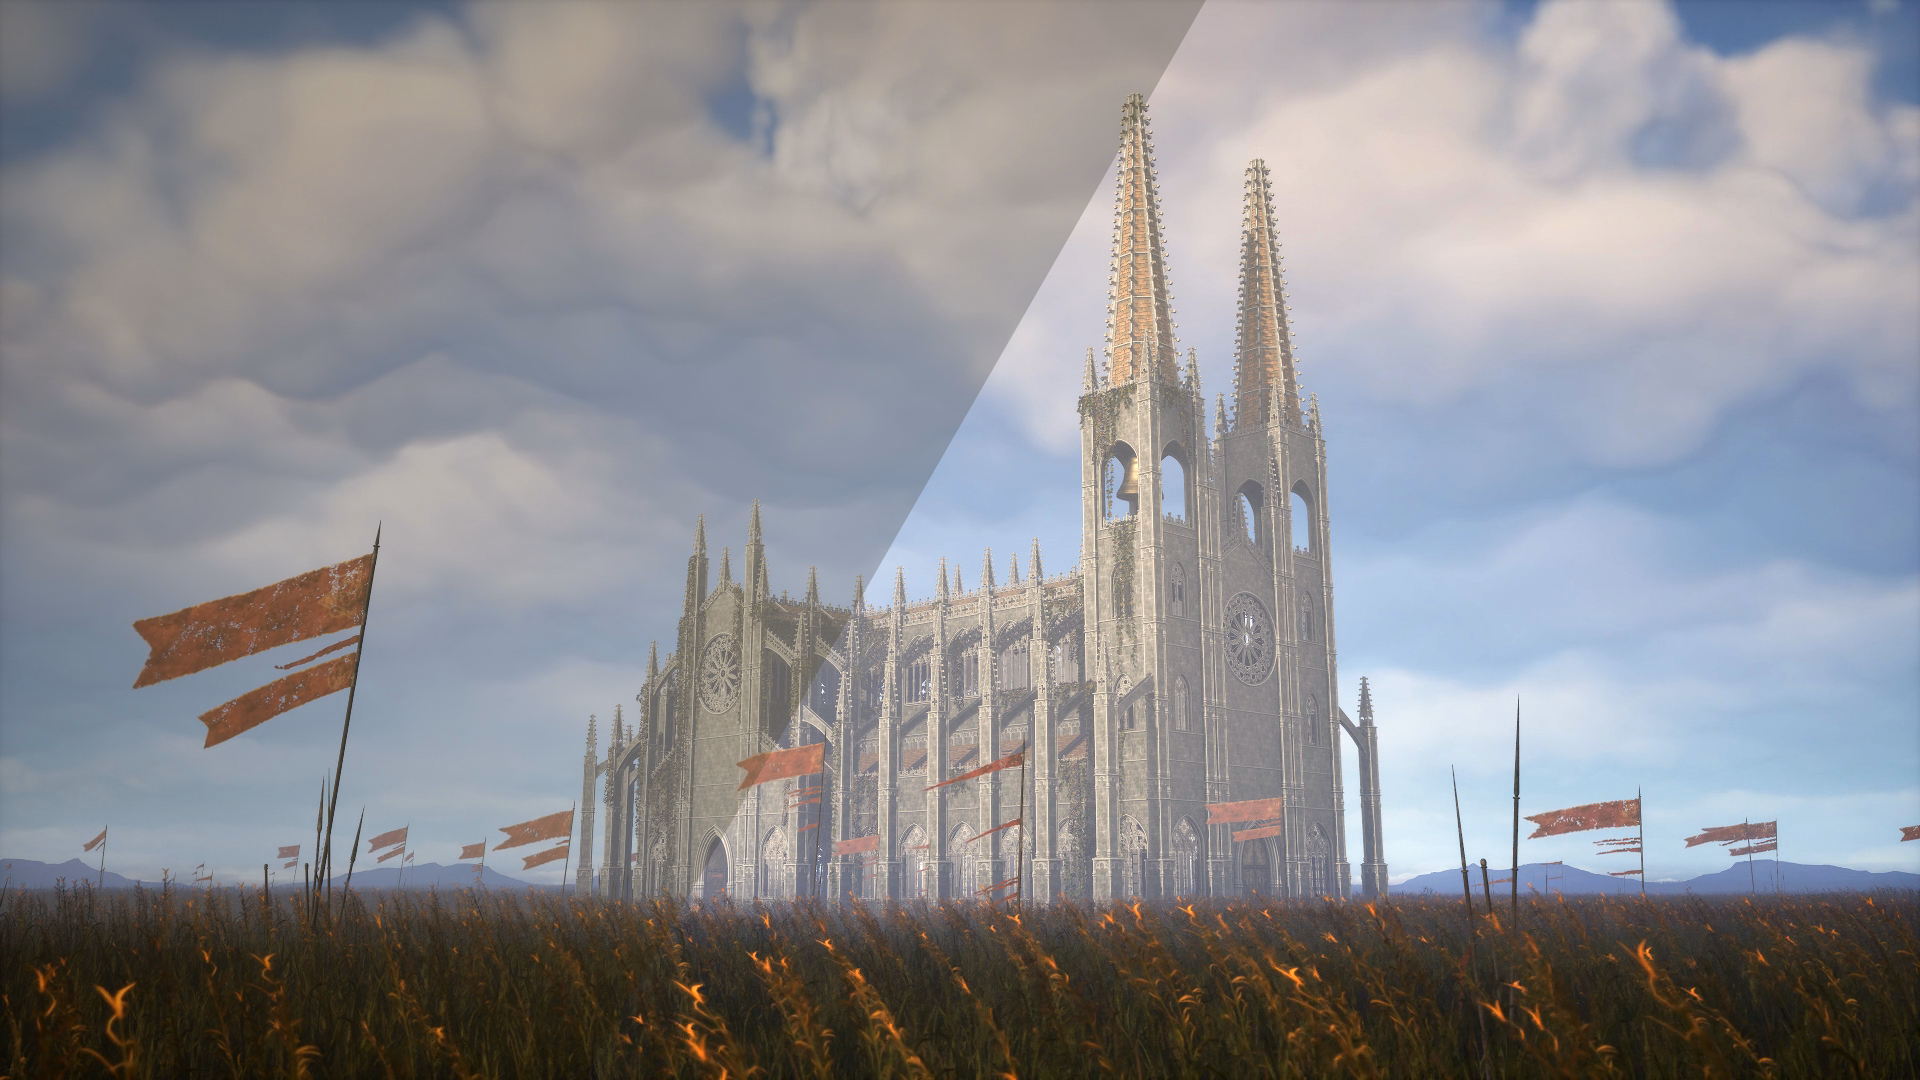
The cathedral has been abandoned for years. Ivy growing all over it, the stone getting cracked as nature reclaims it.
Its golden hour, a time period during sunset, where the clouds appear yellow. Marika's reign, and what it meant has collapsed.
The final PFS with TSSAA on a GTX 1660 ran in the editor is ~ 40fps, with TAA its ~ 70fps. When built with TAA it would be ~ 100 fps, which is alright.
There is still quite a bit of optimization te be done, especially with LODs. Altough I mentioned creating them, I didnt do it for every object because of time constraints.
Also mind that this scene is very heavy on foliage. I needed a lot of dense grass to make the field look good, and there is barely anything obscuring the view, so I needed to render it in a pretty large area too.
Below are all the final renders.
Thank you for reading!